How to Prune Common bean?
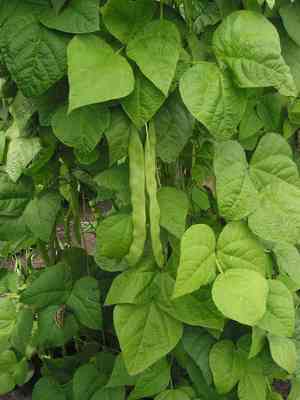
A fundamental crop recognized for its consumable seeds and pods, the common bean flourishes with consistent upkeep. Sever impaired or infected branches at any point. From early spring through late autumn, trim back overgrown sections to improve air movement. This action deters fungal infections and fosters more abundant blooming. Restrict trimming to prevent strain or diminished output. This method enhances bean excellence and plant robustness, focusing solely on the judicious elimination of unproductive components.
What Are the Benefits of Pruning Common Bean?
What Are the Benefits of Pruning Common Bean?
Trimming common bean boosts its vitality and maintains its form by fostering a more robust and fruitful structure. Precise cuts reduce excessive growth and enhance air circulation, leading to a healthier plant less susceptible to illness.
What Is the Best Time for Pruning Common Bean?
What Is the Best Time for Pruning Common Bean?
Early spring is ideal for pruning common bean as it precedes the plant's natural surge in growth, typically in spring and summer. Trimming then allows gardeners to shape the plant and remove winter damage before its active growth phase. Late fall is also suitable for lighter pruning, especially post-harvest, to prepare common bean for winter dormancy. This helps maintain plant health, vigor, and potential productivity for the next season. Avoid pruning during flowering and fruiting to prevent negative impacts on yield.
What Tools Do I Need to Prune Common Bean?
Hand Pruners
Perfect for trimming and shaping common bean plants. Their size allows for precise control to remove excess or dead foliage without harming the main stem.
Scissors
Standard gardening or sharp kitchen scissors can be used for snipping delicate or thin common bean stems. Suitable for deadheading or minor shaping.
Pruning Shears
Best for cutting thicker stems or branches that hand pruners might struggle with, yet still precise enough for common bean.
Gloves
Protective gloves should be worn to provide grip and shield hands from minor scratches when handling common bean.
How to Prune Common Bean
Step1: Inspect and Identify for Pruning
Thoroughly examine common bean to pinpoint old stems, diseased sections, and withered branches needing removal. Look for stems that have completed their life cycle, showing signs of age or no longer producing flowers or beans. Also, check for discolored, lesioned, or unusually grown parts, which may indicate disease. Withered and dead branches will appear dry, brittle, and brown.
Step2: Sterilize Pruning Tools
Sanitize your pruning tools before use to prevent disease transmission. You can use isopropyl alcohol or a bleach solution to clean the blades.
Step3: Remove Diseased Plant Parts
Start by removing diseased sections. Make clean cuts well below the affected area to ensure all diseased tissue is gone. Dispose of these parts properly and do not compost to avoid pathogen spread.
Step4: Prune Old Stems for Rejuvenation
Trim old stems by cutting at their base where they emerge from the main plant or just above a healthy leaf node or branching point. This encourages common bean to produce new, vigorous growth and can enhance overall yields.
Step5: Trim Withered Branches
Cut withered branches by finding the point where healthy tissue meets the dead or dying part. Cut just above this junction to promote healing and prevent damage to the healthier part of common bean.
Step6: Shape for Air Circulation and Light
After pruning, shape the remaining common bean branches if needed to allow for better air circulation and light penetration, which can boost productivity and reduce disease risk.
Step7: Water Post-Pruning
Water common bean thoroughly after pruning to help reduce plant stress and aid recovery.
Step8: Clean Tools After Use
Clean your tools again after you finish pruning to prevent any potential spread of disease in your garden.
Step9: Monitor Plant Recovery
Observe common bean after pruning for signs of new growth. Ensure common bean receives adequate water, sunlight, and nutrients to support its recovery and continued development.
Step10: Regular Pruning Maintenance
Repeat the inspection and pruning process periodically throughout the growing season, as necessary, to maintain the health and productivity of common bean.
Post-Pruning Care for Common Bean
Post-Pruning Care for Common Bean
Immediately after pruning common bean, ensure sufficient watering to lessen stress and aid recovery. Maintain optimal environmental conditions: a moderate climate, adequate humidity, and full sunlight exposure. Apply a balanced fertilizer to replenish nutrients; however, avoid excessive fertilization which can harm common bean. Regularly inspect pruned areas for signs of disease or infection, such as discoloration or wilting. If symptoms appear, treat promptly with an appropriate fungicide or pesticide. Consistent monitoring and gentle care will encourage healthy regrowth in common bean.
Common Pruning Mistakes with Common Bean
Over-pruning Reduces Photosynthesis and Pod Production
Excessive pruning that removes too many leaves and stems, which can stress common bean and diminish its ability to photosynthesize and produce pods effectively.
Improper Tool Sanitation Risks Disease Spread
Pruning without proper sanitation, thereby risking the spread of disease to common bean from potentially contaminated tools.
Non-selective Pruning Damages Growth Points
Pruning indiscriminately or too aggressively which may harm vital growth points, potentially leading to poor yields or misshapen growth.
Tearing Instead of Cutting Increases Infection Risk
Tearing stems and leaves instead of making clean cuts, which creates wounds more vulnerable to infection and pests.
Failing to Remove Only Diseased Plant Parts
Neglecting to remove only the damaged or diseased parts of common bean, leading to further decay or spread of problems within the plant.
Common Pruning Tips for Common Bean
Use Sharp, Clean Shears for Precise Cuts
Always use sharp and clean pruning shears to make precise cuts on common bean, which will help prevent disease transmission and promote quicker healing.
Remove Only Diseased or Dead Tissue
Focus on removing only diseased, damaged or dead tissue from common bean to maintain its health and prevent the spread of potential issues.
Thin Foliage to Boost Airflow and Light Exposure
Thin out dense foliage of common bean to increase air circulation and light penetration, which can help reduce the likelihood of fungal diseases and improve pod development.
Cut at a 45-degree Angle Above Nodes for New Growth
Make cuts on common bean at a 45-degree angle just above a leaf node or lateral branch to foster new growth and maintain the plant's natural shape.
Disinfect Pruning Tools to Prevent Disease Spread
Disinfect your pruning tools both before and after working on common bean, ideally with a mild bleach solution or alcohol, to minimize the risk of spreading diseases.


