How to Prune Russian sage?
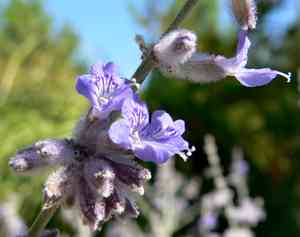
Distinguished by its prickly feel and violet-blue blooms, russian sage flourishes with appropriate trimming. Cut back in early spring to encourage denser development and deter woody stalks. Removing spent flowers boosts subsequent blooming. Winter trimming is not essential but can neaten the plant. Trimming aids in preserving vigor, enhancing air movement, and upholding the plant's form, guaranteeing a strong exhibition of leaves and flowers during the active growth period.
What Are the Benefits of Pruning Russian Sage?
What Are the Benefits of Pruning Russian Sage?
Trimming russian sage promotes denser foliage and stimulates abundant blooming. Regular cutting can deter pests and diseases by removing affected parts and enhancing air movement within the plant's structure.
What Is the Best Time for Pruning Russian Sage?
What Is the Best Time for Pruning Russian Sage?
Cutting russian sage in early spring supports the plant's health by encouraging vigorous new growth and helping to maintain its form. Pruning during winter, when russian sage is dormant, minimizes plant stress and reduces disease transmission risk. These periods avoid cutting during bloom times, ensuring flowers are not accidentally removed, which could diminish the plant's aesthetic appeal and negatively impact pollinators that depend on russian sage.
What Tools Do I Need to Prune Russian Sage?
Bypass Pruners
Perfect for making clean cuts on the woody stems of russian sage. They ensure a precise cut that helps prevent disease.
Pruning Shears
Useful for trimming and shaping russian sage during the active growth period. Their smaller size allows for more controlled cuts.
Pruning Saw
Essential for cutting through thicker, older stems of russian sage that might be too large for pruners.
Gloves
Protect hands from the somewhat rough foliage of russian sage during the trimming process.
Loppers
Provide leverage to cut through medium-sized stems of russian sage that are out of reach or too thick for hand pruners.
Alcohol Wipes or Bleach Solution
Used for sanitizing tools between cuts to prevent spreading diseases to russian sage.
How to Prune Russian Sage
Step1: Tool Preparation and Sterilization
Prepare your cutting tools. Use sharp, clean bypass pruners or shears to avoid crushing the stems of russian sage. Ensure that tools are sterilized with a solution of 1 part bleach to 9 parts water to prevent disease spread.
Step2: Timing for Pruning
Wait for the appropriate trimming time. The best time to prune russian sage is in late winter or early spring, just before new growth begins. This timing helps prevent cold damage to new growth and allows you to clearly see the old structure of russian sage.
Step3: Removing Dead or Damaged Wood
Begin by removing any dead or damaged wood. Identify old wood by looking for stems that are darker, appear woody, and may lack green growth compared to younger stems. Cut these stems back to the ground or to the point of healthy wood.
Step4: Deadheading Spent Flowers
Trim the spent flowers from the previous season to encourage new growth and blooming. Locate the faded flower spikes and cut them back to a set of new growth buds. These will often be visible lower down on the stem.
Step5: Height Reduction and Shaping
Reduce overall height if desired for shaping or to manage the size of russian sage. Cut the stems back by approximately one-third to one-half, making cuts above a set of strong new growth buds.
Step6: Thinning for Air Circulation
Thin out congested areas to improve air circulation. Remove some of the oldest stems of russian sage by cutting them at the base to allow light and air to reach the inner parts of the plant.
Step7: Selective Pruning for Natural Shape
Shape russian sage by selectively trimming to maintain its natural form. Look for any stems that are growing outside the general shape of the plant and trim them back to a desirable size and shape.
Step8: Post-Pruning Cleanup
Clean up all debris from the pruning process around russian sage to deter pests and diseases. Dispose of or compost the cut material.
Step9: Post-Pruning Watering
Water russian sage well after pruning to help the plant recover, especially if the weather is dry. If pruning is done before new growth in the spring, watering may be less necessary.
Post-Pruning Care for Russian Sage
Post-Pruning Care for Russian Sage
After trimming russian sage, immediately water deeply to encourage root development. Place russian sage in full sun with moderate temperatures, ensuring ample air movement to prevent fungal diseases. Light, balanced fertilizer can aid in recovery, but avoid overfeeding. Observe russian sage for wilting, discoloration, or wounds, indicative of stress or infection. If symptoms appear, promptly apply an appropriate fungicide or insecticide. Maintain consistent watering, avoiding waterlogging to support vigorous regrowth.
Common Pruning Mistakes with Russian Sage
Avoid excessive pruning to prevent flowering loss
Over-trimming, which can lead to a reduction in blooming or even damage the vitality of russian sage.
Always use sharp, clean tools for pruning
Using dull or dirty cutting tools, which can hinder clean cuts and potentially introduce diseases to russian sage.
Do not cut into old wood to ensure new growth
Cutting into the woody base of mature russian sage plants, which may prevent new growth, as they typically sprout from the previous year's wood.
Common Pruning Tips for Russian Sage
Prune with precise cuts for faster healing
Use sharp, clean pruning shears to make precise cuts, which help promote quicker healing and reduce the chance of disease.
Promote new growth with strategic spring pruning
Cut back the previous year's stems to a strong set of buds in spring to encourage robust new growth and optimal flowering.
Ensure health with adequate stem thinning for air and light
Thin out crowded stems to improve air circulation and light penetration, which is vital for maintaining a healthy russian sage.


