How to Prune Emerald ripple peperomia?
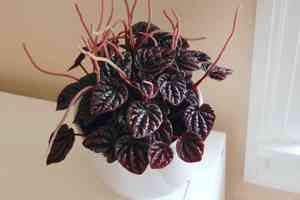
Renowned for its corrugated, heart-shaped foliage, emerald ripple peperomia flourishes when adequately tended. Essential trimming methods involve detaching yellowed or deceased leaves and shortening elongated stalks to foster a denser appearance. The optimal time for pruning extends from early spring through late autumn, coinciding with its active development. For emerald ripple peperomia, employing sanitized, sharp cutting tools is advantageous to avert illness. Pruning not only preserves an appealing form but also stimulates more robust, healthier development for this specimen.
What Are the Benefits of Pruning Emerald Ripple Peperomia?
What Are the Benefits of Pruning Emerald Ripple Peperomia?
Trimming emerald ripple peperomia promotes more robust development and helps maintain its compact, full form. By carefully cutting back, you ensure vibrant foliage and the plant's decorative appeal.
What Is the Best Time for Pruning Emerald Ripple Peperomia?
What Is the Best Time for Pruning Emerald Ripple Peperomia?
These periods are considered ideal because early spring allows emerald ripple peperomia to recover and produce new growth following its winter dormancy. Pruning at this time encourages a denser plant and helps remove any damage from winter. Late fall is suitable as the active growth phase is slowing, enabling emerald ripple peperomia to heal from pruning without the stress of extreme temperatures or active reproduction. It's crucial to avoid winter pruning, as the plant isn't actively growing, and recovery is slower. Additionally, refraining from summer pruning can prevent stress during high-temperature periods.
What Tools Do I Need to Prune Emerald Ripple Peperomia?
Sharp Scissors or Snips
Given that emerald ripple peperomia possesses delicate stems and small leaves, sharp scissors or snips are perfect for making clean cuts without harming the plant's tissues. Clean cuts facilitate quicker healing and lessen the chance of infection.
Precision Pruners
Precision pruners are well-suited for emerald ripple peperomia as they enable accurate trimming of the small, dense foliage without damaging adjacent leaves or stems.
Sterilizing Agent (Isopropyl Alcohol or Bleach Solution)
Sterilizing tools before and after pruning emerald ripple peperomia prevents the spread of disease. A sterilizing agent should be used to clean the blades to maintain plant health.
Gloves
Wearing gloves while pruning emerald ripple peperomia safeguards your hands and ensures cleanliness throughout the process.
How to Prune Emerald Ripple Peperomia
Step1: Timing Pruning Season
Start by choosing the correct time of year for pruning emerald ripple peperomia, which is either spring or summer. Growth is more vigorous during these seasons, allowing the plant to recover better from pruning.
Step2: Prepare Disinfected Cutting Tools
Gather clean, sharp pruning scissors or shears. Disinfecting the blades with alcohol wipes or a bleach solution beforehand will reduce the risk of spreading infections to emerald ripple peperomia.
Step3: Identify Dead Plant Parts
Examine emerald ripple peperomia closely and pinpoint any dead leaves and withered stems. These are plant sections that are brown, dried out, and clearly lifeless.
Step4: Cut Dead Parts at Healthy Growth Junction
Gently hold the dead leaf or withered stem and cut it where it meets healthy, green growth. Make the cut clean and swift to avoid harming the remaining healthy part of emerald ripple peperomia.
Step5: Partial Leaf Pruning Above Healthy Area
When trimming dead leaves, if only a portion of the leaf is dead, cut the leaf back to just above a healthy-looking area. Be careful not to cut into the healthy tissue.
Step6: Trim Withered Stems Near Base or Healthy Node
Remove withered stems as close to the base or to the nearest healthy node as possible, taking care not to damage adjacent stems and leaves.
Step7: Shape Plant Minimally to Avoid Stress
For shaping emerald ripple peperomia, ensure you do not over-prune, as this can stress the plant. Remove only what is necessary to maintain the plant's shape and health. Excessive pruning can lead to fewer leaves and a less lush appearance.
Step8: Clean Pruning Debris to Prevent Decay
After pruning, clear away any fallen debris around emerald ripple peperomia to prevent rot and deter pests.
Step9: Hydrate Plant Post-Pruning
Water emerald ripple peperomia after pruning to provide hydration and aid recovery, but follow emerald ripple peperomia's usual watering needsâemerald ripple peperomia dislikes overwatering.
Step10: Monitor Plant for Healing and Health
Observe the plant in the subsequent weeks to ensure it is healing well and not exhibiting signs of infection or distress at the cut sites.
Post-Pruning Care for Emerald Ripple Peperomia
Post-Pruning Care for Emerald Ripple Peperomia
Immediately after trimming emerald ripple peperomia, ensure the plant is kept in a stable environment with bright, indirect light. Maintain high humidity and a temperature range of 65-75°F to aid recovery. Post-pruning, avoid fertilizing for a month to prevent stressing the roots. Instead, provide a balanced, diluted fertilizer afterward to encourage growth. Regularly inspect emerald ripple peperomia for signs of stress, such as wilting or discoloration, and for infection, indicated by unusual spots or rot. Should symptoms appear, isolate the plant and adjust care as needed.
Common Pruning Mistakes with Emerald Ripple Peperomia
Avoid Over-pruning to Prevent Stress
Excessive pruning, which involves removing too much foliage at once, can stress emerald ripple peperomia, potentially leading to stunted growth or a weakened plant.
Sharpen Tools for Clean Cuts and Disease Prevention
Using dull or dirty cutting tools can make imprecise cuts and introduce pathogens to the wounds of emerald ripple peperomia, leading to disease and poor healing.
Respect Plant's Natural Shape for Aesthetic Pruning
Pruning without considering the plant's natural form can result in an unnatural appearance and diminish the aesthetic appeal of emerald ripple peperomia.
Remove Dead Foliage to Deter Pests and Infections
Ignoring dead or damaged leaves, as failure to remove these can attract pests and may lead to infections in emerald ripple peperomia.
Do Not Prune Too Close to Nodes to Safeguard Growth
Pruning too close to the main stem or leaf node can damage the delicate structure of emerald ripple peperomia and hinder proper new growth.
Common Pruning Tips for Emerald Ripple Peperomia
Use Sharp, Sterile Tools for Healthy Pruning Cuts
Utilize sharp, clean cutting tools to make precise cuts on emerald ripple peperomia, which helps the plant heal quickly and reduces the risk of disease transmission.
Trim Dead Leaves at Base for Plant Health
Focus on removing dead, yellowing, or diseased leaves to maintain the health of emerald ripple peperomia, cutting at the base of the offending leaf's petiole.
Improve Airflow with Thinning to Prevent Fungus
Thin out overcrowded areas to enhance air circulation, which reduces the risk of fungal infections and promotes even growth in emerald ripple peperomia.
Cut at 45-Degree Angle for Optimal Foliage Growth
Make cuts at a 45-degree angle away from the main stem and above the leaf nodes on emerald ripple peperomia to encourage new and healthy foliage.
Provide Aftercare Post-Pruning for Recovery
After pruning, provide emerald ripple peperomia with appropriate aftercare, such as adequate water and indirect light, to support recovery and new growth.


