How to Prune Maypop?
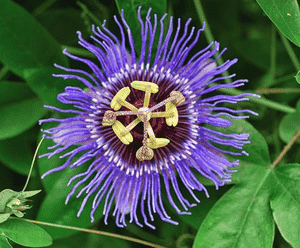
Distinguished by its elaborate violet blossoms and palatable fruit, the maypop flourishes with appropriate attention. Trim deceased or excessively long tendrils in late winter or early spring to foster robust development and fruit generation. Concentrate on eliminating frail stalks and molding the plant for superior air movement. Trimming during its dormant phase reduces strain and stimulates energetic spring development. This variety gains from consistent trimming to uphold its form and avert intertwining, thereby improving both its visual charm and fruit output.
What Are the Benefits of Pruning Maypop?
What Are the Benefits of Pruning Maypop?
Trimming maypop encourages more abundant yields by fostering vigor and promoting a sturdy framework. Strategic cuts maintain its form, enhancing both the plant's appearance and well-being, which leads to increased resistance against pests and diseases.
What Is the Best Time for Pruning Maypop?
What Is the Best Time for Pruning Maypop?
During late winter, maypop is typically dormant, which minimizes stress and allows for healthy regeneration. Early spring is optimal as it precedes new growth, enabling the gardener to shape the plant and remove any dead or diseased wood before the growth cycle commences. This timing also ensures maypop has ample time to recover and produce flowers and fruit in its active season.
What Tools Do I Need to Prune Maypop?
Hand Pruners
Perfect for making precise cuts on maypop, as its stems are relatively slender. Excellent for deadheading and shaping.
Pruning Saw
Suitable for cutting thicker, woodier stems of maypop that hand pruners cannot manage, ensuring a clean cut without harming the plant.
Pruning Loppers
Offer additional leverage for cutting through maypop's mature stems, useful for larger-scale trimming tasks.
Gloves
Protect hands from maypop's occasional thorns and from sap that might cause skin irritation.
Cleaning Materials
To clean and sanitize pruning tools between cuts, reducing the risk of spreading disease to maypop.
How to Prune Maypop
Step1: Tool Preparation
Prepare the necessary implements for trimming maypop. Ensure you have sharp pruning shears or secateurs, gloves, and disinfectant for cleaning your tools to prevent the spread of disease.
Step2: Disinfect Tools
Clean your tools with disinfectant before you begin trimming maypop to prevent the introduction of pathogens. This is especially crucial if you have just pruned a diseased plant.
Step3: Identify Dead Wood
Identify dead wood by looking for branches that lack green, flexible growth and feel brittle. These can be removed at any time of year as they do not contribute to maypop's health or productivity.
Step4: Prune Dead Branches
Carefully trim the dead wood, making your cuts at a 45-degree angle about 1/4 inch above a leaf node or a main stem to promote healthy regrowth. Use sharp, clean tools to make clean cuts that maypop can heal quickly from.
Step5: Spot Diseased Branches
Inspect maypop for diseased branches, which may exhibit unusual coloring, spots, or rot. Remove these branches promptly to prevent the disease from spreading to the rest of the plant.
Step6: Remove Infected Sections
When removing diseased branches, cut well below the affected area, at least several inches into healthy tissue. Disinfect your tools after each cut when dealing with diseased wood to prevent contaminating healthy parts of maypop.
Step7: Eliminate Suckers
Locate suckers, which are shoots growing from the root system or at the base of maypop. These can drain energy from the main plant and should be pruned to direct growth into more desirable areas.
Step8: Sucker Removal Technique
Cut the suckers down to the ground level or as close to their originating point as possible. Do not leave stubs as these can become entry points for pests and diseases.
Step9: Shape and Thin Plant
After pruning for dead wood, diseased branches, and suckers, examine maypop for its overall shape and health. Consider light thinning of the plant to improve air circulation and light penetration if necessary, always cutting just above a healthy leaf node or bud.
Step10: Discard Pruned Material
Dispose of all trimmed material away from maypop, especially diseased wood, to prevent any chance of spreading disease back to the plant or others in your garden.
Step11: Water and Mulch Post-Pruning
Water maypop after pruning to help reduce stress on the plant, and apply a layer of mulch to conserve moisture and provide nutrients as the plant recovers.
Step12: Monitor and Maintain Health
Monitor maypop for signs of new growth and health, and repeat this pruning process annually or as needed during the growing season to maintain plant vigor and productivity.
Post-Pruning Care for Maypop
Post-Pruning Care for Maypop
Immediately after trimming maypop, maintain high humidity and indirect sunlight to reduce stress. Adjust the temperature to 65-75°F for optimal recovery. Fertilize lightly with a balanced, slow-release formula to encourage growth, but avoid over-fertilization which can harm the recovering plant. Monitor maypop for wilt, discolored leaves, or lesions, indicators of stress or infection. In such cases, enhance care, considering potential adjustments in water, light, or additional organic matter amendments to the soil.
Common Pruning Mistakes with Maypop
Excessive pruning harms plant vigor
Trimming too aggressively can shock maypop, leading to reduced blooming and potentially harming the plant's vigor. Removing more than a third of the growth may cause undue stress to maypop.
Dull tools cause jagged cuts and disease
Using dull or dirty pruning tools can cause jagged cuts that are susceptible to infection. Sanitation is essential to prevent the spread of disease while trimming maypop.
Cuts too close to stem hinder healing
Cutting too close to the main stem or node may damage the plant's natural structure and healing process. Leaving a small stub is preferable for maypop's recovery.
Neglecting dead material invites pests
Neglecting to remove dead or diseased material can invite pests and inhibit new growth, which stifles the overall health and aesthetic appeal of maypop.
Overgrown vines from pruning fear reduce health
Shying away from trimming out of fear of harming maypop may result in overgrown, tangled vines that lack adequate air circulation and light penetration, leading to poor flowering.
Common Pruning Tips for Maypop
Angled cuts above leaf nodes for growth
Aim to make clean, angled cuts just above a leaf node to encourage new growth in maypop. This promotes a fuller, more vigorous vine with better access to light.
Remove weak stems for health and bloom
Remove dead, diseased, or weak stems to maintain maypop's health and aesthetics. This redirects energy to stronger parts of the plant for more prolific blooming.
Thin overcrowding for better air and light
Focus on thinning out overcrowded areas to enhance air flow and light penetration, which are crucial for preventing disease and encouraging robust growth in maypop.
Sharp, clean tools for precise cuts
Use sharp, well-maintained pruning tools to make precise cuts on maypop. Clean tools after each use to minimize the risk of transmitting pathogens between plants.
Train vines for optimal growth and support
Support maypop by selectively training and tying the vines to structures for optimal growth direction and to prevent breakage from the weight of the plant.


