How to Prune Osage orange?
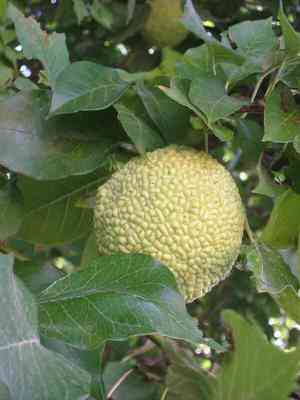
A resilient, compact tree recognized for its substantial, non-edible fruit and spiky limbs, Maclura pomifera thrives with regular trimming. Eliminate deceased branches and sculpt juvenile trees by shortening the prior year's development. Perform pruning in late winter or early spring prior to the emergence of new growth. Reducing the density of the crown enhances light access and airflow, diminishing the likelihood of ailments. Given its robust character, Maclura pomifera withstands extensive pruning, which can aid in controlling its dimensions and encouraging fruit yield.
What Are the Benefits of Pruning Osage Orange?
What Are the Benefits of Pruning Osage Orange?
Trimming osage orange encourages vigorous development and assists in maintaining its desired form. Strategic cuts enhance light penetration and air movement, lowering disease risk and fostering a robust structure.
What Is the Best Time for Pruning Osage Orange?
What Is the Best Time for Pruning Osage Orange?
During late winter and early spring, osage orange is in a dormant state, which reduces stress on the plant and decreases the likelihood of disease infection through pruning wounds. This timing allows for the removal of dead or damaged branches before the onset of the new growth season, ensuring energy is directed towards the production of healthy foliage and branches. Additionally, pruning before the sap-flow resumes in spring facilitates better wound closure. Since osage orange does not have a significant early spring flowering period, pruning during this time will not negatively impact its bloom or fruiting cycle.
What Tools Do I Need to Prune Osage Orange?
Hand pruners
Osage orange has branches that are relatively small in diameter, which can typically be pruned with a sturdy pair of hand pruners. Hand pruners are easy to maneuver and precise for thinning out or removing smaller branches.
Loppers
For slightly thicker branches of osage orange that hand pruners cannot handle, loppers will be more suitable. They provide more leverage to cut through branches up to 1.5 to 2 inches thick and are ideal for shaping the tree or shrub.
Pruning saw
When dealing with osage orange's mature branches that are thicker than what loppers can handle, a pruning saw is necessary. This tool allows clean cuts through thick branches, ensuring the health of the plant.
Protective gloves
Osage orange has thorns that can make pruning a challenging task. Wearing a thick pair of protective gloves will safeguard the hands against cuts and scratches during the pruning process.
Long-sleeved clothing
Due to the thorny nature of osage orange, it is advisable to wear long-sleeved clothing to protect the skin from thorns while reaching into the plant for pruning.
How to Prune Osage Orange
Step1: Identify Problematic Wood
Examine osage orange for dead wood, diseased branches, and damaged limbs. A thorough inspection is needed to pinpoint all parts requiring removal.
Step2: Sanitize Pruning Tools
Prepare clean pruning tools. Disinfect shears, saws, and other equipment with alcohol or a bleach solution to prevent the spread of disease during pruning.
Step3: Cut Dead Wood at 45-Degree Angle
Trim dead wood by making clean cuts at a 45-degree angle, approximately 1/4 inch above a healthy bud or branch junction. This angle promotes water runoff and healthy regrowth.
Step4: Remove Diseased Branches Below Damage
Eliminate diseased branches by cutting at least several inches below the visibly affected areas to ensure all diseased tissue is removed. If the disease is widespread, it may be necessary to remove the entire branch.
Step5: Utilize Three-Cut Method for Damaged Limbs
Sever damaged limbs using the three-cut method to prevent bark tearing. The initial upward cut should be made about a foot from the trunk to avoid peeling bark. The second cut should be made downwards, a few inches further out from the first cut, to remove the limb's weight. Finally, the third cut is made just outside the branch collar to cleanly remove the stub.
Step6: Thin Interior for Better Air and Light
After removing the three aforementioned types of problematic wood, proceed to shape osage orange by thinning out the interior to increase air circulation and sunlight penetration.
Step7: Avoid Topping or Heading Cuts
Refrain from topping or heading cuts, as osage orange does not respond well to these and it can lead to weak, water-sprout growth.
Step8: Proper Disposal of Pruned Material
Dispose of all removed material properly by burning or bagging, particularly if the branches were diseased, to prevent the spread of pathogens.
Step9: Re-sanitize Tools After Use
After pruning, clean all the tools again to prevent any potential spread of disease to other plants.
Step10: Water Plant Post-Pruning
Water osage orange adequately after pruning to support healing and new growth, but avoid overwatering which can lead to root issues.
Step11: Monitor Plant Health Post-Pruning
Monitor osage orange for signs of disease or pest issues following pruning and take appropriate action if any problems arise.
Post-Pruning Care for Osage Orange
Post-Pruning Care for Osage Orange
Immediately after pruning osage orange, clean cuts should be allowed to heal naturally without sealants. Maintain slightly increased humidity and ensure ample indirect sunlight to support recovery. Moderate soil moisture is key—overwatering can cause stress. Provide a balanced fertilizer to aid in nutrient replenishment. Monitor regularly for signs of infection or distress, such as wilting or discoloration. If symptoms appear, adjust care or consult a horticulturalist for pest or disease management.
Common Pruning Mistakes with Osage Orange
Unsterilized Pruning Tools Spread Disease
Failing to disinfect pruning tools, which can spread disease to osage orange.
Over-Pruning Stresses Plants
Trimming too much at once, which can stress osage orange and lead to poor growth or increased vulnerability to pests and diseases.
Tearing Branches Impedes Healing
Tearing or ripping branches instead of making clean cuts, which can damage the bark and wood of osage orange, impeding the healing process.
Ignoring Plant's Natural Shape
Disregarding the natural shape of osage orange, which may result in a less aesthetically pleasing and potentially less healthy plant.
Improper Cuts Damage Healing Process
Cutting branches flush to the trunk, which can remove the branch collar and detrimentally affect the ability of osage orange to heal properly.
Leaving Stubs Invites Decay and Pests
Leaving stubs when cutting branches, which can lead to decay and invite pests or diseases.
Common Pruning Tips for Osage Orange
Sharp, Clean Cuts for Healthy Pruning
Use sharp, clean pruning tools to make precise cuts on osage orange, which will promote quicker healing and reduce the risk of disease.
Prune for Health and Shape Preservation
Prune to maintain the natural shape of osage orange, removing only the necessary branches for plant health, such as dead, damaged, or diseased wood.
Angled Cuts Above Buds or Branches
Make angled cuts just above a bud or branch to encourage proper water runoff and discourage disease in osage orange.
Remove Suckers to Enhance Main Structure
Remove any suckers from the base of osage orange to direct more resources to the main structure of the plant.
Thinning Increases Light and Air Circulation
Thin out overgrown areas to increase light penetration and air circulation throughout osage orange, which helps prevent disease and promotes vigorous growth.
Gradual Size Reduction to Avoid Shock
When reducing the height or spread of osage orange, do so gradually over several seasons to avoid shocking the plant.


