How to Prune Red Spider lily?
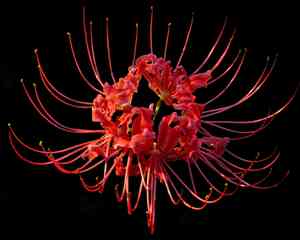
Originating from East Asia, red Spider lily is a perennial plant characterized by its striking red blossoms and elongated, strap-like leaves. After the flowering period, once the foliage turns yellow, it should be cut back; spent blooms can also be removed if preferred. The most suitable time for this trimming is from late winter to early spring, prior to the appearance of new shoots. Pruning stimulates revitalization, keeps the plant neat, and may improve future floral displays. As red Spider lily is a bulbous plant, exercise caution to avoid harming its subterranean components.
What Are the Benefits of Pruning Red Spider Lily?
What Are the Benefits of Pruning Red Spider Lily?
Trimming red Spider lily promotes vigorous development and helps maintain an appealing shape. Strategic cuts can boost vitality, ensuring the plant's energy is directed towards healthier, more abundant blooms.
What Is the Best Time for Pruning Red Spider Lily?
What Is the Best Time for Pruning Red Spider Lily?
These periods are ideal for trimming red Spider lily as the plant is typically dormant. Pruning in late winter and early spring allows red Spider lily to channel energy into healing cuts and producing new growth as temperatures rise. This timing also prevents the removal of leaves and stems vital for photosynthesis and energy storage during the active growing season. Furthermore, pruning before the spring growth surge will enhance the display of the plant's characteristic flowers, which usually appear from late summer to fall. Ensuring red Spider lily is pruned when it's not actively growing or setting flowers helps maintain its health, vigor, and blooming potential.
What Tools Do I Need to Prune Red Spider Lily?
Hand Pruners
For precise trimming and removal of dead or damaged foliage of red Spider lily, ergonomically designed bypass pruners are recommended due to their sharp, curved blades that make clean cuts without harming the plant's delicate stems.
Garden Shears
Ideal for shaping and maintaining the overall appearance of red Spider lily. Look for shears with long and straight blades to ensure even trimming across the plant's grass-like foliage.
Gloves
To protect hands from potential skin irritants in red Spider lily's sap and from sharp foliage edges, durable gardening gloves should be used during the pruning process.
Garden Waste Bag
To efficiently collect and dispose of the trimmed foliage and spent flowers of red Spider lily, have a garden waste bag or bin handy to keep the site clean and organized.
How to Prune Red Spider Lily
Step1: Inspect Plant for Withered or Dead Parts
Examine red Spider lily for any signs of withered leaves, dead stalks, and infected parts. Ensure you do this inspection once blooming has finished, typically in late summer or fall, as pruning should not interrupt the flowering cycle of red Spider lily.
Step2: Prepare and Sterilize Pruning Tools
Prepare your pruning tools. Use sharp, clean shears to make clean cuts. Sterilize the blades with rubbing alcohol before and after pruning to prevent the spread of disease.
Step3: Prune Withered Leaves from Base
Locate withered leaves on red Spider lily. These are typically yellow or brown and may be dry or drooping. Prune withered leaves at the base where they emerge from the bulb to avoid damaging healthy tissue.
Step4: Cut Dead Stalks at Ground Level
Identify dead stalks on red Spider lily. These are the flower stalks that remain after the flowers have died back and offer no further growth or blooms. Carefully cut the dead stalks as close to the ground as possible without harming the bulb or nearby shoots.
Step5: Remove Infected Plant Parts Thoroughly
Carefully examine red Spider lily for any infected parts. Signs of infection may include abnormal spots, discolored areas, or rotting. When pruning infected parts, remove slightly beyond the visibly damaged tissue into the healthy area to ensure no pathogens remain.
Step6: Properly Dispose of Pruned Materials
Dispose of all pruned material properly. Do not compost diseased plant parts as this can propagate the disease. Burn or discard them in a way that conforms to local regulations regarding plant waste.
Step7: Clean Plant Surroundings to Prevent Disease
After pruning, clean the area around red Spider lily to prevent any disease from spreading. Remove fallen leaves, debris, and any other plant material.
Step8: Water Plant if Necessary Post-Pruning
Water red Spider lily after pruning only if the soil is dry. Over-watering can lead to bulb rot, especially in the absence of the leaves' photosynthetic activity to process the moisture.
Step9: Monitor Plant for Post-Pruning Health
Monitor red Spider lily after pruning for any signs of stress or further infection. Ensure proper care by allowing adequate sunlight exposure and avoiding excessive moisture around the bulb zone.
Post-Pruning Care for Red Spider Lily
Post-Pruning Care for Red Spider Lily
After pruning red Spider lily, immediately water the soil to alleviate stress and promote recovery. Maintain environmental conditions with partial shade, high humidity, and temperate climate, avoiding extreme temperature fluctuations. Fertilize with a balanced, slow-release formula to support new growth. Monitor red Spider lily for signs of wilting or discoloration, and address potential infections with appropriate fungicides. Consistent, careful observation ensures a healthy regrowth period.
Common Pruning Mistakes with Red Spider Lily
Pruning Essential Photosynthesis Parts
Pruning live leaves and stems that are essential for photosynthesis, which compromises the energy red Spider lily needs for growth and flowering.
Removing Foliage Post-Flowering too Early
Removing the foliage right after flowering which can prevent the replenishment of the bulbs' energy reserves.
Cutting Flower Stalks Before Withering
Cutting back the flower stalks before they have completely withered and turned yellow, leading to potential stress on the plant.
Over Pruning or Cutting into Bulb
Over pruning or cutting into the bulb, which can injure red Spider lily and make it susceptible to diseases.
Using Dirty or Dull Tools
Using dirty or dull pruning tools that can cause rough cuts, leading to infections and damage to red Spider lily.
Common Pruning Tips for Red Spider Lily
Allow Natural Foliage Dieback for Nutrients
Allow the foliage of red Spider lily to die back naturally, providing the bulbs with nutrients necessary for the next growing season.
Remove Yellow Foliage when Easily Detached
When foliage is yellow and comes away easily, gently remove it to tidy up red Spider lily and prevent disease.
Prune Dead or Diseased Foliage for Health
Prune dead or diseased foliage anytime during the growth cycle to maintain the health of red Spider lily.
Use Sharp and Clean Pruning Tools
Use sharp and clean pruning tools to ensure clean cuts that heal quickly, reducing the risk of disease.
Proper Disposal of Removed Foliage
Dispose of any removed foliage properly to keep the area around red Spider lily free from potential pests and diseases.
Minimize Pruning to Necessary Only
Minimize pruning to what is necessary for plant health, as red Spider lily does not require significant shaping or sizing adjustments.


