How to Prune Bay laurel?
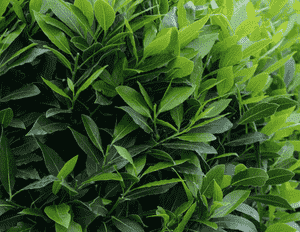
Bay laurel, characterized by its fragrant leaves and sturdy stems, thrives with judicious trimming. To sculpt its form and stimulate thicker leaf development, snip off terminal growth and eliminate any lifeless or ailing branches. Perform this evergreen's pruning during its dormant winter phase, steering clear of late frost occurrences. Consistent, gentle pruning improves air movement and overall plant well-being, whereas excessive cutting can result in sparse new growth. Refrain from making drastic cuts, as bay laurel tends to recuperate slowly.
What Are the Benefits of Pruning Bay Laurel?
What Are the Benefits of Pruning Bay Laurel?
Trimming bay laurel enhances its vitality and preserves its form, fostering a lush, thick canopy perfect for cooking, aesthetic appeal, and garden upkeep.
What Is the Best Time for Pruning Bay Laurel?
What Is the Best Time for Pruning Bay Laurel?
During late winter, bay laurel remains inactive, which reduces stress and the chance of disease spread via pruning cuts. This timing encourages healthier spring growth, aligns with the plant's natural cycle, and avoids removing potential flower buds, thus ensuring the plant's capacity to produce leaves, flowers, and berries in the coming season is not hindered.
What Tools Do I Need to Prune Bay Laurel?
Hand Pruners
For most trimming tasks on bay laurel, a good quality pair of hand pruners, also known as secateurs, is essential. Bay laurel has relatively small leaves and stems, making hand pruners ideal for shaping and removing individual leaves or branches. They provide a clean cut vital for the plant's health.
Loppers
When dealing with thicker branches that hand pruners cannot manage, loppers are the next tool to use. Bay laurel can develop branches too thick for hand pruners, and loppers offer the leverage needed to make clean cuts without straining the gardener's hands.
Pruning Saw
For the oldest and thickest branches of bay laurel, a pruning saw becomes necessary. A pruning saw allows for the removal of branches too large for hand pruners or loppers, doing so without causing undue stress to the plant's remaining parts.
Hedge Shears
If bay laurel is grown as a hedge or needs shaping over larger areas, hedge shears can be employed. These are perfect for maintaining straight lines and even surfaces on hedges. However, for detailed work or health-related pruning, hedge shears may not be suitable.
Gloves
While not a cutting tool, gloves are crucial when trimming bay laurel to shield the gardener's hands from scratches and the plant's natural oils, which can irritate some individuals.
How to Prune Bay Laurel
Step1: Assessment of Plant Health and Structure
Evaluate bay laurel before trimming to identify overgrown, dead, or unproductive sections. Look for misshapen foliage, branches showing no new growth, or wood that appears dry, brittle, or discolored, indicating dead or diseased wood.
Step2: Tool Sanitization to Prevent Disease Spread
Sanitize your pruning tools like shears or saws before you start to prevent disease transmission. You can clean them with rubbing alcohol or a 10% bleach solution.
Step3: Dead Wood Removal and Angle Cutting
Begin by removing dead wood. Make your cuts at a 45-degree angle just above a healthy leaf node or a dormant bud. Ensure your cuts are clean and do not tear the bark. This promotes healthy new growth.
Step4: Non-productive Branch Removal for Better Structure
Identify and remove unproductive wood, recognized by a lack of new shoots or leaves. These branches can be cut back to a main stem or to an outward-facing bud to encourage a more open structure and improved air circulation.
Step5: Canopy Thinning for Shape Maintenance and Growth
To address overgrown foliage, selectively thin out bay laurel's canopy by removing some older, longer branches. This helps maintain bay laurel's shape and encourages new growth. Be sure to distribute cuts evenly around the plant to preserve a balanced form.
Step6: Shaping Cuts for Denser, Healthier Growth
When shaping bay laurel, cut back overgrown branches by up to one-third of their length, always cutting back to a lateral branch or leaf node. This will encourage bay laurel to become bushier and fill out any gaps in the foliage.
Step7: Cleanup to Minimize Pests and Disease Risks
After pruning, clear all debris from around bay laurel to prevent the potential spread of pests or diseases. Dispose of or compost healthy trimmings and destroy any diseased material.
Step8: Post-pruning Care and Recovery Assistance
Aftercare is vital. Water bay laurel deeply after trimming to aid recovery, and apply a balanced fertilizer to promote healthy growth. Monitor the plant for any signs of stress following the pruning.
Post-Pruning Care for Bay Laurel
Post-Pruning Care for Bay Laurel
Immediately after trimming bay laurel, ensure it gets enough indirect sunlight to aid healing, but avoid intense direct sun which might stress the freshly cut areas. Maintain ambient humidity and stable temperatures to prevent shock. Gradually reintroduce balanced, slow-release fertilizer to support new growth. Regularly check for wilting, discoloration, or sap leakage as signs of stress or infection. If present, adjust care or consult a plant pathologist to address specific issues.
Common Pruning Mistakes with Bay Laurel
Over-pruning Stress and Disease Vulnerability
Trimming too much at once, which can stress bay laurel and lead to poor growth or increased susceptibility to diseases.
Random Cutting Disregarding Growth Habit
Cutting branches randomly without understanding bay laurel's natural growth habit or considering the impact on the plant's shape and health.
Using Dull or Dirty Tools, Risk of Disease
Using dull or dirty trimming tools, which can damage bay laurel's branches and introduce pathogens that could cause diseases.
Poor Air Circulation and Light from Dense Pruning
Trimming within interior dense foliage without thinning out, which can result in poor air circulation and insufficient light penetration, reducing bay laurel's overall health.
Indiscriminate Tip Snipping Reduces Foliage
Snipping the tips of branches indiscriminately, which can limit the development of new foliage and reduce the plant's density and natural shape.
Common Pruning Tips for Bay Laurel
Use Sharp, Clean Shears for Healthy Cuts
Always use sharp, clean trimming shears to make clean cuts that bay laurel can heal from quickly, to minimize infection risk.
Respect Natural Growth Patterns in Pruning
Trim bay laurel to maintain its desired shape and size, while respecting its natural growth patterns; a pyramid shape is a practical guide for balanced growth.
Remove Problematic Branches for Plant Health
Remove any dead, diseased, or crossing branches to promote good health and air circulation throughout bay laurel.
Enhance Structure for Inner Branch Health
Trim to enhance bay laurel's overall structure, ensuring that the inner branches receive enough light and air to maintain healthy foliage density.
Gradual Thinning of Older Branches for Vigor
When encouraging a strong framework, focus on selectively thinning out older branches over time rather than all at once to maintain bay laurel's health and vigor.


