How to Prune Dieffenbachia?
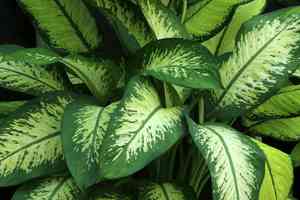
Recognized for its expansive, patterned foliage, dieffenbachia stands as a favored interior ornamental plant. Trimming should concentrate on eliminating discolored or compromised leaves, and cutting back can stimulate denser development. The ideal period for pruning extends from early spring through late autumn, aligning with its vigorous growth cycle. Always don protective gloves to guard against the plant's irritating fluid. Pruning aids dieffenbachia by preserving a condensed form and fostering more vibrant, sturdier leaves.
What Are the Benefits of Pruning Dieffenbachia?
What Are the Benefits of Pruning Dieffenbachia?
Trimming dieffenbachia promotes robust new development, helping it maintain a compact, well-defined shape. This crucial maintenance practice prevents legginess and improves the plant's visual appeal.
What Is the Best Time for Pruning Dieffenbachia?
What Is the Best Time for Pruning Dieffenbachia?
These periods are ideal for dieffenbachia pruning due to various factors. In early spring, the plant starts to emerge from its winter dormancy and begins a new growth cycle, making it perfect for shaping and encouraging healthy development. Pruning in early spring ensures that new growth quickly follows any cuts, helping the plant recover swiftly and maintain its vitality. Late fall, after the primary growing season, is also suitable for pruning. This timing allows gardeners to remove any elongated or undesirable growth from the summer, prepare the plant for its dormant winter phase, and reduce the risk of pest and disease issues that can arise from neglected, excessive foliage. Pruning during this time also minimizes stress on dieffenbachia, as it is not actively producing new leaves or flowers, and cut areas have ample time to heal before the next growth spurt in spring.
What Tools Do I Need to Prune Dieffenbachia?
Sharp bypass pruners
Excellent for making precise cuts on dieffenbachia stems without crushing plant tissues, which is vital for encouraging healthy regrowth.
Disinfectant (e.g. rubbing alcohol or bleach solution)
Used to sanitize pruning tools before and after use to prevent the transmission of diseases to or from dieffenbachia.
Pruning shears with a curved blade
Aids in precise snipping of dieffenbachia leaves and slender stems, allowing for better shaping and removal of dead or yellowing foliage.
Gloves
Crucial for protecting hands when pruning dieffenbachia, as its sap can cause skin irritation.
Gardening shears for larger growth
Useful for cutting back more substantial, woody growth that can occur in mature dieffenbachia specimens.
Fine-toothed saw
For larger dieffenbachia specimens with thick, tough stalks, a fine-toothed saw can simplify cutting and prevent plant damage.
How to Prune Dieffenbachia
Step1: Inspect plant and identify unhealthy parts
Thoroughly examine dieffenbachia before pruning to pinpoint yellow leaves and withered branches that require removal. Also, check for any signs of pests or diseases.
Step2: Sanitize pruning tools
Sterilize your pruning tools with rubbing alcohol or a 10% bleach solution to prevent disease spread.
Step3: Remove yellow leaves with clean cuts
Using sharp and clean pruning shears, snip off any yellow leaves at the stem's base. Make precise cuts without tearing to avoid unnecessary damage to dieffenbachia.
Step4: Trace and understand branch structure
Locate the withered branches on dieffenbachia. Gently trace the branch back to its origin point to understand its structure and growth pattern.
Step5: Prune withered branches for regrowth
Trim withered branches just above a healthy leaf node or a main stem to encourage new growth. Cut at a 45-degree angle to promote healing and prevent water accumulation on the cut surface.
Step6: Trim healthy stems to encourage density
To shape dieffenbachia and maintain a bushy appearance, lightly trim back long, healthy stems by cutting just above a leaf node. This will promote branching and denser foliage.
Step7: Clean up clippings to prevent fungal growth
Remove any clippings and fallen debris from the soil surface to prevent fungal growth and keep the base of dieffenbachia clean.
Step8: Water the plant post-pruning
After pruning, water dieffenbachia thoroughly to reduce stress and aid recovery. Avoid overwatering, as dieffenbachia does not prefer to sit in overly moist soil.
Step9: Monitor the plant's recovery
Observe dieffenbachia for a few weeks after pruning to ensure proper healing and to notice new growth. Adjust care as needed to support its health.
Post-Pruning Care for Dieffenbachia
Post-Pruning Care for Dieffenbachia
Immediately after pruning dieffenbachia, clean the cuts with sterilized tools to prevent infection. Ensure dieffenbachia is placed in moderate, indirect light and maintain high humidity and temperatures between 65-75°F. Post-pruning, reduce fertilization for a month to allow dieffenbachia to recover, then resume with a balanced, water-soluble fertilizer every 6 weeks. Monitor dieffenbachia for yellowing leaves or wilting, which indicate stress or disease; if present, adjust care and consult a plant specialist if conditions worsen.
Common Pruning Mistakes with Dieffenbachia
Using Dull or Dirty Pruning Tools
Trimming dieffenbachia with dull or unclean tools, which can harm the stem and leaves or introduce disease.
Over-pruning and Shocking Plant
Removing too much foliage at once, which can shock dieffenbachia and hinder its growth.
Indiscriminate Pruning of Healthy Leaves
Cutting healthy leaves without discrimination instead of focusing solely on removing yellow, damaged, or diseased foliage.
Common Pruning Tips for Dieffenbachia
Clean Cuts with Sharp Pruning Shears
Utilize sharp, clean pruning shears to make precise cuts on dieffenbachia, which helps prevent diseases and promotes faster healing.
Prune Damaged Leaves for Healthy Growth
Remove yellow, damaged, or diseased leaves at the stem's base to encourage dieffenbachia's energy to be redirected towards new healthy growth.
Gradual Pruning for Plant Health
When pruning dieffenbachia for size or shape, do so gradually over time rather than all at once, to avoid causing unnecessary stress to the plant.


