How to Prune Garden pink?
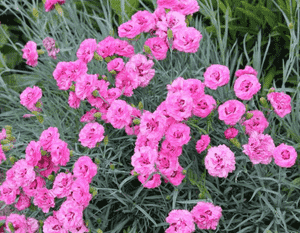
A member of the Caryophyllaceae family, garden pink is admired for its slender leaves and distinctive fringed blossoms. Consistent removal of spent flowers boosts blooming, and the plant clusters need dividing every 3-4 years to revitalize them. Trimming can occur nearly at any point; nevertheless, cutting back after flowering will stop self-seeding if that is your preference. Advantages encompass fostering compact development, managing dimensions, and improving well-being by eliminating lifeless parts. Always employ sanitized, sharp implements to avert the spread of pathogens when reducing the size of this perennial.
What Are the Benefits of Pruning Garden Pink?
What Are the Benefits of Pruning Garden Pink?
Trimming garden pink promotes abundant flowering, stimulates vigorous development, and maintains a tidy shape. This is crucial for ensuring garden pink's optimal health and visual appeal.
What Is the Best Time for Pruning Garden Pink?
What Is the Best Time for Pruning Garden Pink?
Spring is optimal for pruning garden pink, occurring after the final frost when new growth commences. This timing allows for the removal of winter damage and encourages a burst of new growth that will produce flowers. Late summer pruning, immediately following the main bloom period, helps prevent seed dispersal and can encourage a second bloom in certain climates. These periods ensure the plant remains robust and well-shaped without disrupting its natural flowering cycle.
What Tools Do I Need to Prune Garden Pink?
Bypass Pruners
Perfect for making clean, precise cuts, bypass pruners are well-suited for garden pink due to their ability to slice through stems without causing unnecessary harm, which is vital for maintaining plant health.
Shears
Garden pink can form dense stem clusters, so shears are useful for shaping and evenly trimming back large sections, particularly along the plant's edges where exactness is less critical.
Gardening Scissors
For deadheading or removing spent flowers, gardening scissors are easy to handle and provide precise control, which is appropriate for the delicate work needed to maintain garden pink's aesthetic.
Hand-held Pruning Snips
These are ideal for thinning out small, congested stems of garden pink without harming surrounding foliage, thanks to their compact size and accurate cutting capability.
How to Prune Garden Pink
Step1: Prepare Sanitized Pruning Shears
Gather clean, sharp pruning shears. Disinfect the blades with rubbing alcohol or a bleach solution to prevent disease spread to garden pink.
Step2: Identify Withered Flowers on Plant
Locate withered flowers on garden pink. These are blooms that have lost their color and vibrancy, often appearing dry and papery.
Step3: Removing Dead Blooms with Angled Cuts
Trim the withered flowers by cutting them just above the first set of healthy leaves below the spent bloom. Use an angled cut to allow water runoff and deter disease.
Step4: Locate and Assess Dead Stems
Find dead stems on garden pink. These are typically brown or black, may show signs of decay, and feel brittle.
Step5: Prune Dead Stems at Growth Nodes
Prune dead stems at the point where they emerge from the main foliage clump or just above a new growth node or healthy leaf set.
Step6: Shape Plant by Trimming Overgrown Areas
After removing withered flowers and dead stems, gently shape garden pink by trimming back overgrown areas to maintain an attractive, compact form.
Step7: Discard Pruned Debris to Prevent Pests
Clear away all pruned plant material from around garden pink to discourage pests and diseases from lingering.
Step8: Water Plant Post-Pruning
Water garden pink sufficiently after pruning to reduce plant stress and encourage new growth, but avoid overwatering, which can promote fungal diseases.
Step9: Monitor and Repeat Pruning as Needed
Monitor garden pink for new growth and repeat the pruning process when necessary to maintain the plant's health and appearance.
Post-Pruning Care for Garden Pink
Post-Pruning Care for Garden Pink
Immediately after pruning garden pink, ensure adequate water for recovery, avoiding saturation. Position garden pink to receive full sun with moderate humidity and temperatures between 15-21°C. Apply a balanced, slow-release fertilizer to nourish garden pink without overfeeding. Monitor garden pink for wilting, discoloration, or unusual spots, indicating stress or disease. If symptoms appear, adjust care and consult a horticulturist for specific treatment.
Common Pruning Mistakes with Garden Pink
Severe Over-Pruning Hinders Growth and Flowering
Pruning garden pink too aggressively can stress the plant, potentially impeding its growth and reducing its flowering capacity. It's important to avoid removing more than one-third of its growth.
Dull and Dirty Tools Damage Plant Stems
Using dull or unclean pruning tools can harm garden pink stems, leading to jagged cuts that are more vulnerable to disease. Always use sharp and sanitized equipment.
Neglecting to Deadhead Redirects Energy to Seeds
Leaving spent blooms without deadheading garden pink can cause the plant to divert energy into seed production instead of new flowers. This diminishes the overall floral display.
Common Pruning Tips for Garden Pink
Angled Cuts Above Nodes Prevent Disease
Make angled cuts just above a leaf set or stem node when pruning garden pink. This technique promotes water runoff and minimizes disease risk.
Light Post-Flowering Prune for Second Bloom
After the initial flowering, lightly prune garden pink to shape the plant and encourage a second flush of blooms. This helps maintain a compact and attractive form.
Thin Crowded Stems to Avoid Fungal Diseases
Thin out congested stems to improve air circulation among garden pink's foliage. This is crucial for preventing fungal diseases, which thrive in dense, moist conditions.


