How to Prune Scotch broom?
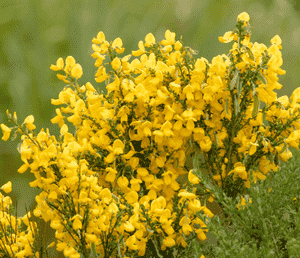
Recognized for its brilliant yellow blossoms and swift development, scotch broom thrives with trimming to preserve its form and inhibit excessive proliferation. Reduce approximately one-third of the limbs immediately following blooming, ideally in late spring or early summer, to stimulate fresh growth and the subsequent season's flowers. Eliminate aged, woody stalks for revitalization. Trimming aids in managing dimensions, enhances the plant's well-being, and can diminish its spread in regions where scotch broom is deemed intrusive.
What Are the Benefits of Pruning Scotch Broom?
What Are the Benefits of Pruning Scotch Broom?
Trimming scotch broom promotes vibrant blooms and robust health by eliminating diseased or dead wood, enhancing air circulation, and reducing pest issues. It ensures scotch broom maintains an appealing form and size, boosting garden beauty and plant vigor.
What Is the Best Time for Pruning Scotch Broom?
What Is the Best Time for Pruning Scotch Broom?
Pruning scotch broom in late spring to early summer is advisable as it coincides with the plant's post-flowering period, which typically occurs during this timeframe. Trimming after blooming allows gardeners to shape the plant and manage its dimensions without sacrificing the subsequent season's flowers. Scotch broom forms buds on new growth, so pruning at this time encourages vigorous development and optimal flowering for the following year. Additionally, this timing helps prevent diseases and pests, which are more active in later seasons, from infecting fresh cuts. Avoid pruning in late autumn or winter, as this can stimulate new growth vulnerable to frost damage.
What Tools Do I Need to Prune Scotch Broom?
Bypass Pruners
Perfect for making clean cuts on scotch broom's smaller stems, bypass pruners operate like scissors and are less likely to crush plant tissues, fostering healthier regrowth.
Loppers
Suitable for cutting through scotch broom's thicker branches that are too large for bypass pruners. Loppers offer longer handles for improved leverage and reach.
Pruning Saw
Essential for the toughest, thickest branches of scotch broom that loppers cannot manage. A pruning saw can quickly cut through dense growth.
Hand Shears
Useful for shaping scotch broom and trimming thinner, softer growth with greater precision. Excellent for maintaining the desired form and encouraging bushier development.
Gloves
When pruning scotch broom, gloves will shield your hands from thorns and rough bark, ensuring safety while working.
Safety Glasses
Protect your eyes from flying debris when cutting back scotch broom's branches. Safety should always be a priority.
How to Prune Scotch Broom
Step1: Timing Pruning Post-Bloom
Determine the correct time for pruning scotch broom, which is typically immediately after flowering in late spring or early summer. This is crucial to encourage new growth and avoid disrupting next year's blooms, as scotch broom flowers on new wood that develops from the previous year's growth.
Step2: Identifying Old Wood
Inspect scotch broom for old wood (stems that have already flowered in prior years). These will be thicker and more rigid. It's vital to locate these as they are less likely to produce vigorous blooms and may divert resources from newer growth.
Step3: Sterilizing Pruning Tools
Utilize clean, sharp secateurs or pruning shears to make precise cuts. You should sanitize your tools before and after pruning to prevent the spread of disease.
Step4: Selective Old Wood Trimming
Cut back the old wood selectively, trimming each stem to just above a new growth shoot or bud. Your cuts must be at a 45-degree angle to prevent water accumulation, which could lead to rot or disease. As a general rule, you should never prune more than one-third of the entire plant in one season to avoid stressing scotch broom.
Step5: Deadheading Spent Flowers
Remove dead flowers by cutting them off just above the closest set of leaves. This process, known as 'deadheading,' encourages scotch broom to direct energy into producing new growth instead of seed formation.
Step6: Removing Damaged Stems
Locate and prune away damaged stems, which may be caused by disease, pests, or physical injury. Remove the damaged section back to a healthy part of the stem, ensuring clean cuts to facilitate quick healing.
Step7: Shaping the Plant
Shape scotch broom after the removal of old wood, dead flowers, and damaged stems. Ensure that the plant maintains a balanced, natural shape, as drastic shaping cuts can stimulate growth that is weak or too vigorous, which can affect the overall health and appearance of scotch broom.
Step8: Disposal of Pruning Debris
Discard all the cuttings to prevent the potential spread of pests or diseases. Composting is not recommended unless you're certain that the material is disease-free.
Step9: Post-Pruning Watering
Water scotch broom appropriately after pruning to help reduce stress on the plant and encourage recovery and new growth.
Step10: Monitoring Plant Health
Monitor scotch broom for signs of stress or disease after pruning and maintain regular care, including suitable watering and feeding regimens. Always consider the specific needs of scotch broom, such as its preference for well-drained soil and full sun exposure.
Post-Pruning Care for Scotch Broom
Post-Pruning Care for Scotch Broom
Immediately after pruning scotch broom, water thoroughly, ensuring adequate soil moisture without waterlogging. Place scotch broom in an environment with full sunlight exposure while shielding it from extreme temperatures. Maintain moderate humidity levels to aid in recovery. In the subsequent weeks, apply a balanced, slow-release fertilizer to promote healthy new growth. Continuously inspect scotch broom for any signs of distress, such as wilting or discoloration, and treat promptly with appropriate fungicides or insecticides if infection or infestation is detected.
Common Pruning Mistakes with Scotch Broom
Avoid cutting into non-green old wood
Cutting into old wood: scotch broom has a limited capacity to sprout new growth from old wood. Pruning too deeply into older stems where no green growth is visible can result in sparse regrowth or weaken the plant.
Prevent over-pruning to maintain plant vitality
Over-pruning: It is a common misconception that more pruning leads to denser growth. With scotch broom, removing too much foliage at once can stress the plant and reduce its vitality.
Use sharp and clean tools for pruning
Using dull tools: Pruning scotch broom with dull or unclean pruning tools can cause damage to the stems, leading to an increased risk of disease and a less aesthetic outcome.
Common Pruning Tips for Scotch Broom
Perform selective thinning for health and shape
Selective thinning: To maintain the health and shape of scotch broom, selectively remove some of the older stems. This encourages airflow and light penetration to the center of the shrub, promoting healthy growth.
Prune after flowering to shape and encourage growth
Prune for shape: After flowering, trim scotch broom to maintain its desired shape and size. Focus on cutting back the tips of the stems that have just flowered, which encourages new growth and subsequent flowering.
Sterilize tools for clean cuts and disease prevention
Sterilize tools: Before starting, ensure that pruning tools are sharp and sterilized. This helps make clean cuts that heal quickly, and prevents the spread of disease between plants.


