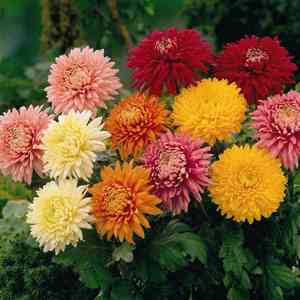
How to Prune Garden mum?
A favored perennial, known for its vivid blossoms and abundant leaves, the garden mum flourishes with consistent trimming. In spring, nip off the growing tips to foster a denser form, and remove faded flowers to encourage ongoing blooming. Reduce the plant's size by one-third in early summer to prepare for autumn flowers. Trimming can be performed at any point, but refrain from late autumn cuts as these may diminish the garden mum's vigor prior to its dormant period. Pruning improves air movement, lowers the chance of disease, and guarantees abundant flowering in this adaptable decorative plant.
What Are the Benefits of Pruning Garden Mum?
What Are the Benefits of Pruning Garden Mum?
Trimming garden mum promotes a more profuse flowering period, supports robust development, and maintains an attractive form, aligning the plant's structure with the gardener's preferences.
What Is the Best Time for Pruning Garden Mum?
What Is the Best Time for Pruning Garden Mum?
Pruning in spring coincides with the start of garden mum's active growth phase, allowing the plant to recover swiftly and produce new growth. Early summer trimming helps shape the plant and encourages a denser growth habit, which can increase the number of blossoms. This timing also prevents stress on garden mum that could result from cutting during peak summer heat or winter dormancy, ensuring the plant remains healthy and vigorous for its blooming season.
What Tools Do I Need to Prune Garden Mum?
Hand Pruners
Perfect for making precise cuts on garden mum, hand pruners are suitable for snipping stems and removing spent blooms. They provide clean cuts that help prevent disease and encourage healthy growth.
Thinning Shears
Garden mum may require thinning to enhance air circulation and reduce disease risk. Thinning shears are designed for selectively removing finer stems and congested growth.
Pruning Snips
For detailed shaping and deadheading the smaller, delicate flowers of garden mum, pruning snips can access tight areas and make precise, minimal cuts.
Gloves
While pruning garden mum, gloves protect the gardener's hands from thorns and sharp tools, as well as from potential skin irritants found in plant sap.
Cleaning Cloth and Disinfectant
To avoid spreading disease while pruning garden mum, use a clean cloth and disinfectant to wipe down tools before and after use.
How to Prune Garden Mum
Step1: Identifying Dead and Diseased Plant Parts
Examine garden mum for withered flowers and unhealthy stems. Begin with a visual check to pinpoint the sections needing removal. Dead flowers will appear limp and brown, while diseased stems may show signs of discoloration, spots, or decay.
Step2: Tool Sanitization Process Before Pruning
Sanitize pruning tools prior to starting. Clean your shears or clippers with a solution of one part bleach to nine parts water to prevent the spread of disease.
Step3: Proper Cutting Technique for Dead Flowers
Position your shears just above a leaf node closest to the spent flower. Make a clean cut at a 45-degree angle approximately 1/4 inch above the leaf set to encourage new growth.
Step4: Removing Diseased Stems with Precision
To remove diseased stems, trace back to the point of healthy tissue, which will typically be green and firm to the touch. Make a cut at least 1 inch into the healthy tissue to ensure all diseased parts are removed.
Step5: Regular Deadheading for Sustained Blooming
Remove spent flowers regularly, especially during the blooming season, to promote continuous flowering and maintain the aesthetic appeal of garden mum.
Step6: Debris Clearance to Prevent Disease Spread
When trimming diseased stems, be diligent about removing any fallen debris from the soil surface to reduce the chance of disease spreading.
Step7: Tool Disinfection Post-Pruning
After pruning, disinfect your tools again to eliminate any pathogens that may have been transferred from the diseased stems.
Step8: Proper Disposal of Pruned Plant Parts
Dispose of the removed parts by burning or discarding them in the trash. Do not compost diseased plant material as it can contaminate the compost.
Step9: Appropriate Post-Pruning Watering
Water garden mum appropriately after pruning to reduce stress on the plant and encourage recovery. Avoid overhead watering to minimize the risk of disease.
Step10: Post-Pruning Health Monitoring
Monitor garden mum after pruning for signs of new growth and health improvement, ensuring that no further disease or dead flower issues persist and addressing any new occurrences promptly.
Post-Pruning Care for Garden Mum
Post-Pruning Care for Garden Mum
After trimming garden mum, immediately ensure optimal environmental conditions by placing it in an area with bright indirect sunlight, stable humidity, and temperatures between 60-70°F. Maintain moist soil without waterlogging. Apply a balanced, slow-release fertilizer to support recovery. Monitor for wilted or discolored leaves as indicators of stress or infection. If symptoms appear, adjust care and consult a horticultural expert for potential disease management.
Common Pruning Mistakes with Garden Mum
Over-Pruning Reduces Blooming
Trimming too aggressively, which can stress garden mum and diminish its potential to bloom.
Excessive Removal of Healthy Tissue
Failing to remove only the dead or diseased parts of garden mum, leading to the unnecessary removal of healthy tissue.
Using Dull or Dirty Tools
Employing dull or unclean pruning tools, which can result in jagged cuts and potentially introduce disease to garden mum.
Pruning Without a Clear Goal
Trimming without a defined objective, leading to a lack of shape or failure to encourage desired growth patterns in garden mum.
Forcing Unnatural Plant Shape
Disregarding the natural shape of garden mum, and attempting to force it into an unnatural form, which can lead to poor growth and flowering.
Common Pruning Tips for Garden Mum
Use Sharp, Clean Shears for Healthy Cuts
Always use sharp, clean pruning shears to make clean cuts that will heal quickly, minimizing the risk of disease in garden mum.
Maintain Natural Form for Healthy Growth
Prune garden mum to maintain its natural form, removing only the necessary parts to promote healthy growth and prolific blooming.
Deadhead Flowers to Boost Bloom Production
Snip off spent flowers just below the base of the flower head to encourage garden mum to produce more blooms and prevent seeding.
Thin for Better Air Circulation and Growth
Thin out the center of garden mum to improve air circulation and light penetration, which can help prevent disease and encourage more vigorous growth.
Selective Pruning Encourages Branching
When shaping garden mum, perform selective pruning to encourage branching, which can lead to a fuller plant with more flowers.


