How to Prune Natal plum?
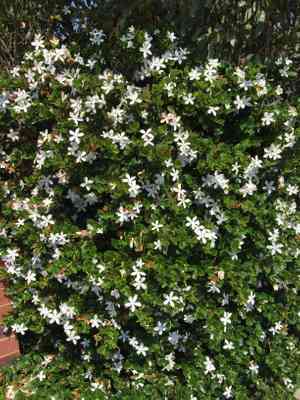
This perennial bush, recognized for its lustrous foliage and stellate blossoms, necessitates judicious trimming to preserve its form and foster robust development. Essential methods for Carissa macrocarpa involve reducing dense branches and shortening excessive sections to facilitate air movement and light exposure. The most effective time for pruning is in early spring to encourage strong spring development. Trimming not only improves visual appeal but also stimulates the creation of the plant's palatable fruit and diminishes the likelihood of infestations and ailments.
What Are the Benefits of Pruning Natal Plum?
What Are the Benefits of Pruning Natal Plum?
Trimming natal plum can boost fruit production, stimulate vigor, and maintain a desired shape. It helps ensure the plant's optimal health and visual appeal.
What Is the Best Time for Pruning Natal Plum?
What Is the Best Time for Pruning Natal Plum?
In early spring, natal plum typically enters a vigorous phase of new growth after a dormant winter period. Pruning at this time capitalizes on the plant's natural growth cycle, encouraging a robust and healthy development throughout the season. By trimming natal plum at this stage, gardeners can shape the plant and remove any damaged or diseased wood before the energy is directed into new foliage and branches. This timing also ensures that the flowering and fruiting periods are not adversely affected as natal plum blooms on the current year's growth. Pruning just before the onset of rapid growth allows the wound healing process to occur quickly, reducing stress and vulnerability to pests and diseases.
What Tools Do I Need to Prune Natal Plum?
Hand Pruners
Perfect for snipping thin branches and shaping natal plum, these tools enable precise cuts without harming the plant.
Lopping Shears
Utilized for thicker branches that hand pruners cannot manage, lopping shears offer the necessary leverage for branches up to approximately 1.5 inches in diameter.
Pruning Saw
For the thickest branches of natal plum, a pruning saw can make clean cuts without tearing the bark or causing undue stress to the plant.
Gloves
Given natal plum's sharp thorns, wearing gloves is crucial for protection during the pruning process.
Disinfectant
To prevent disease spread, sanitizing pruning tools before and after use on natal plum is advised. This can be done with rubbing alcohol or a 10% bleach solution.
How to Prune Natal Plum
Step1: Timing Pruning Post-Flowering
Select the appropriate time to prune natal plum, typically after the plant has bloomed in spring or early summer to avoid removing flower buds. Refrain from pruning in late fall or winter when the plant is less active.
Step2: Tool Sterilization for Hygienic Pruning
Sanitize your pruning tools with rubbing alcohol or a household disinfectant to prevent disease transmission. Clean them between cuts if trimming diseased branches.
Step3: Deadwood Identification and Removal
Locate and eliminate any deadwood. These are branches lacking leaves, discolored, or appearing dry and brittle. Cut deadwood back to the base or to a living lateral branch using clean, sharp cuts.
Step4: Sucker Growth Trimming
Find and trim any suckers, which are vigorous vertical shoots growing from the base of natal plum or from the roots. Cut these to ground level or as close to the main stem as possible without harming the main structure.
Step5: Cutting Back Diseased Branches
Inspect natal plum for any diseased branches, indicated by discoloration, abnormal growth, or wilting. Cut these branches back to healthy tissue, ideally 3 to 5 inches into the healthy part to ensure complete disease removal.
Step6: Thinning for Light and Airflow
Shape natal plum by selectively thinning out overgrown areas to promote light penetration and air circulation. Make cuts just above outward-facing buds to encourage outward growth and maintain a natural shape.
Step7: Post-Pruning Cleanup
Clear all debris to prevent the spread of pathogens and pests. Dispose of or destroy diseased material off-site and not in your compost to avoid contamination.
Step8: Hydration and Fertilization
After pruning, water the base of natal plum to ensure it's hydrated, and if necessary, apply a balanced, slow-release fertilizer to support recovery and growth.
Post-Pruning Care for Natal Plum
Post-Pruning Care for Natal Plum
Immediately after pruning natal plum, ensure it's kept in a well-lit area but protected from harsh sunlight. Maintain moderate humidity and steady temperatures to mitigate stress. Apply a balanced, slow-release fertilizer to support recovery and growth. Monitor the plant for wilt, discoloration, or signs of infection. Any adverse changes should prompt adjustments in care or a consultation with a plant health expert. Regular and careful observation is crucial for the post-pruning period.
Common Pruning Mistakes with Natal Plum
Excessive Pruning Reduces Flowering and Harms Vitality
Over-trimming natal plum can lead to stress and reduced blooming. Removing more than one-third of the plant can harm its growth and vigor.
Dull or Dirty Tools Cause Branch Damage and Disease
Using dull or unclean pruning tools can damage natal plum's branches, making them more susceptible to disease and pests.
Improper Cuts into Old Wood Hinder Plant Recovery
Cutting into old wood where there is no green growth may prevent natal plum from recovering properly, as it does not regenerate well from old wood.
Not Removing Dead Wood Risks Health and Disease Spread
Failing to remove dead or diseased branches, which can hinder healthy growth and potentially spread disease throughout natal plum.
Uninformed Pruning Leads to Unnatural Shape and Damage
Pruning without understanding the natural shape of natal plum leading to an unnatural appearance and potential harm to the plant's structure.
Common Pruning Tips for Natal Plum
Sharp, Sterilized Shears for Clean Cuts and Disease Prevention
Use sharp and sterilized pruning shears to make clean, precise cuts that will heal quickly and have less risk of disease for natal plum.
Prune for Natural Shape, Health, and Air Circulation
Prune natal plum to maintain its natural rounded shape, promoting healthier growth and better air circulation within the plant.
Cut Above Nodes or Branches for Bushier Growth
Cut just above a leaf node or lateral branch to encourage bushier growth and increase the likelihood of flowering in natal plum.
Regular Dead Wood Removal Boosts Health and Appearance
Regularly remove dead or diseased wood as soon as it is noticed to increase the overall health and appearance of natal plum.
Balance and Structure in Mind When Shaping
When shaping natal plum, make pruning decisions with the overall structure in mind to maintain a balanced, attractive form while allowing light to penetrate the canopy.


