How to Prune Indian shot?
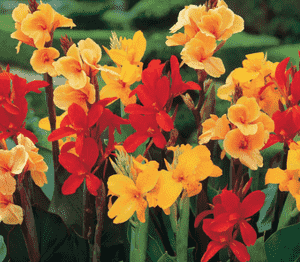
This enduring plant, characterized by its striking leaves and vivid blossoms, flourishes with proper trimming. For indian shot, eliminate faded flowers and deceased leaves at any point to encourage ongoing blooming. Cutting back to soil level is best performed in early spring, readying indian shot for robust development. Trimming in late summer ought to be less extensive, concentrating on contouring and removing spent blooms. Pruning fosters denser plants and guards against fungal infections. Sterilized, keen implements are crucial to avoid harm and illness.
What Are the Benefits of Pruning Indian Shot?
What Are the Benefits of Pruning Indian Shot?
Trimming indian shot promotes vigorous development by redirecting energy to new shoots, fostering a robust structure. Strategic cutting maintains its size and form for aesthetic and spatial reasons, ensuring a well-kept garden appearance.
What Is the Best Time for Pruning Indian Shot?
What Is the Best Time for Pruning Indian Shot?
Pruning indian shot in early spring is optimal as the plant emerges from dormancy and begins a new growth cycle. This timing allows shaping and stimulates strong growth. Once pruned, indian shot can focus energy on new shoots and leaves instead of old or damaged foliage. The risk of frost damage post-pruning is also minimized as temperatures rise. Trimming in late summer is also beneficial, as indian shot has typically finished its main flowering period. Pruning then helps prevent disease by removing spent flowers or foliage that could harbor pests or fungal spores. It also allows indian shot to generate fresh growth that will harden before colder weather, improving its resilience and overall health.
What Tools Do I Need to Prune Indian Shot?
Bypass Pruners
These pruners operate like scissors and are perfect for making clean cuts on the green stems of indian shot, encouraging healthy regrowth.
Anvil Pruners
Not advised for indian shot as they tend to crush stems, potentially harming the plant.
Pruning Saws
Useful for cutting through any larger, woody stems if indian shot has been allowed to grow extensively without prior trimming.
Long-Handled Loppers
These can help reach higher stems and provide leverage for thicker stems, ensuring minimal effort is needed for pruning indian shot.
Hand Gloves
Wearing gloves is recommended to protect hands from any rough edges or sap that may be present when pruning indian shot.
Pruning Shears
Suitable for shaping the plant and removing dead or diseased foliage from indian shot without harming adjacent stems and leaves.
How to Prune Indian Shot
Step1: Identifying Prunable Plant Parts
Identify the sections of indian shot that require trimming. Look for spent flowers, any diseased plant parts, and wilted or damaged stems.
Step2: Disinfecting Pruning Tools
Sanitize your pruning tools with a disinfectant solution or rubbing alcohol to prevent the spread of disease among plants.
Step3: Deadheading Flowers for Growth
Begin with dead flowers. Cut the flower stalks at a 45-degree angle, approximately 1 to 2 inches above the next side shoot or leaf junction to promote new growth.
Step4: Removing Diseased Plant Tissue
Prune away any diseased parts of indian shot next. Make cuts at least a few inches below the affected area to ensure all diseased tissue is removed. Dispose of these parts promptly and carefully, away from healthy plants.
Step5: Trimming Wilted/Damaged Stems
Address wilted or damaged stems by cutting them back either to the base of the plant or to an outward-facing side shoot, depending on the severity. If the stem is only partially damaged, prune above a healthy leaf node.
Step6: Timing Severe Pruning Correctly
For any severe pruning, down to the base of indian shot, ensure it is done post-flowering when the plant begins to go dormant, usually in late fall or early winter.
Step7: Watering After Pruning
Water the base of indian shot thoroughly after pruning to help reduce stress on the plant and enable it to recover and direct energy to the development of new growth.
Step8: Post-Pruning Tool Cleanup
Clean your tools again after completing the pruning to prevent the potential transfer of disease to other plants or the next time you prune indian shot.
Step9: Aftercare Monitoring and Feeding
Monitor indian shot closely over the following weeks, providing adequate water and possibly a balanced, slow-release fertilizer to encourage healthy new growth.
Post-Pruning Care for Indian Shot
Post-Pruning Care for Indian Shot
Immediately after trimming indian shot, ensure proper hydration to facilitate recovery, but avoid waterlogging. Balance light exposure, providing partial shade to prevent stress. Maintain ambient temperatures of 60-75°F and high humidity. Post-pruning, apply a balanced fertilizer to replenish nutrients. Regularly inspect indian shot for signs of stress, such as wilting or discoloration, and disease indicators like spots or rot. Address any issues promptly by adjusting care or applying appropriate treatments while observing environmental conditions.
Common Pruning Mistakes with Indian Shot
Over-pruning Weakens Plants
Excessive pruning can be a frequent error, where too much of the plant is cut back, which can weaken indian shot or reduce its ability to flower.
Dull and Dirty Tools Damage Stems
Using dull or unclean pruning tools can harm the stems of indian shot, potentially leading to disease or undesirable growth patterns.
Not Removing Spent Blooms Reduces New Growth
Failure to remove spent blooms and seed pods may result in indian shot focusing energy on seed production rather than on new growth and flowers.
Improper Cuts Near Main Stem Hinder Growth
Trimming too close to the main stem or 'rhubarb', which might accidentally harm the growing point, can impede the development of indian shot.
Crowded Growth Limits Airflow and Increases Disease Risk
Neglecting to thin out crowded areas can lead to reduced air circulation, increasing the risk of fungal diseases for indian shot.
Incorrectly Angled Cuts Promote Rot
Cutting stems at a wrong angle might allow water to accumulate on the cut surface, fostering rot and disease in indian shot.
Common Pruning Tips for Indian Shot
Use Sharp, Clean Shears for Healthy Cuts
Use sharp, clean pruning shears to make precise cuts that will heal quickly, thus preventing damage to the indian shot.
Prune Regularly to Boost Blooms and Growth
Prune spent flowers and seed pods regularly to encourage indian shot to produce more blooms and to allocate energy towards healthy growth.
Remove Old Leaves to Improve Airflow and Health
For optimal health and aesthetic, prune old and discolored leaves at the base to promote air circulation and reduce the chance of disease for indian shot.
Thin Out Stalks for Better Air and Light
Thin out the stalks if indian shot becomes overcrowded to maintain good air flow and sunlight penetration, which are vital for the plant's health.
Make Angled Cuts to Avoid Water Accumulation
Make angled cuts when pruning indian shot to prevent water from sitting on the cut surfaces, thereby minimizing the risk of rot and disease.
Leave Stem Length to Protect Growing Points
Leave a few inches of the stem when cutting back spent stems to protect the growing points and ensure future growth of indian shot.


