How to Prune Canterbury bells?
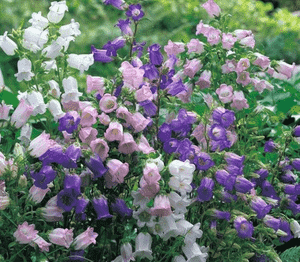
This herbaceous perennial features campanulate blossoms atop elongated stalks. To achieve the best canterbury bells care, snip off spent flowers to stimulate a subsequent flowering period. Trimming the plant following its initial bloom, preferably in mid-summer, additionally sustains its vitality and aesthetic appeal. While it can withstand pruning throughout the year, post-flowering trimming maximizes its health and bloom production. Consistent removal of spent blooms helps deter self-propagation and encourages more flowers. Since canterbury bells reacts favorably to pruning, these actions will improve the garden's visual impact by fostering vigorous development.
What Are the Benefits of Pruning Canterbury Bells?
What Are the Benefits of Pruning Canterbury Bells?
Trimming canterbury bells promotes a strong flowering cycle and stimulates vigorous development. Strategic cuts help maintain its desired form and size, enhancing the plant's aesthetic appeal and vitality.
What Is the Best Time for Pruning Canterbury Bells?
What Is the Best Time for Pruning Canterbury Bells?
During late winter or early spring, canterbury bells is in its dormant phase, which reduces stress and disease risk. Pruning before new growth begins helps shape the plant and encourages healthier, more abundant blooms in the subsequent season. This timing also allows for the removal of any dead or damaged foliage from winter, ensuring canterbury bells directs energy into new, healthy growth.
What Tools Do I Need to Prune Canterbury Bells?
Bypass Pruners
Perfect for making clean cuts on canterbury bells's green, soft stems without crushing them. Should be kept sharp to avoid harming the plant tissue.
Scissors
Suitable for removing spent canterbury bells flowers or trimming small, delicate stems and faded blooms with precision.
Gloves
Protects hands from canterbury bells's sap and any rough foliage during trimming. Wearing gloves is crucial for the gardener's personal safety.
Gardening Shears
Useful for shaping and managing the overall size of canterbury bells, ensuring uniform growth and an attractive form.
Pruning Saw
When mature stems of canterbury bells become woody, a small pruning saw can be used for making larger, more challenging cuts.
How to Prune Canterbury Bells
Step1: Deadheading After Bloom
Start trimming canterbury bells after it has finished flowering, typically in late summer or early fall. This is when you will notice dead flowers that need to be removed.
Step2: Sterilize Pruning Shears
Use clean, sharp pruning shears to prevent damage and disease. Sterilize your shears before trimming canterbury bells to minimize the risk of spreading diseases.
Step3: Identify Dead Flowers
Identify the dead flowers on canterbury bells. They are typically faded, brown, or withered. Spend a few moments examining canterbury bells to distinguish the dead blooms.
Step4: Precise Dead Flower Removal
Cut the dead flowers off canterbury bells just below the flower head. Make the cut at the base of the flower stalk, ensuring not to damage new buds or leaves that may be forming.
Step5: Diseased Stem Detection
Check for diseased stems on canterbury bells. Symptoms may include abnormal spots, discoloration, or a mushy texture.
Step6: Remove Diseased Stems to Healthy Tissue
Remove any diseased stems from canterbury bells by cutting them back to healthy tissue. If a stem is entirely diseased, cut it down to the base of the plant.
Step7: Discard Dead and Diseased Debris
Discard the dead flowers and diseased stems in a bin rather than composting them to prevent spreading any potential disease.
Step8: Post-pruning Hydration
After pruning, water canterbury bells at the base to help rejuvenate it. Ensure the soil remains moist but not waterlogged, as this can promote root rot.
Step9: Monitor and Repeat Pruning
Monitor canterbury bells regularly for new growth and additional dead or diseased tissue, repeating the pruning process as necessary.
Post-Pruning Care for Canterbury Bells
Post-Pruning Care for Canterbury Bells
After trimming canterbury bells, immediately ensure sufficient moisture to aid in recovery. Maintain the plant in partial shade to avoid stress from intense sunlight and monitor the humidity, keeping it moderate. Adjust temperatures to favor canterbury bells's growth, avoiding extremes. Apply a balanced, mild fertilizer to replenish nutrients, facilitating healthy regrowth. Watch for wilt or discoloration, signs of stress, or infection, and act promptly by adjusting care or consulting an expert if such issues persist.
Common Pruning Mistakes with Canterbury Bells
Excessive Pruning Stunts Growth
Over-pruning, which may lead to stunted growth or reduced flowering in canterbury bells. Removing too much foliage or too many stems can stress the plant and limit its energy reserves.
Improper Cutting Causes Plant Injury
Cutting into the woody base of canterbury bells, which can cause injury to the plant and potentially introduce diseases. It's important to prune just above the healthy leaf nodes.
Neglecting Spent Flowers Drains Energy
Neglecting to remove spent flowers or seedheads, which can lead to canterbury bells using energy for seed production rather than for new growth and next year's blooms.
Uniform Pruning Hampers Air Circulation
Pruning all stems at the same height, creating a 'haircut' look that is unnatural and can lead to poor air circulation within the plant. Varied stem lengths are preferable.
Not Removing Damaged Stems Threatens Health
Ignoring diseased or damaged stems during pruning, which can affect the overall health of canterbury bells. It's crucial to remove these to maintain a healthy plant.
Common Pruning Tips for Canterbury Bells
Prune After Flowering for Repeat Blooms
Prune canterbury bells immediately after flowering to encourage a tidy appearance and potentially a second, although smaller, bloom period. Use clean, sharp pruning shears to make precise cuts.
Deadheading Encourages New Growth
Deadhead spent flowers by cutting back to the first set of healthy leaves. This can redirect energy to new growth and flower production, making the plant more vibrant.
Trim Leggy Stems for Bushier Growth
Cut back leggy stems to maintain an aesthetically pleasing shape and to encourage bushier growth. This helps improve sunlight penetration and air circulation throughout the plant.
Thinning Dense Areas Prevents Disease
Thin out dense areas by selectively removing some stems at the base. This improves air circulation and reduces the risk of fungal diseases, which are common in crowded plants.
Prune and Check for Plant Health
Conduct a health check while pruning by looking for signs of pests or diseases. Remove any affected parts, and dispose of them away from the garden to prevent spreading.


