How to Prune Bird's-nest fern?
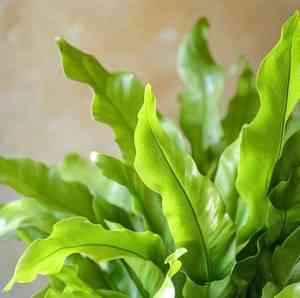
A vibrant, air-dwelling fern, the bird's-nest fern's wavy leaves emerge from a central cluster, resembling a bird's dwelling. To foster more robust development, detach withered or compromised fronds near the base, utilizing sharp, disinfected cutting tools to avert the spread of pathogens. Trimming is most effective in early spring or late winter to align with its developmental rhythm. This practice not only preserves the bird's-nest fern's neat look but also stimulates energetic new foliage, improves air movement, and discourages insect problems.
What Are the Benefits of Pruning Bird's-nest Fern?
What Are the Benefits of Pruning Bird's-nest Fern?
Trimming bird's-nest fern promotes vigorous development and maintains its desired shape. Removing older leaves encourages fresh, strong foliage, keeping the plant compact and enhancing its aesthetic appeal.
What Is the Best Time for Pruning Bird's-nest Fern?
What Is the Best Time for Pruning Bird's-nest Fern?
These periods are ideal because bird's-nest fern typically grows slower in late winter, allowing for easier recovery without significant plant stress. Pruning in early spring is beneficial as it occurs just before the plant's active growth phase. This timing encourages healthier, more robust growth, as the plant can direct energy to new fronds replacing old or damaged ones removed during pruning. It's also crucial to avoid pruning when bird's-nest fern is actively growing or under environmental stress, such as extreme heat or drought.
What Tools Do I Need to Prune Bird's-nest Fern?
Sharp Scissors or Snips
Given the delicate nature of bird's-nest fern's fronds, sharp scissors or snips are perfect for making clean cuts without harming the tissue. Precision is key to prevent tearing the fronds.
Sterilized Tools
Using sanitized pruning tools prevents the introduction of diseases or pests to bird's-nest fern. Before pruning, tools should be cleaned with a bleach or alcohol solution.
Gloves
Bird's-nest fern typically lacks sharp edges, but wearing gloves can protect the gardener's hands from potential skin irritants or when handling sterilization chemicals.
How to Prune Bird's-nest Fern
Step1: Inspect Plant for Pruning
Examine bird's-nest fern thoroughly to identify dead leaves, damaged fronds, and old fronds needing removal. Ensure you recognize healthy fronds, as they are vital for photosynthesis and plant well-being.
Step2: Sanitize Pruning Tools
Disinfect your pruning tools before starting to prevent disease spread. Use isopropyl alcohol or a 10% bleach solution to clean the blades.
Step3: Remove Dead Leaves at Base
Using sharp scissors or pruning shears, carefully remove dead leaves by cutting at the base near the central rosette. Do not pull leaves, as this can harm the plant's structure.
Step4: Prune Damaged Fronds
Trim damaged fronds by locating the point where the frond appears healthy and green. Make a clean diagonal cut just above this point to remove the damaged part without affecting healthy growth.
Step5: Trim Old Growth
Cut old fronds that are brown or have significantly slowed in growth. These are usually found lower on the plant. Cut at the frond's base, close to the central rosette, leaving minimal stub.
Step6: Dispose of Plant Cuttings
After pruning, clear away all cuttings from the base of bird's-nest fern to prevent potential pests or diseases from establishing in decaying plant material.
Step7: Prune Gradually to Avoid Shock
Limit pruning to a few fronds at a time to avoid shocking bird's-nest fern. It's better to prune sparingly and regularly rather than all at once.
Step8: Fertilize After Pruning
After pruning, consider applying a diluted balanced fertilizer to support bird's-nest fern's recovery and promote healthy growth, following product instructions.
Post-Pruning Care for Bird's-nest Fern
Post-Pruning Care for Bird's-nest Fern
Immediately after pruning bird's-nest fern, ensure high humidity and stable temperatures between 65-75°F. Place in indirect light, avoiding direct sun. Water sparingly to prevent root rot. Within 2-4 weeks, apply a balanced liquid fertilizer to encourage growth. Regularly inspect bird's-nest fern for yellowing or wilted leaves, indicating stress or infection. Remove affected fronds carefully and adjust care as needed. Consistent monitoring facilitates bird's-nest fern's robust recovery.
Common Pruning Mistakes with Bird's-nest Fern
Pruning healthy leaves reduces energy and photosynthesis
Trimming live, healthy leaves instead of naturally yellowing or brown ones. Bird's-nest fern uses each leaf for photosynthesis and energy; unnecessary removal of green fronds can impede the plant's growth.
Cutting fronds too short damages central growth rosette
Cutting fronds too close to the base, potentially harming the central rosette where new growth emerges. This can lead to stunted growth or make bird's-nest fern susceptible to diseases.
Over-pruning causes shock and reduces plant vigor
Removing too many leaves at once, which can shock bird's-nest fern and lead to stress or reduced vitality. It's essential to prune conservatively to maintain plant health.
Unsterilized tools risk spreading disease to plant
Using unsterilized tools, which could introduce bacteria, fungi, or pests to cut areas, potentially harming bird's-nest fern's health.
Jagged cuts on fronds invite disease
Leaving jagged or torn edges when pruning, which don't heal well and could become entry points for pathogens. Smooth, clean cuts are crucial for bird's-nest fern's well-being.
Common Pruning Tips for Bird's-nest Fern
Use sharp, sterilized tools for healthy cuts
Always use sharp and sterilized pruning shears or scissors to make clean cuts, which helps prevent infection and ensures quick healing of pruned areas on bird's-nest fern.
Prune only old, discolored fronds to boost growth
Target only older, yellowing, or brown fronds for removal, as these are naturally being shed by bird's-nest fern. Cutting them back can improve air circulation and direct more energy into new growth.
Cut fronds at an angle to protect central rosette
Cut fronds at an angle and leave about an inch of the base to prevent damage to the central rosette when pruning bird's-nest fern. This ensures the healthy part of the plant is not compromised.
Prune sparingly for plant health and slow growth
Prune sparingly and selectively, focusing on damaged or diseased leaves. Bird's-nest fern's growth is slow, and it doesn't require frequent pruning.
Remove debris post-pruning to prevent disease spread
Clean up removed fronds after pruning bird's-nest fern to prevent the potential spread of pests and diseases and to maintain a clean growing environment.
Monitor plant health after pruning for early issue detection
After pruning bird's-nest fern, monitor the plant for any signs of stress or disease. If issues arise, address them promptly to maintain plant health.
Support large fronds during pruning to prevent damage
If bird's-nest fern's fronds are large and unwieldy, support the leaf being cut with one hand while pruning with the other to avoid tearing or accidental damage to other healthy fronds.


