How to Prune Norfolk island pine?
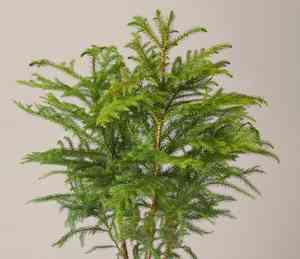
Norfolk island pine, a unique conifer characterized by its pyramidal form and layered horizontal branches, should ideally be trimmed in winter during its inactive period. It is advisable to undertake only light pruning, primarily to eliminate any deceased or compromised branches, thereby preserving the plant's well-being and contour. Employ sharp, disinfected implements to execute precise cuts, taking care not to harm the branch collars. This practice fosters more abundant foliage and can counteract sparse growth in indoor plants, improving both their appearance and structural soundness.
What Are the Benefits of Pruning Norfolk Island Pine?
What Are the Benefits of Pruning Norfolk Island Pine?
Trimming norfolk island pine encourages robust development, leading to a denser, more balanced form. It aids in preserving the desired silhouette, fostering a strong, visually pleasing structure crucial for its decorative appeal.
What Is the Best Time for Pruning Norfolk Island Pine?
What Is the Best Time for Pruning Norfolk Island Pine?
Winter is considered ideal for pruning norfolk island pine as the plant is in a dormant state. During this period, its slower growth rate minimizes stress on norfolk island pine, allowing for effective recovery from pruning. Additionally, the plant's sap is less active, reducing the risk of sap loss and potential pest infestation at cut sites. Winter pruning also prepares norfolk island pine for a vigorous growth spurt in spring, resulting in a healthier and more attractive shape.
What Tools Do I Need to Prune Norfolk Island Pine?
Sharp Bypass Pruners
Perfect for making clean cuts on norfolk island pine's smaller branches and foliage without crushing plant tissues, offering precise control and minimizing harm to the plant.
Long-Handled Loppers
Useful for reaching higher branches and providing the leverage needed for cutting through thicker branches of norfolk island pine, typically up to two inches in diameter.
Pruning Saw
Essential for cutting through norfolk island pine's larger branches that are too thick for loppers, ensuring a smooth and clean cut to encourage healthy regrowth.
Gardening Gloves
Protects hands from the rough texture of norfolk island pine's bark and foliage during the pruning process, ensuring safety and comfort.
Sturdy Ladder
Provides safe access to higher branches of norfolk island pine, allowing for a thorough pruning job without the risk of injury from overreaching or falling.
How to Prune Norfolk Island Pine
Step1: Timing Pruning to Seasonal Growth Cycles
Select the appropriate time of year to prune norfolk island pine, ideally in late winter or early spring before new growth commences. Avoid pruning in autumn, as new growth may be harmed by colder temperatures.
Step2: Pruning Tool Preparation and Sterilization
Prepare clean, sharp pruning tools. Sanitize them with alcohol to prevent the spread of disease.
Step3: Identifying and Removing Dead Branches
Examine norfolk island pine to locate dead branches, which are typically dry, brittle, and devoid of green foliage.
Step4: Proper Cutting Technique for Healthy Recovery
Using your tools, make a clean cut to remove dead branches. Cut at a slight angle just beyond the branch collar, the swollen area of trunk tissue that forms at the base of the branch, to promote proper healing.
Step5: Removing Yellow Leaves Indicating Plant Stress
Identify yellow leaves, which often signal stress or age. Pinch or use pruning shears to remove yellow leaves, being careful not to damage healthy parts.
Step6: Correcting Misshapen Growth for Symmetry
Address misshapen growth by selecting the leggy or awkward branches that disrupt the symmetrical growth habit of norfolk island pine. Make a precise cut above a whorl of branches or a healthy node to encourage denser growth.
Step7: Thinning for Enhanced Light and Air Canopy Penetration
Thin out crowded areas to improve light penetration and air circulation within the canopy. Remove only a few branches, as norfolk island pine does not tolerate heavy pruning.
Step8: Inspecting Cuts for Cleanliness and Smoothness
Inspect the pruning cuts for cleanliness and smoothness, ensuring that no jagged edges are left as they can be entry points for pests and diseases.
Step9: Debris Cleanup Post-Pruning for Plant Health
Clean up all debris from the pruning process to maintain a tidy growing environment and reduce the risk of pests and disease.
Step10: Monitoring Plant Health Post-Pruning
Monitor norfolk island pine after pruning for signs of stress or decay. Adequate watering and fertilization can support the health and recovery of the plant after pruning.
Post-Pruning Care for Norfolk Island Pine
Post-Pruning Care for Norfolk Island Pine
After pruning norfolk island pine, promptly ensure the wound sites are clean to aid recovery. Place norfolk island pine in bright, indirect light, maintaining humidity at 50-60% and temperature around 65-75°F. Initiate a balanced fertilization schedule 4-6 weeks post-pruning to encourage growth, using a balanced, slow-release fertilizer. Regularly inspect for wilting or discoloration as signs of stress. Should infection signs appear, such as oozing or discoloration at cuts, treat immediately with an appropriate fungicide.
Common Pruning Mistakes with Norfolk Island Pine
Over-Pruning Damages Symmetry and Regrowth
Excessive pruning leading to sparse foliage or damage to the norfolk island pine's symmetrical shape, as it does not regenerate branches in the same way as many other trees.
Topping Halts Vertical Growth and Leader
Cutting the top off the norfolk island pine, which can halt its vertical growth, resulting in a misshapen plant without a central leader.
Unsterilized Tools Risk Disease Introduction
Pruning without sterilized tools, which increases the risk of introducing diseases to the norfolk island pine.
Pruning New Growth Weakens Plant
Pruning healthy or new growth, which can weaken the norfolk island pine and reduce its vigor.
Ignoring Dead or Damaged Limb Removal
Neglecting to remove only the dead or damaged limbs, which is usually all that is necessary for maintaining the health and appearance of the norfolk island pine.
Common Pruning Tips for Norfolk Island Pine
Sterilize Tools to Prevent Disease Spread
Sterilize pruning tools before use to prevent the spread of disease to the norfolk island pine.
Remove Only Dead or Damaged Branches
Focus on removing only dead, damaged, or diseased branches to maintain the natural growth and symmetry of the norfolk island pine.
Prune Sparingly for Natural Shape Maintenance
Prune sparingly, understanding that the norfolk island pine rarely needs extensive pruning due to its natural, well-maintained shape.
Cut Close to Trunk, Avoiding Stubs
When a branch must be removed, cut close to the main trunk without leaving stubs to promote quicker healing.
Light Trimming Preserves Aesthetic
Ensure any necessary shaping is done by lightly trimming the tips of the branches, rather than removing large sections, to preserve the norfolk island pine's aesthetic.


