How to Propagate Japanese thuja?
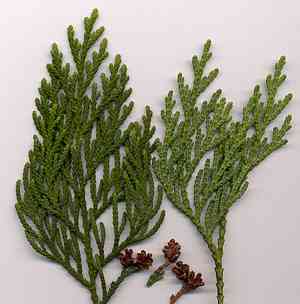
Belonging to the Cupressaceae lineage, japanese thuja is a conifer that flourishes in moderate environments. Effective propagation of japanese thuja entails utilizing semi-hardwood sections. For superior root formation, select vigorous shoots from the present year's growth, making sure each cutting possesses multiple nodes. Apply a rooting stimulant to these sections to foster sturdy root growth. Insert them into a well-drained, damp substrate, ensuring sufficient moisture and warmth, but avoiding direct solar exposure. Perseverance is crucial, as japanese thuja can require a period to develop a substantial root network.
What Is the Best Time To Propagate Japanese Thuja?
Propagation Type
Cutting
Propagation Season
Autumn,Winter
What Tools Are Used in Japanese Thuja Propagation?
Sharp Pruning Shears
Pruning shears are essential for taking cuttings of japanese thuja. They must be sharp to ensure a clean cut that does not harm the plant tissues. A clean cut helps prevent infection and promotes faster rooting. The use of high-quality, sharp pruning shears reduces the stress on japanese thuja cuttings, enhancing the chances of successful rooting.
Rooting Hormone Powder
Rooting hormone powder stimulates root growth from the cuttings of japanese thuja. By dipping the cut end of the cutting into the hormone powder, you increase the likelihood of rooting success. This is particularly important for woody plants like japanese thuja, which might otherwise root slowly or with difficulty.
Sterile Potting Mix
A sterile potting mix provides a clean and controlled environment for the cuttings of japanese thuja to root. It is free from pathogens and weeds, minimizing the risk of disease and competition. The mix should be light and well-draining yet retain enough moisture to keep the cuttings hydrated.
Propagation Tray with Dome
A propagation tray with a clear dome is used to house the cuttings of japanese thuja and maintain high humidity around them. The dome helps retain moisture and heat, mimicking a mini greenhouse environment. This tool is crucial for maintaining adequate conditions for root development without the risk of the cuttings drying out.
Heat Mat
A heat mat is particularly useful for propagating japanese thuja, especially in cooler climates. It gently warms the soil, encouraging the rooting process. The consistent bottom heat provided by a heat mat can significantly improve the rooting rate and overall success of japanese thuja cuttings propagation.
How to Propagate Japanese Thuja?
Propagation Type
Moderately Difficult
How to Care for Your Newly Propagated Japanese Thuja?
How to Care for Your Newly Propagated Japanese Thuja?
Once the cutting of japanese thuja has successfully rooted, gradually acclimate it to less humid conditions by removing the plastic cover over a period of a few days. Water the new plant regularly but avoid waterlogging, as japanese thuja does not tolerate excessive moisture. Provide balanced, slow-release fertilizer to encourage growth once the plant is established. Position the plant in an area with full to partial sunlight, depending on local climate conditions, and protect from extreme temperatures. Regularly check for pests and diseases to maintain plant health.
Common Mistakes to Avoid When Propagating Japanese Thuja
Overwatering
Excessive moisture can lead to root rot in japanese thuja, as it requires well-drained soil. Poor drainage and overwatering create an environment susceptible to fungal diseases.
Using dull pruning tools
Dull tools can cause damage to japanese thuja's tissues during cuttings preparation, which can impede healing and increase the risk of infection.
Improper cutting selection
Harvesting cuttings that are either too young or too woody can result in poor root development. Japanese thuja requires semi-hardwood cuttings for optimal rooting.
Neglecting humidity levels
Japanese thuja cuttings need a consistently high humidity environment to root successfully. Ignoring humidity control can lead to desiccation and failure to root.
Planting depth
Inserting cuttings too deeply or not deep enough in the rooting medium can hinder root initiation and growth in japanese thuja.
Ignoring cleanliness
Failing to work with sterile tools and fresh propagation media can introduce pathogens, affecting japanese thuja cuttings.
Tips For Propagating Japanese Thuja
Proper watering
Maintain a balance in soil moisture for japanese thuja. The soil should be kept moist but not waterlogged to support rooting without causing rot.
Sharp tool use
Utilize sharp, sanitized pruning tools for cutting japanese thuja to minimize tissue damage and prevent disease transmission.
Correct cutting timing
Select semi-hardwood stem cuttings that are neither too immature nor overly mature. They should be free of diseases and pests.
Humidity retention
Cover japanese thuja cuttings with a humidity dome or mist regularly to maintain high humidity without soaking the foliage, promoting successful root development.
Appropriate planting depth
Insert japanese thuja cuttings just deep enough to support themselves, usually about one-third the length of the cutting, ensuring the rooting nodes are in contact with the soil.
Sanitation practices
Clean all tools and containers before use and choose a sterile rooting medium to minimize the risk of contaminating japanese thuja cuttings.


