How to Propagate Dyer's madder?
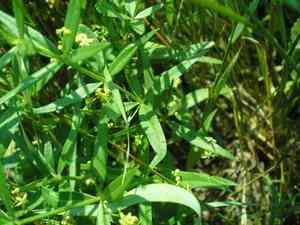
A member of the Rubiaceae family, dyer's madder is a perennial species historically prized for its root, which produces a crimson pigment. For successful propagation, cuttings are the favored technique, as they typically establish roots readily and can be harvested from robust, established specimens. These cuttings ought to possess multiple nodes to enhance the likelihood of successful root formation. After being severed, they should be placed in soil that drains effectively, ensuring consistent moisture without saturation to encourage root growth.
When Is the Optimal Time to Propagate Dyer's Madder?
Propagation Type
Cutting
Propagation Season
Spring,Summer
What Tools Are Utilized for Dyer's Madder Propagation?
Sharp Pruning Shears
These are crucial for obtaining clean, precise cuttings from dyer's madder. A sharp, sterile cut helps prevent disease and promotes faster rooting. Ensure shears are disinfected before use to avoid spreading pathogens between plants.
Rooting Hormone
Dyer's madder cuttings can greatly benefit from applying a rooting hormone. This product stimulates root development at the cutting site, increasing the likelihood of successful propagation. It's especially useful for accelerating root formation and enhancing the overall vigor of new plants.
Propagation Tray
A propagation tray offers an ideal environment for rooting dyer's madder cuttings. These trays help maintain consistent moisture and temperature, which are vital for root development. Ensure the tray has adequate drainage to prevent waterlogging, which can lead to rot.
Peat pots
Peat pots are advantageous for dyer's madder as they minimize root disturbance during transplanting, which is critical for the delicate roots of young plants. These biodegradable pots can be planted directly into the soil, reducing transplant shock and fostering healthier, quicker growth.
Misting Bottle
Regular misting is essential for maintaining the necessary humidity around dyer's madder cuttings, encouraging root growth. A misting bottle helps apply water gently and precisely, preventing soil erosion or seed displacement that might occur with heavier watering methods.
How to Propagate Dyer's Madder?
Propagation Type
Easy
How to Care for Your Newly Propagated Dyer's Madder?
How to Care for Your Newly Propagated Dyer's Madder?
Once dyer's madder cuttings have established roots, gradually introduce them to less humid conditions before moving them to individual pots. Use a well-draining soil mix and place them in a location with full sun to partial shade. Water consistently to keep the soil moist but not waterlogged. Fertilize monthly with a balanced liquid fertilizer during the active growth period. Monitor for pests and diseases, treating as needed to maintain healthy growth.
Common Errors to Avoid When Propagating Dyer's Madder
Overwatering
Excessive watering can cause root rot, which is particularly damaging for dyer's madder. This plant does not tolerate waterlogged soil, and too much moisture can harm its delicate root system.
Using poor soil mix
Selecting an unsuitable soil mix can hinder dyer's madder's growth. Inadequate drainage or an incorrect pH balance can stress the plant, leading to poor development and reduced chances of successful propagation.
Overlooking pest control
Dyer's madder can be vulnerable to pests, especially during the propagation stage. Neglecting this can result in infestations that may weaken young plants.
Neglecting acclimatization
Moving dyer's madder cuttings or seedlings to a new environment without proper acclimatization can cause shock, stressing or killing the young plants due to abrupt changes in conditions.
Improper cutting technique
Using incorrect techniques when taking cuttings for propagation can damage both the parent and offspring dyer's madder plants. It's important to use a clean, sharp tool and make precise cuts to ensure healthy plant development.
Tips For Propagating Dyer's Madder
Choosing healthy parent plants
Select vigorous and disease-free parent plants for propagation. The health of the parent directly influences the success rate of dyer's madder's propagation.
Correct soil mix
Utilize a well-draining soil mix with appropriate organic matter content to encourage the growth of strong, healthy roots for dyer's madder.
Mild watering
Maintain a consistent, moderate watering schedule to keep dyer's madder's soil moist but not waterlogged. Proper moisture is crucial for root establishment without risking root rot.
Pest monitoring
Regularly inspect dyer's madder for signs of pests and address them promptly using suitable methods to prevent damage to young propagules.
Gradual acclimatization
Acclimatize dyer's madder gradually to new conditions to prevent transplant shock. Adjustments in light, temperature, and humidity should be made progressively.


