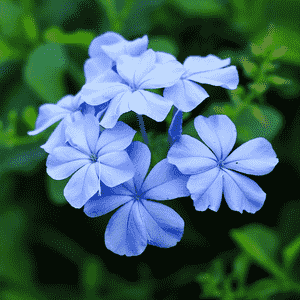
How to Propagate Cape leadwort?
Plumbago auriculata is most effectively propagated by dividing its root ball in the spring and fall. The emergence of fresh shoots indicates successful establishment. Carefully separating the root system and promptly re-establishing the sections significantly enhances the chances of successful propagation.
Optimal Time for Cape Leadwort Propagation
Propagation Method
Separation
Propagation Period
Spring, Autumn
Tools for Cape Leadwort Propagation
Sharp knife or pruning shears
Utilized for precise separation of the cape leadwort root ball during division, minimizing root damage and plant stress. A clean cut promotes quicker healing and reduces disease and pest entry points.
Spade or garden fork
Excellent for carefully lifting cape leadwort from the ground or its container. This tool helps reduce root disturbance, vital for the plant's recovery and successful establishment post-propagation.
Watering can or hose with a gentle spray attachment
Ensures cape leadwort receives sufficient moisture after division and transplanting. Proper hydration aids plant recovery by facilitating initial root growth and helping it settle into its new location.
Propagating Cape Leadwort Guide
Propagation Method
Division
Difficulty Level
Simple
Post-Propagation Care for Cape Leadwort
Post-Propagation Care for Cape Leadwort
Maintain consistent moisture for new cape leadwort plantings, but avoid overwatering. Apply a balanced, slow-release fertilizer after several weeks to encourage growth. Monitor for pests and diseases, addressing any issues promptly. As cape leadwort matures, prune to maintain desired shape and size.
Common Errors to Avoid When Propagating Cape Leadwort
Improper cutting technique
Using a dull tool or making incorrect cuts can harm the parent cape leadwort or the cuttings, decreasing rooting success. Damaged tissue is more prone to disease and may not heal, leading to cutting failure.
Excessive watering
Overly moist propagation media can cause rot in cape leadwort cuttings. Wet conditions foster fungal growth and can lead to cutting loss due to decay before rooting occurs.
Neglecting sanitation
Failure to sterilize equipment or containers can introduce pathogens to cape leadwort cuttings, potentially causing disease that hinders successful propagation or spreads infection among multiple cuttings.
Insufficient light
Cape leadwort needs bright, indirect light for optimal rooting. Too little light can cause etiolation (leggy growth) and weak development, while too much direct sun can scorch and dehydrate tender cuttings.
Ignoring humidity control
Not providing a humid environment for cape leadwort cuttings can cause them to dry out before rooting. Cuttings require specific humidity levels to encourage root growth without depleting their stored water.
Advice for Propagating Cape Leadwort
Clean cuts
Use a sharp, sterilized blade for clean cuts on cape leadwort. This ensures healthy cuttings more likely to root successfully and prevents disease transmission from uncleaned tools.
Moderate watering
Provide cape leadwort cuttings with a well-draining propagation medium and water sparingly to maintain slight moisture, avoiding waterlogged conditions, which enhances root development without rot.
Hygienic practices
Sterilize all pots, trays, and tools before beginning the cape leadwort propagation process. This step is crucial to prevent disease transmission to the cuttings.
Adequate lighting
Place cape leadwort cuttings in bright, indirect light, which is the ideal condition for root formation without the risk of leaf burn or excessive stress from direct sunlight.
Humidity management
Utilize a humidity dome or a vented plastic bag to create a humid microenvironment for cape leadwort cuttings. Proper humidity levels are important to prevent drying out and promote root formation.


