How to Propagate New zealand flax?
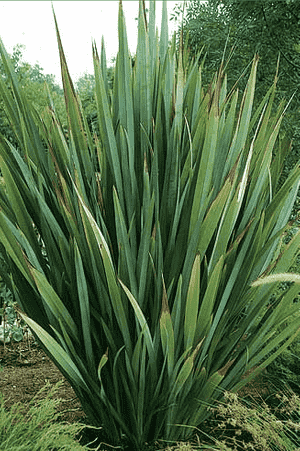
New Zealand flax is most effectively multiplied through separation in the Spring and Autumn periods. This technique is quite straightforward, with fresh shoots indicating successful multiplication. Verify that the separated sections possess sufficient roots and leaves for the best outcome.
Optimal Time for New Zealand Flax Propagation
Propagation Method
Splitting
Propagation Period
Spring, Fall
Tools for New Zealand Flax Propagation
Sharp Knife or Pruning Shears
These are crucial for making clean cuts through the thick roots and rhizomes of new zealand flax during division. A sharp, straight blade ensures precise cuts, minimizing harm and lowering disease risk. For new zealand flax, a tool capable of handling its tough rhizomes without shredding is vital.
Spade or Shovel
Used to extract clumps of new zealand flax for division, a robust spade or shovel is essential to lift the heavy, dense root ball without premature breakage. The leverage from a long-handled tool helps prevent damage to the plant's root structure during removal.
Garden Fork
A garden fork aids in gently separating new zealand flax's roots with minimal damage during division. Its tines can be carefully worked through the root ball to divide clumps into smaller sections suitable for replanting.
Rooting Hormone
While not always necessary for new zealand flax, rooting hormone can stimulate quicker root development on newly divided sections. It promotes robust root systems, especially beneficial when propagating larger specimens that have been split into many parts.
Watering Can with a Fine Rose
A gentle watering device is important to settle the soil around newly planted new zealand flax divisions and provide adequate moisture without eroding the soil or harming delicate roots. The fine rose attachment evenly distributes water and prevents disruption of the soil structure.
How to Propagate New Zealand Flax?
Propagation Method
Division
Difficulty Level
Simple
Caring for Your Newly Propagated New Zealand Flax
Caring for Your Newly Propagated New Zealand Flax
After propagation, continue to water the new new zealand flax plants regularly to maintain consistently moist soil, particularly during their initial growing season as they become established. Apply a balanced, slow-release fertilizer annually in the spring. Position new zealand flax in a location with full sun to partial shade and in well-draining soil. Protect from severe winter frosts if needed. Remove dead or damaged foliage to keep new zealand flax tidy and encourage healthy new growth.
Common Errors to Avoid When Propagating New Zealand Flax
Excessive watering of cuttings
Overwatering new zealand flax cuttings can lead to root rot, which is detrimental to the plant's growth. Roots require air, and too much water impedes growth and fosters fungal diseases.
Planting cuttings too deep
Inserting new zealand flax cuttings too far into the soil can prevent oxygen from reaching developing roots and may cause the cutting's base to rot before roots can form.
Neglecting cleanliness
Using unsterilized tools or containers can introduce harmful pathogens to new zealand flax cuttings, severely impacting propagation success as young plants are especially vulnerable to disease.
Ignoring pest management
Failing to control pests during the early stages of new zealand flax propagation can result in significant damage or death to young plants, as pests can quickly overwhelm them due to their lack of established defense mechanisms.
Advice for Propagating New Zealand Flax
Appropriate cutting selection
Select healthy and robust sword-like leaves from mature new zealand flax plants to increase the likelihood of successful propagation. Vigorous leaves have a greater capacity to develop into strong new plants.
Adequate moisture regulation
Maintain a balanced moisture level in the medium when propagating new zealand flax to support healthy root development without causing rot. The medium should be damp but not waterlogged.
Correct cutting depth
Insert new zealand flax cuttings no more than a few inches into the soil to ensure they have sufficient access to air and can easily begin to develop roots.
Pest and disease monitoring
Regularly inspect new zealand flax for signs of pests and diseases, especially during the early propagation stages when they are most susceptible, and take prompt action if any are detected.


