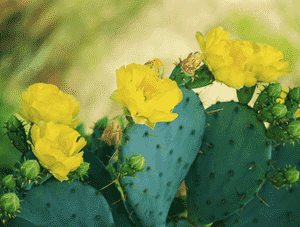
How to Propagate Eastern prickly pear?
The favored method for multiplying eastern prickly pear involves obtaining cuttings during the prime periods of Spring and Summer. This propagation process is typically straightforward, with successful outcomes evidenced by fresh development. Exercise caution when handling due to the presence of spines.
Optimal Time for Eastern Prickly Pear Propagation
Propagation Method
Cutting
Propagation Period
Spring, Summer
Tools Required for Eastern Prickly Pear Propagation
Sharp knife or garden pruners
A keen blade or garden shears are vital for making precise cuts from eastern prickly pear, minimizing harm to the parent plant and the segment. Accurate cuts help prevent infections and improve rooting success.
Gloves
Given eastern prickly pear's spines, protective gloves are essential to shield hands during the cutting process. Gloves should be robust enough to prevent injury.
Rooting hormone
Eastern prickly pear can benefit from applying rooting hormone to the cut end of the segment, which can stimulate root development and enhance the likelihood of successful propagation.
Clean potting containers
Sanitized potting containers are crucial to prevent contaminating eastern prickly pear cuttings with pathogens. Proper hygiene promotes healthy root formation.
Cactus potting mix
A well-draining cactus potting mix is suitable for eastern prickly pear, as it prevents root rot by providing the necessary drainage and aeration for newly forming roots.
Tongs or forceps
Tongs or forceps can be utilized to handle eastern prickly pear cuttings without direct contact, offering a safe way to manipulate the spiny segments.
Plastic wrap or a humidity dome
A humidity dome or a simple plastic wrap setup can create a moist environment around eastern prickly pear, helping to maintain hydration levels and encourage rooting while the cutting adapts.
How to Propagate Eastern Prickly Pear?
Propagation Type
Cutting
Difficulty Level
Easy
How to Care for Your Newly Propagated Eastern Prickly Pear?
How to Care for Your Newly Propagated Eastern Prickly Pear?
Once rooting occurs, gradually increase irrigation but allow the substrate to dry out between waterings to prevent decay. Position eastern prickly pear in a spot receiving full sun to partial shade. During winter, shield from extreme cold and water sparingly. As eastern prickly pear is drought-tolerant, avoid excessive watering. Fertilize lightly during the growth period for robust development.
Common Mistakes to Avoid When Propagating Eastern Prickly Pear
Overwatering
Excessive watering is a critical error when propagating eastern prickly pear. This species is adapted to dry conditions and can easily suffer from root rot if the soil remains too damp. Poor drainage can worsen this issue, leading to a lack of oxygen around the roots and fostering fungal growth.
Using non-sterile tools
Propagating eastern prickly pear with unsterilized cutting implements can introduce disease-causing agents, leading to infections. Blades or shears should be disinfected before each cut to minimize pathogen transmission.
Ignoring pest inspection
Failing to check eastern prickly pear for pests when selecting a section for propagation can result in the spread of pests to new plants. Pests can severely harm cuttings and reduce the chances of successful establishment.
Applying direct fertilization
Directly applying fertilizer to the cutting or newly propagated eastern prickly pear can cause chemical burn or shock to young roots, impeding growth. It's essential to wait until the plant is established before fertilizing.
Immediate sunlight exposure
Exposing fresh cuttings of eastern prickly pear to direct sunlight can dehydrate and stress them before they have a chance to root. Gradual acclimation to sunlight is crucial for their survival.
Tips For Propagating Eastern Prickly Pear
Proper soil mix
Utilize a well-draining soil blend that mimics eastern prickly pear's natural habitat, such as a cactus or succulent mix with added perlite or pumice for aeration. This helps prevent waterlogging and supports root development.
Cutting technique
Select a healthy pad of eastern prickly pear and make a clean incision. Allow the cutting to form a callus for a few days before placing it in soil, which reduces the risk of rot.
Indirect sunlight
Start the cuttings in a bright, indirectly lit area to avoid scorching and allow for steady growth. Gradually move them to a sunnier location as they establish.
Moderate watering
Water the eastern prickly pear cuttings sparingly, allowing the soil to dry out between waterings. This encourages rooting while preventing root rot and overwatering issues.
Pest control
Regularly inspect the propagated eastern prickly pear for signs of pests and diseases. Treat with appropriate, plant-safe pesticides or natural remedies as needed, ensuring the health of the new plants.


