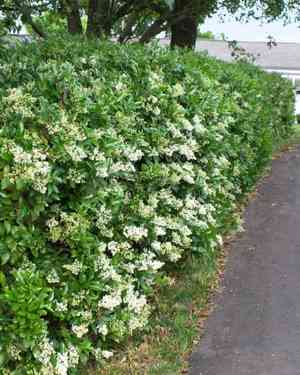
How to Propagate Japanese privet?
Japanese privet reproduces well from cuttings, preferably in the spring and summer seasons. This method is typically straightforward, with fresh foliage indicating successful rooting. Maintaining dampness and warmth for the cuttings assists in successful propagation.
Optimal Period for Japanese Privet Propagation
Propagation Method
Cutting
Propagation Period
Spring, Summer
Tools Required for Japanese Privet Propagation
Pruning Shears
Sharp, clean pruning shears are crucial for taking healthy japanese privet cuttings. They ensure precise cuts, preventing tissue damage. Clean cuts aid in infection prevention and promote quicker rooting.
Rooting Hormone
Rooting hormone encourages root development when applied to the cut end of japanese privet cuttings. It enhances the likelihood of successful rooting, vital for new plant viability.
Potting Mix
A sterile, well-draining potting mix offers an ideal environment for japanese privet cuttings to root. It supports adequate moisture retention while preventing root rot by allowing excess water to drain.
Propagation Tray or Pots
Propagation trays or pots hold the potting mix and keep japanese privet cuttings upright. They must have sufficient drainage holes to allow excess water to escape.
Plastic Dome or Wrap
A plastic dome or wrap creates a humid microclimate around japanese privet cuttings, providing the high humidity necessary to prevent them from drying out before successful rooting.
Heating Mat (Optional)
An optional heating mat can gently warm the rooting area, encouraging faster root growth in japanese privet cuttings by maintaining a consistent, ideal root-zone temperature.
Method for Propagating Japanese Privet
Propagation Type
Cutting
Difficulty Level
Moderately Difficult
Post-Propagation Care for Japanese Privet
Post-Propagation Care for Japanese Privet
After propagation, water new japanese privet plants regularly but avoid overwatering. They thrive in well-drained soil and prefer full sun to partial shade. Apply a balanced, slow-release fertilizer in spring. Prune annually to maintain shape and size, and monitor for pests like aphids and scale. As japanese privet can be invasive, manage its growth accordingly.
Common Errors to Avoid When Propagating Japanese Privet
Poor cutting selection
Selecting weak, diseased, or old stems for cuttings can result in poor rooting and plant development. Robust, healthy, and young growth is essential for successful japanese privet propagation.
Excessive watering of cuttings
While moisture is necessary for cutting development, too much water can lead to rot and fungal infections, which can kill the delicate new roots of japanese privet.
Neglecting soil conditions
Using an unsuitable soil mix can hinder root growth. Japanese privet requires well-draining, fertile soil to flourish.
Insufficient humidity
Low humidity can cause japanese privet cuttings to dry out before rooting. However, excessive humidity can promote diseases.
Planting cuttings too deeply
Burying japanese privet cuttings too deep can suffocate them, reducing oxygen availability and impeding root formation.
Forgetting to label
Without proper labeling, cuttings can be confused, leading to incorrect care based on the specific needs of japanese privet.
Advice for Propagating Japanese Privet
Healthy cuttings
For optimal results with japanese privet, use semi-hardwood stems from the current or previous year's growth, as they possess the ideal balance of maturity and vigor for rooting.
Moisture control
Keep the soil moist but not waterlogged to encourage rooting in japanese privet cuttings. A well-draining soil mixed with peat or perlite can help achieve the correct moisture level.
Soil quality
A sterile, well-draining potting mix will support the initial growth of japanese privet without introducing pathogens that could harm the cuttings.
Maintain humidity
Increase humidity around japanese privet cuttings with a plastic cover or misting, but ensure good air circulation to prevent mold and fungus.
Correct planting depth
Plant japanese privet cuttings at an appropriate depth where the base is in contact with the soil, but the majority of the stem is above the soil line.
Clear labeling
Label each japanese privet cutting immediately after planting to ensure correct identification and care throughout the rooting process.


