How to Propagate Creeping juniper?
Creeping juniper is most effectively multiplied via cuttings and layering throughout the spring and summer seasons. This technique is quite straightforward, with fresh development signaling successful propagation. Guarantee adequate soil hydration and warmth for peak outcomes.
Optimal Period for Creeping Juniper Propagation
Propagation Type
Cutting
Propagation Season
Spring,Summer
Tools for Creeping Juniper Propagation
Sharp pruning shears
Utilized for making clean, precise cuts when harvesting creeping juniper cuttings, minimizing harm to the parent plant and boosting the cuttings' rooting prospects. A keen blade lessens tissue damage, which can invite disease.
Rooting hormone powder or gel
Applied to the severed end of creeping juniper cuttings to encourage root development and elevate propagation success. This aid is particularly useful for promoting quicker and stronger root formation.
Sterile potting mix
Offers a clean, pathogen-free environment for creeping juniper cuttings to establish roots. A light, well-draining blend ensures oxygen access for developing roots, vital for creeping juniper's root health.
Propagation tray with humidity dome
Provides a regulated setting for creeping juniper cuttings to retain moisture and warmth, both essential for successful rooting. The dome helps maintain high humidity, mimicking a greenhouse effect.
Heat mat
Positioned beneath the propagation tray to deliver consistent warmth, which can be crucial for creeping juniper's root development during cooler periods or climates. Steady bottom heat encourages faster rooting.
Watering can with a fine rose attachment
Enables gentle irrigation of creeping juniper cuttings without dislodging the sterile potting mix or disturbing delicate new roots. Soft, even water distribution is important during the initial stages of cutting propagation.
Post-Propagation Care for Creeping Juniper
How to Care for Your Newly Propagated Creeping Juniper?
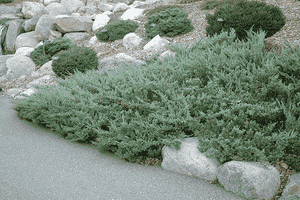
Once the creeping juniper cutting has developed a strong root system, transfer it to a larger container or directly into the garden in a spot with ample room to spread. Creeping juniper thrives in sunny locations with well-draining soil. It is drought-tolerant once mature, but ensure it receives regular watering during its initial growing season to foster a robust, healthy root system. Lightly prune creeping juniper to shape and encourage denser growth. Avoid excessive fertilization as creeping juniper does not require high nutrient levels.
Common Errors to Avoid When Propagating Creeping Juniper
Overwatering
Excessive watering can lead to root rot in creeping juniper, which prefers well-drained conditions. Too much moisture can suffocate roots, impairing nutrient uptake and increasing disease susceptibility.
Improper cutting selection
Choosing weak, diseased, or non-viable stems for cuttings will likely result in failed propagation. Cuttings should always be healthy and vigorous to enhance rooting potential.
Inadequate soil prep
Using a soil medium that lacks sufficient aeration and drainage can impede root development. This is especially problematic for creeping juniper which prefers well-draining conditions.
Ignoring cleanliness
Failing to sterilize tools or containers can introduce pathogens to creeping juniper cuttings, risking infection and poor health, which can severely disrupt the propagation process.
Advice for Propagating Creeping Juniper
Healthy cutting selection
Ensure cuttings are taken from healthy, disease-free parts of creeping juniper. Strong, vigorous stems increase the chances of successful rooting and growth.
Soil preparation
Use a well-draining soil mix to prevent waterlogging. Good aeration is crucial for the development of healthy roots in creeping juniper.
Rooting hormone
Applying a rooting hormone to the cuttings of creeping juniper can stimulate root growth and enhance the overall success rate of propagation.
Moderate watering
Maintain a consistent moisture level without overwatering to support the rooting process of creeping juniper. The soil should be damp but not waterlogged to prevent root decay.


