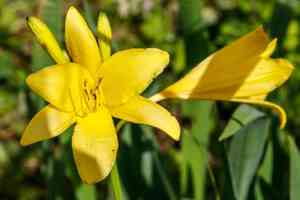
How to Propagate Yellow daylily?
The most effective method for propagating Yellow daylily is by dividing the plant, preferably during the spring or autumn seasons. This procedure is quite straightforward, and successful multiplication is evident from robust root development and emerging sprouts. Essential advice involves ensuring the divided sections receive ample moisture and are planted at an appropriate depth.
When Is the Best Time to Propagate Yellow Daylily?
Propagation Method
Separation
Propagation Period
Spring, Autumn
What Tools Are Used for Yellow Daylily Propagation?
Sharp garden spade or knife
Utilized for separating yellow daylily clumps into smaller portions. A keen edge ensures clean cuts, minimizing root and crown damage, which promotes quicker recovery and successful propagation.
Garden fork
Aids in gently lifting yellow daylily from the ground, preserving its root structure. Employing a garden fork lessens the risk of root damage compared to a shovel, which is vital for the health of the divided plants.
Pruning shears
Trim any damaged or excess foliage and roots on yellow daylily. Neatly cut leaves and roots prevent infection and encourage growth after division. Ensure the shears are disinfected to prevent disease transmission.
Watering can with a gentle shower head
Used to water yellow daylily after planting. The soft shower head ensures a mild water flow that won't disturb the freshly planted divisions, aiding in proper establishment.
Rooting hormone (optional)
Stimulates root development in the recently divided yellow daylily. While not always essential, rooting hormone can boost the success rate of new plants, especially if they exhibit weak roots.
Sterilizing solution (such as alcohol or bleach)
To cleanse all tools before and after dividing yellow daylily. This prevents the spread of diseases and pathogens between plantings, which is crucial for yellow daylily's health and propagation success.
How to Propagate Yellow Daylily?
Propagation Method
Division
Difficulty Level
Easy
How to Care for Your Newly Propagated Yellow Daylily?
How to Care for Your Newly Propagated Yellow Daylily?
Following propagation, ensure your yellow daylily receives consistent watering, particularly during the initial weeks, to encourage root establishment. Provide yellow daylily with a balanced, slow-release fertilizer in early spring. Remove spent flowers if desired, but it is not essential for yellow daylily. During the growing season, yellow daylily may benefit from occasional watering during extended dry periods. In late fall, after the foliage has died back, cut back the foliage to a few inches above the ground to tidy up the plant and reduce the risk of diseases. Apply a light layer of mulch around the base of yellow daylily for winter protection, especially in colder climates. Note that yellow daylily is a resilient plant that can thrive with minimal care once established.
Common Mistakes to Avoid When Propagating Yellow Daylily
Overwatering after division
Excessive watering of yellow daylily after division can lead to root rot. This surplus moisture can create an environment for fungal diseases, resulting in poor plant health or demise.
Planting divisions too deep
Setting the separated sections of yellow daylily too deeply in the soil can impede their growth and may cause the crown to rot, hindering successful propagation.
Neglecting to trim roots
Failing to trim the roots of yellow daylily during division can result in tangled growth that doesn't anchor well in the new soil, decreasing the chances of successful propagation.
Ignoring plant health
Attempting to propagate yellow daylily from unhealthy sections can lead to poor growth or disease transmission. Propagating from robust, disease-free portions is vital for success.
Using dull tools for division
Blunt tools can damage the roots and crowns of yellow daylily, leading to poor healing and increased susceptibility to diseases.
Tips For Propagating Yellow Daylily
Adequate soil preparation
Prepare a well-draining soil mix rich in organic matter to provide optimal conditions for yellow daylily root growth.
Appropriate division size
Ensure each division of yellow daylily has at least one fan of leaves and several healthy roots to increase the likelihood of successful propagation.
Proper planting depth
Plant divisions of yellow daylily at the correct depth, ensuring the crown is just at or slightly above the soil surface to prevent rot.
Water management
Provide yellow daylily with consistent moisture after planting, but avoid overwatering. Aim for a balance to encourage healthy root development without causing waterlogging.
Sanitize cutting tools
Use clean, sharp tools for dividing yellow daylily to reduce damage and prevent the spread of disease during the propagation process.


