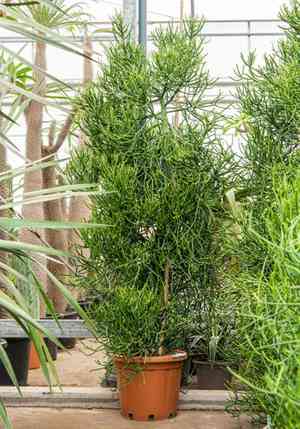
How to Propagate Pencil cactus?
Pencil cactus readily multiplies via cuttings, ideally undertaken in the spring and summer seasons. Lightly spray the cutting prior to potting to prevent abundant sap leakage. The emergence of new foliage signifies successful establishment. A rooting stimulant may be employed to accelerate the process.
Optimal Time for Pencil Cactus Propagation
Propagation Method
Cuttings
Propagation Period
Spring, Summer
Tools Required for Pencil Cactus Propagation
Sharp Pruning Shears
These facilitate accurate and clean cuts when taking pencil cactus cuttings, minimizing harm to both the parent plant and the new section. Clean cuts help prevent disease and promote efficient callusing and rooting.
Rubber Gloves
Handling pencil cactus requires protection due to its poisonous sap, which can irritate skin and eyes. Rubber gloves create a barrier to prevent direct contact with the sap during cutting and handling.
Alcohol Wipes or Rubbing Alcohol
Disinfecting all tools before use helps prevent the spread of diseases between plants. Cleaning pruning shears with alcohol wipes or rubbing alcohol is vital for the health of pencil cactus.
Rooting Hormone
While not mandatory, applying rooting hormone to the cut end of the pencil cactus cutting can stimulate root development. This speeds up the rooting process and improves propagation success rates.
Cactus or Succulent Potting Mix
A well-draining potting mix specifically designed for cacti and succulents is essential for the successful rooting and growth of pencil cactus cuttings. It prevents waterlogging, which can cause rot in the delicate cut ends.
Small Pots with Drainage Holes
Ideal for individual pencil cactus cuttings, small pots with drainage holes provide space for root growth and ensure excess water can escape, preventing rot.
Plastic Wrap or Clear Plastic Dome
Creating a humid environment can assist the rooting process of pencil cactus, especially in arid climates. Covering the pot with plastic wrap or a clear plastic dome helps retain moisture and warmth, fostering optimal rooting conditions.
How to Propagate Pencil Cactus?
Propagation Method
Cuttings
Difficulty Level
Easy
Caring for Your Newly Propagated Pencil Cactus
Caring for Your Newly Propagated Pencil Cactus
Pencil cactus thrives in bright light, including some direct sun, but it's important to gradually acclimate the plant to prevent sunburn. Water when the soil has completely dried out—this might be every 1-2 weeks, depending on the environment. Avoid letting the plant sit in waterlogged soil. Fertilize with a diluted balanced fertilizer during the active growth period. Protect pencil cactus from cold temperatures; they cannot tolerate frost. Pruning is generally not needed but can be done for shaping or size control.
Common Errors to Avoid When Propagating Pencil Cactus
Improper cutting selection
Choosing a pencil cactus cutting that is too young, too small, or unhealthy can lead to failed propagation. Such cuttings may lack the necessary vigor to establish roots and grow.
Incorrect cut
Making a messy or jagged cut on pencil cactus's stem can result in infections and poor healing, jeopardizing the cutting's ability to root.
Inadequate healing time
Not allowing the cut end of pencil cactus to form a callus properly before planting increases the risk of rot once the cutting is placed in soil.
Overwatering
After planting pencil cactus's cutting, excessive watering can lead to root rot and fungal issues, as new cuttings require less moisture than mature plants.
Ignoring sap precautions
Failing to handle the toxic sap carefully when cutting pencil cactus can cause skin irritation or allergic reactions, and potentially damage the cutting’s tissues.
Neglecting hygiene
Using unclean tools or containers can introduce pathogens to pencil cactus’s cutting, hindering successful propagation.
Tips for Propagating Pencil Cactus
Healthy cutting choice
Select a mature, robust stem of pencil cactus for cutting. Ensure it is at least several inches long to give it the best chance of survival.
Clean, angled cut
Using a clean, sharp blade, make a smooth, angled cut to reduce the potential for infection and to increase the surface area for root growth.
Callousing period
Allow the pencil cactus cutting to dry and form a callus over the cut area for about a week before planting to protect it from rot.
Light watering
Provide minimal watering to the planted pencil cactus cutting, ensuring the soil remains slightly moist but not saturated to encourage root growth without the risk of rot.
Sap safety
When handling pencil cactus, wear gloves and eye protection to avoid contact with the irritating sap. Wash tools and surfaces that come into contact with the sap afterward.
Sterilized equipment
Always use sterilized cutting tools and pots when propagating pencil cactus to prevent introducing harmful microbes to the cuttings.


