How to Propagate Wintercreeper?
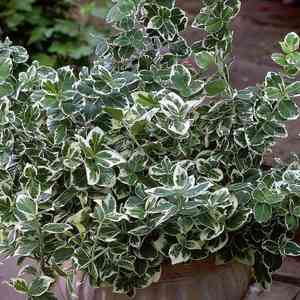
Euonymus fortunei is readily multiplied through the use of tender stem sections or by ground layering. The most suitable period for this process is during the spring and summer months. The level of difficulty for propagation is typically minimal, and indicators of successful rooting include the emergence of fresh root structures and new growth. It is advisable to maintain damp soil conditions and to shield the plant from intense sunlight throughout the propagation phase.
When Is the Best Time to Propagate Wintercreeper?
Propagation Method
Cutting
Propagation Period
Spring,Summer
What Equipment Is Used in Wintercreeper Propagation?
Pruning Shears
These are vital for taking clean, precise cuts from wintercreeper, minimizing harm to the parent plant and boosting the likelihood of successful rooting. Shears should be sharp and sanitized to prevent disease transmission.
Rooting Hormone
This chemical compound stimulates root growth in wintercreeper cuttings. Applying rooting hormone to the cut end prior to planting can significantly improve rooting success and promote stronger root development.
Propagation Tray with Humidity Dome
A propagation tray offers an organized space for placing cuttings, while the humidity dome maintains a high-humidity environment crucial for wintercreeper cuttings to prevent excessive moisture loss during the rooting process.
Potting Mix or Sterile Medium
A suitable growing substrate, such as peat moss or a perlite-vermiculite blend, is needed for holding wintercreeper cuttings. The medium should be well-draining and sterile to support new root development without the risk of soil-borne pathogens.
Misting Bottle
Used for gently watering cuttings without disturbing the potting medium. Regular misting helps maintain the necessary moisture levels around wintercreeper cuttings to support their growth and reduce water stress.
Labeling Tags
These tags are used to mark and identify cuttings with important details like the propagation date and any specific treatments applied. Labeling is essential for tracking progress and maintaining organization in wintercreeper propagation efforts.
Heating Mat (Optional)
A heating mat can provide bottom warmth to the propagation tray, which may enhance rooting success in wintercreeper cuttings. Consistent heat can accelerate root formation, especially important in cooler growing conditions.
How to Care for Your Newly Propagated Wintercreeper?
How to Care for Your Newly Propagated Wintercreeper?
Post-propagation, gradually introduce wintercreeper to less humid conditions by opening the plastic cover daily. Once established, keep wintercreeper in an area with partial to full sun exposure, water when the top inch of soil feels dry, and fertilize every 4-6 weeks during the growing season with a balanced, slow-release fertilizer.
Common Mistakes to Avoid When Propagating Wintercreeper
Improper stem cutting preparation
Wintercreeper cuttings that are not correctly prepared may struggle to root. A cutting that is too short, lacks a node, or has too many leaves can lead to poor root development and a lower chance of successful propagation.
Excessive watering
Overwatering can cause wintercreeper cuttings to rot before they can root. Proper moisture levels are critical, as overly saturated soil can lead to fungal diseases and poor root health.
Ignoring light requirements
Insufficient light can weaken wintercreeper cuttings, yet too much direct exposure can scorch them. Maintaining a balance is essential for the energy they need to develop roots without causing stress or burn.
Neglecting humidity
Wintercreeper cuttings require consistent humidity to root successfully. Without it, they may dry out or fail to create the necessary environment for root initiation.
Using contaminated tools or pots
Disease spread through unclean tools or pots can severely affect the health of wintercreeper cuttings. This can result in failed propagation due to infection.
Tips For Propagating Wintercreeper
Proper cutting selection
Choosing a healthy, semi-hardwood stem cutting with at least one node is crucial for wintercreeper. This ensures the cutting has the potential to generate roots and supports a strong start to growth.
Optimal watering practices
Water wintercreeper cuttings sufficiently to keep the soil moist but not waterlogged. Using a well-draining potting mix helps prevent overwatering issues that could otherwise hinder root formation.
Appropriate lighting
Provide bright, indirect light to wintercreeper cuttings to encourage robust growth. Direct sunlight should be avoided to prevent damage to the delicate new growth.
Maintaining humidity
Utilize plastic covers or a propagation chamber for wintercreeper cuttings to retain consistent humidity, which is necessary for successful root development.
Disinfecting tools and containers
Disinfecting tools and pots before using them for wintercreeper is crucial to prevent the spread of pathogens. Using a bleach solution or rubbing alcohol can help ensure a clean start for propagation.


