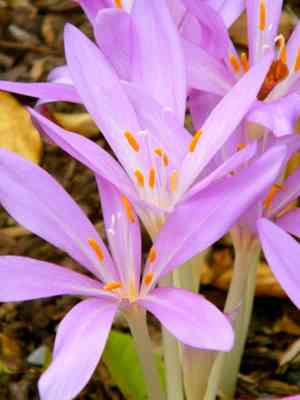
How to Propagate Autumn crocus?
The most effective propagation for Autumn crocus occurs in Spring via the separation of tubers. This technique is relatively straightforward, with the emergence of new sprouts signifying successful propagation. Provide sufficient hydration and prevent excessive density to encourage prime development.
Optimal Time for Autumn Crocus Propagation
Propagation Method
Utilize The Corms
Propagation Period
Spring
Tools Required for Autumn Crocus Propagation
Gloves
For safe handling of autumn crocus's corms, as they contain toxic compounds.
Trowel
To carefully excavate around autumn crocus corms, preventing damage during removal.
Garden Fork
To loosen the soil and gently lift autumn crocus corms, minimizing structural harm.
Sharp Knife
For dividing autumn crocus corms, a clean, sharp blade ensures precise cuts without introducing pathogens.
Sterilizing Agent
For sanitizing propagation tools, preventing disease transmission among autumn crocus corms.
Corm Storage Tray
Post-division, provides an appropriate environment for autumn crocus corms to cure and helps prevent decay.
Perlite or VerMiculite
To provide aeration and drain excess moisture around autumn crocus's corms, vital for healthy root growth.
Anti-fungal Powder
To treat cut surfaces of autumn crocus corms, reducing the risk of fungal infections.
Labeling Tags
For identifying autumn crocus corms and ensuring proper tracking throughout the propagation process.
Steps to Propagate Autumn Crocus
Propagation Method
Utilize The Corms
Difficulty Level
Simple
Post-Propagation Care for Autumn Crocus
Post-Propagation Care for Autumn Crocus
After propagation, continue to irrigate autumn crocus as it establishes, being careful not to overwater. During the active growth phase, ensure adequate moisture and nutrients using a balanced fertilizer. As the foliage yellows and dies back, reduce watering to allow the plant to enter dormancy. Protect from freezing temperatures if necessary. Monitor for any signs of pests or diseases and take appropriate action. By the next blooming season, autumn crocus should be well-established and will produce flowers if care has been consistent with its needs.
Common Errors to Avoid When Propagating Autumn Crocus
Excessive Watering
Since autumn crocus has a dormant period after flowering, continued watering during this time can lead to corm rot. Overwatering is problematic as it can cause the corms to decay, hindering successful propagation.
Planting Depth
Incorrect planting depth is a mistake that can result in poor sprouting, as autumn crocus's corms must be planted at an appropriate depth to ensure proper emergence. Planting them too shallow or too deep can prevent sprouting or lead to weak plants.
Ignoring Pests
Neglecting to monitor for pests like bulb mites can compromise corm health. These pests can damage the corms, impeding propagation efforts and potentially destroying future plants.
Poor Soil Preparation
Using a soil mixture that lacks proper drainage or sufficient fertility can be detrimental to autumn crocus's growth. Corms require well-draining soil to prevent rot and enough nutrients to support their development.
Advice for Propagating Autumn Crocus
Corm Division
Dividing autumn crocus's corms during their dormancy period is an effective propagation technique. This ensures each new plant has sufficient resources to establish itself without competition from the parent plant.
Disease Prevention
Disease-free planting material is essential. Always inspect corms for signs of rot or disease before planting. Using healthy corms ensures disease doesn't spread and affect propagation success.
Adequate Spacing
Providing each corm with enough space allows for proper root and foliage development. Crowding corms can lead to poor air circulation and growth, reducing the plant's vitality and propagation potential.
Pest Management
Regularly inspect corms and soil for signs of pests. Taking preventive actions against pests such as bulb mites ensures they do not harm the corms or impede propagation.


