How to Propagate spotted catasetum?
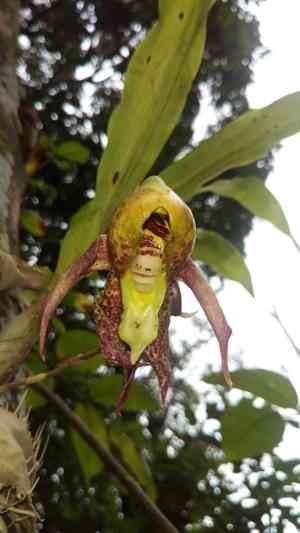
The spotted catasetum, recognized for its appealing speckled blossoms, flourishes in warm and humid climates, necessitating a substrate that drains efficiently and a moderate level of atmospheric moisture. Reproduction through separation entails meticulously dividing the pseudobulbs, making certain that every section possesses healthy roots and bulbs. Reinsert the divided portions into a somewhat damp, airy growing mix, maintaining a warm and luminous setting, yet shielded from direct solar exposure. Periodically spray with water to preserve humidity without oversaturating. Verify these methods against specialized orchid care instructions for peak performance.
Optimal Period for Propagating Spotted Catasetum
Propagation Method
Division
Propagation Period
Spring,Autumn
Tools Utilized in Spotted Catasetum Propagation
Sterile Pruning Shears
These are crucial for making clean cuts when separating spotted catasetum. Employing sterile pruning shears helps avert the spread of infections or diseases, which is vital for the well-being of the plant sections being propagated.
Propagation Trays
Propagation trays offer a controlled setting for the divided portions of spotted catasetum. They ensure that the newly separated parts have ample room and suitable conditions to form roots, fostering successful growth.
Rooting Hormone
Applying rooting hormone to the cut surfaces of the divided sections aids in stimulating root growth in spotted catasetum. This is particularly advantageous as it boosts the likelihood of successful root development and establishment.
Misting Bottle
A misting bottle is employed to maintain the necessary moisture levels for spotted catasetum during the initial propagation phases. Keeping the cuttings damp but not saturated is essential for preventing dehydration and supporting new growth.
Heat Mat
A heat mat positioned beneath the propagation trays can provide consistent warmth, which is beneficial for spotted catasetum during root formation. The steady temperature helps encourage quicker and healthier root growth.
Labeling Tags
Labeling tags are indispensable for tracking various divisions of spotted catasetum. Accurate labeling assists in monitoring growth progress and ensures proper identification during subsequent care or transplanting stages.
How to Propagate Spotted Catasetum?
Propagation Type
Easy
Post-Propagation Care for Your Spotted Catasetum
Post-Propagation Care for Your Spotted Catasetum
Following propagation, continue to care for spotted catasetum by maintaining consistent moisture and ensuring adequate humidity. Position the plant in indirect, bright light and provide regular feeding with a diluted orchid fertilizer during the active growth period. Watch for new growth and repot when necessary to prevent overcrowding. Ensure proper air circulation to prevent fungal infections and observe for signs of overwatering or underwatering to keep the plant healthy.
Common Errors to Avoid When Propagating Spotted Catasetum
Overwatering
Leads to root rot and fungal infections, which can severely hinder propagation success.
Inadequate light
Insufficient light can result in weak and elongated growth, compromising the plant's ability to establish itself.
Wrong potting medium
Using a medium that retains too much moisture or dries out too quickly can stress the plant and impede root development.
Poor air circulation
Lack of ventilation can lead to fungal and bacterial infections, affecting overall plant health.
Incorrect humidity levels
Too low humidity can cause dehydration, while too high can encourage mold growth and rot.
Failure to sterilize tools
Unsterilized tools can introduce pathogens that may infect both mother and propagated plants.
Advice for Propagating Spotted Catasetum
Use well-draining medium
Utilize a mix of orchid bark, perlite, and charcoal to ensure proper drainage and prevent waterlogging.
Maintain moderate humidity
Aim for humidity levels around 50-70% to promote healthy growth without encouraging mold.
Provide bright, indirect light
Place spotted catasetum in a location with abundant indirect sunlight to support vigorous and healthy development.
Sterilize cutting tools
Ensure all tools are cleaned and sterilized before use to prevent the spread of diseases.
Allow cuttings to callous
Let the cuts on the parent plant dry and callous for a few days before planting to reduce the risk of rot.
Monitor for pests
Regularly check for and manage pests such as spider mites and aphids to protect young plants.


