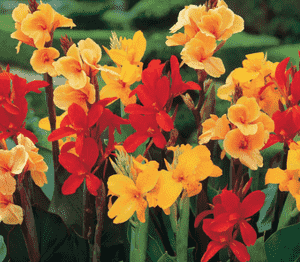
How to Propagate Indian shot?
Canna indica is most effectively multiplied by dividing its rhizomes, preferably in the spring or fall. This procedure is quite straightforward, and the emergence of new shoots signifies successful propagation. Maintain sufficient hydration without saturating the soil to achieve the best outcome.
Optimal Period for Indian Shot Propagation
Propagation Method
Splitting
Propagation Period
Spring, Autumn
Tools Required for Indian Shot Propagation
Sharp Spade or Garden Knife
A keen spade or garden knife is vital for dividing indian shot's rhizomes. This implement enables the gardener to make precise cuts, minimizing harm to plant tissues, which is crucial for reducing infection risk and promoting successful regrowth.
Hand Trowel
A hand trowel is useful for excavating around the base of indian shot, loosening the earth, and gently lifting the rhizomes for division. Its compact size and control help prevent unnecessary damage to the plant's root system and adjacent flora.
Gardening Gloves
Wearing gardening gloves offers protection to the propagator's hands from any sharp edges on the rhizomes or from soil-borne pathogens. This tool is important for maintaining hygiene and safety during the process.
Sterilizing Agent (e.g., Rubbing Alcohol)
A sterilizing agent is crucial for sanitizing cutting tools before and after use to prevent the spread of disease among indian shot plants. Proper cleanliness ensures the health of the propagated plants.
Watering Can with a Gentle Shower Head
Following the planting of divided rhizomes, indian shot requires careful watering to settle the soil and provide sufficient moisture. A watering can with a soft shower head ensures even water distribution without disturbing the soil or harming the plant.
Rooting Hormone (Optional)
While not strictly necessary for indian shot, a rooting hormone can be applied to the cut surfaces of the rhizomes to encourage faster root development and healthier growth. It can enhance the success rate of new plant establishment.
Labeling Tags
Labeling the divided indian shot with tags assists in tracking the propagation process. Tags can be used to record the division date and any other pertinent information to monitor growth and development.
How to Propagate Indian Shot?
Propagation Type
Division
Difficulty Level
Easy
Caring for Your Newly Propagated Indian Shot
Caring for Your Newly Propagated Indian Shot
Once indian shot has been propagated and new shoots have emerged, ensure they receive ample sunlight; a minimum of 4-6 hours daily is recommended. Continue to water them, allowing the soil to dry slightly between waterings. Fertilize monthly with a balanced fertilizer during the growing season. As indian shot can grow quite tall, provide support if necessary to prevent wind damage. After the first frost in autumn, the foliage will die back. In regions with cold winters, dig up the rhizomes, store them in a frost-free place, and replant in spring. If grown in a milder climate, mulching the base may be sufficient. Regularly check for pests and diseases and take appropriate measures to control them.
Common Errors to Avoid When Propagating Indian Shot
Overwatering
Excessive watering can lead to root rot in indian shot, a condition detrimental to the roots and potentially fatal to the plant. Indian shot's rhizomes prefer to be relatively dry between waterings.
Planting too deep
Burying indian shot's rhizomes too deeply can hinder their growth. Rhizomes should be planted shallow to ensure proper growth and blooming.
Ignoring offsets
Gardeners may overlook or discard the offsets from indian shot, which are actually valuable for propagation. Offsets can produce mature plants faster than seeds.
Overcrowding
Overcrowding occurs when gardeners plant indian shot's rhizomes too close together, which can reduce air circulation and sunlight, leading to poor plant development and disease.
Using diseased rhizomes
Employing diseased rhizomes for propagation of indian shot can spread pathogens to the new plants, severely affecting growth and health.
Tips For Propagating Indian Shot
Healthy rhizomes
Select robust and healthy rhizomes for propagation of indian shot to ensure a higher chance of successful growth and development.
Adequate spacing
Provide sufficient space between the rhizomes when planting indian shot to promote strong growth and prevent competition for resources.
Right depth
Plant rhizomes of indian shot just beneath the soil surface, as they need to be near the surface to properly sprout and form shoots.
Use offsets
Utilize offsets from indian shot for propagation. They should be separated with care and planted to create new plants.
Water management
Maintain a balanced moisture level for indian shot during propagation. The soil should be moist but not waterlogged, to prevent root rot.


