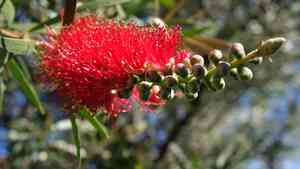
How to Propagate Crimson bottlebrush?
Crimson bottlebrush is most effectively multiplied via cuttings during the warmer periods, such as spring and summer. Its propagation is quite straightforward, with new root development signaling success. Sufficient hydration and dappled sunlight are crucial for the best outcomes.
Optimal Time for Crimson Bottlebrush Propagation
Propagation Method
Cutting
Propagation Period
Spring, Summer
Essential Tools for Crimson Bottlebrush Propagation
Sharp Pruning Shears
These are crucial for making precise cuts on semi-mature stem cuttings from crimson bottlebrush. A clean cut minimizes harm to the parent crimson bottlebrush plants and maximizes the cuttings' chances of rooting without decay or illness.
Rooting Hormone Powder or Gel
This enhances the probability of successful root formation when applied to the cut end of stem cuttings. It stimulates root growth, which is vital for crimson bottlebrush, aiding in the efficient reproduction of a healthy new plant.
Sterile Potting Mix
This soilless growing medium is perfect for rooting crimson bottlebrush cuttings because it's sterile, thereby reducing the risk of fungal or bacterial infections that can be harmful during the delicate stage of new root development.
Propagation Tray or Pots
These hold the sterile potting mix and support crimson bottlebrush cuttings as they root. They must have adequate drainage to prevent waterlogging, which is crucial to avert root rot in crimson bottlebrush during the rooting process.
Plastic Covers or Domes
Maintaining a high humidity level is necessary for crimson bottlebrush cuttings to prevent them from drying out before roots form. Covers create a mini-greenhouse effect, which can improve rooting success.
Heating Mat (Optional)
For crimson bottlebrush, which thrives in warm conditions, a heating mat can provide consistent bottom warmth that promotes faster rooting. This can be especially beneficial in cooler climates or during colder times of the year.
Watering Can with a Fine Rose
Gentle watering is required for crimson bottlebrush cuttings to keep the medium moist without disturbing them. A watering can with a fine rose or sprinkler attachment allows for soft, even water distribution.
How to Propagate Crimson Bottlebrush?
Propagation Type
Cutting
Difficulty Level
Moderately Difficult
Post-Propagation Care for Your Crimson Bottlebrush
How to Care for Your Newly Propagated Crimson Bottlebrush?
To care for crimson bottlebrush after propagation, provide full sun to partial shade and water the plant regularly, allowing the soil to dry slightly between waterings. Fertilize once established with a balanced, slow-release fertilizer and prune after flowering to maintain shape and encourage denser growth. Protect from frost and apply a mulch layer to conserve soil moisture and reduce weed competition.
Common Errors to Avoid When Propagating Crimson Bottlebrush
Overwatering cuttings
Excessive moisture can lead to the decay of crimson bottlebrush cuttings before they have a chance to root properly.
Poor cutting selection
Using diseased or weak stems as cuttings can impede the growth and health of new crimson bottlebrush plants, as they lack the vitality to establish a strong root system.
Planting cuttings too deeply
Burying crimson bottlebrush cuttings too deep can reduce oxygen availability to the developing roots, which may hinder their growth or even cause decay.
Neglecting humidity
Ignoring the need for a humid environment can result in the desiccation of crimson bottlebrush cuttings, as they typically require high humidity to establish roots without dehydration.
Misjudging rooting medium
Choosing an unsuitable rooting medium can affect the aeration and drainage necessary for crimson bottlebrush cuttings to develop roots successfully.
Tips For Propagating Crimson Bottlebrush
Sterile equipment
Use clean and sterilized tools to take cuttings from crimson bottlebrush to minimize the risk of introducing pathogens that can affect rooting success.
Healthy parent plant
Select cuttings from vigorous and healthy crimson bottlebrush specimens to ensure that the plantlets have the best potential for growth and development.
Adequate depth and support
Insert crimson bottlebrush cuttings to the appropriate depth with sufficient support, allowing for stability without overly restricting oxygen flow to the base of the stem.
Humidity control
Maintain a consistent high-humidity environment for crimson bottlebrush cuttings by using a humidity dome or plastic bag to retain moisture and encourage rooting.
Optimal rooting medium
Employ a well-draining, sterilized potting mix or a perlite and peat moss combination that will support the delicate early root development of crimson bottlebrush.


