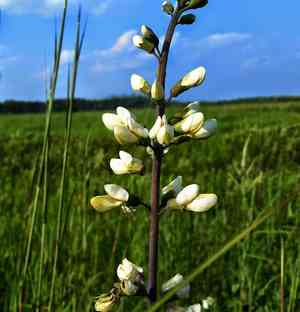
How to Propagate White wild indigo?
The primary method for propagating white wild indigo involves planting seeds in the spring, presenting a straightforward to moderately challenging process. Evidence of successful propagation includes the sprouting of seeds and the emergence of young plants. Sufficient hydration and elevated temperatures are vital elements for this procedure.
Optimal Time for White Wild Indigo Propagation
Propagation Method
Seeding
Propagation Period
Spring
Tools for White Wild Indigo Propagation
Seed trays or flats
Seed trays or flats offer a controlled setting for white wild indigo seed germination. They ensure consistent spacing and planting depth, promoting uniform sprouting and robust initial growth. Their shallow design is particularly beneficial for white wild indigo, as it doesn't require a deep medium for early seed development.
Sterile potting mix
Employing a sterile potting mix is crucial for preventing soil-borne diseases during white wild indigo germination. This mix supplies essential nutrients and aeration for white wild indigo's initial root formation, leading to a higher propagation success rate. It also helps maintain appropriate moisture levels, vital for seed sprouting.
Fine vermiculite or perlite
These materials are frequently applied as a top dressing for seeds to maintain consistent moisture and provide insulation. For white wild indigo, which can be susceptible to drying out or excessive moisture, a layer of vermiculite or perlite can significantly improve seedling establishment by preventing the soil surface from hardening.
Heat mats
White wild indigo seeds benefit from warmth from below to encourage germination, mimicking the warming soil conditions of their natural spring sprouting cues. Heat mats provide a steady heat source, ensuring the soil temperature remains ideal for white wild indigo seed germination without overheating.
Watering can with a fine rose
A watering can equipped with a fine rose attachment is essential for gently irrigating white wild indigo seeds and seedlings without disturbing them with strong water flow. It ensures the seeds stay moist but not waterlogged, reducing the risk of rot. Gentle watering also helps keep seeds in place, promoting even growth.
Labels and markers
Labels and markers are critical for organized propagation, especially when managing multiple species or varieties. For white wild indigo, they help track sowing dates and germination times, which are vital for monitoring progress and providing appropriate care at various developmental stages.
Transparent dome or plastic wrap
A transparent dome or plastic wrap can create a miniature greenhouse effect over the seed tray, maintaining high humidity and stable temperatures. This micro-environment is favorable for white wild indigo seed germination, as it prevents the soil from drying out too quickly and helps regulate temperature fluctuations.
How to Propagate White Wild Indigo?
Propagation Method
Seeding
Difficulty Level
Simple
Caring for Newly Propagated White Wild Indigo
Caring for Newly Propagated White Wild Indigo
Following propagation, white wild indigo should be placed in an environment that replicates its natural habitat. It prefers full sun to partial shade and thrives in well-drained soil. Once established, white wild indigo is drought-tolerant and requires minimal upkeep. During its initial growing season, ensure consistent watering, but avoid overwatering. Prune any dead foliage to encourage new growth. As a perennial, white wild indigo can remain undisturbed for several years, continuing to grow and expand, enhancing your garden's beauty and structure.
Common Errors to Avoid When Propagating White Wild Indigo
Insufficient soil preparation
Using soil that drains poorly or lacks nutrients can lead to root rot or stunted growth for white wild indigo. This plant prefers well-drained soil rich in organic matter.
Excessive watering
Too much water can deprive white wild indigo's roots of oxygen, fostering fungal diseases and root rot. White wild indigo tolerates dry conditions and needs less water than many other garden plants.
Planting seeds too deep
Sowing seeds too deeply may prevent white wild indigo from emerging through the soil surface. White wild indigo seeds require light to germinate and should be sown shallowly.
Neglecting rhizobia inoculation
Failing to inoculate the soil with Rhizobia bacteria can impede white wild indigo's ability to fix nitrogen, a crucial process for its growth and health, as white wild indigo is a legume.
Rough handling of root cuttings
White wild indigo's roots are delicate. Rough handling during division or transplanting can damage the plant's root system, hindering its establishment and growth.
Tips for Propagating White Wild Indigo
Prepare the appropriate substrate
Utilize well-draining soil enriched with organic matter to create optimal growing conditions for white wild indigo. This promotes healthy root development.
Moderate irrigation
Water white wild indigo sparingly, keeping the soil moist but not saturated. White wild indigo is drought-resistant and does not require frequent watering.
Correct seed depth
Sow white wild indigo seeds on the soil surface or cover lightly with soil, as they need light for optimal germination.
Rhizobia inoculation
If cultivating white wild indigo in a location where legumes have not been previously planted, inoculate the soil with Rhizobia to enhance nitrogen fixation and support plant health.
Gentle root handling
When propagating white wild indigo via root division or transplanting, handle the roots with care to prevent damage and encourage successful establishment.


