How to Propagate Golden wattle?
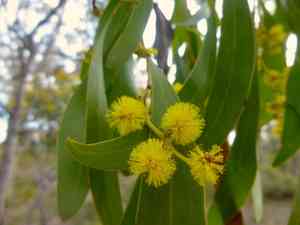
Originating from Australia, Acacia pycnantha is valued for its vibrant yellow, downy blossoms and rapid development. Reproduction is successfully accomplished using semi-hardwood cuttings. Choose robust, pathogen-free stems and apply a rooting stimulant to the severed ends for peak results. Insert cuttings into a substrate that drains efficiently and sustain steady moisture levels. Prudent irrigation, avoiding excessive saturation, fosters root formation. After they are rooted, juvenile plants ought to be progressively accustomed to external environments prior to transplanting.
Optimal Period for Golden Wattle Propagation
Propagation Method
Cutting
Propagation Period
Autumn,Winter
Tools Required for Golden Wattle Propagation
Sharp Pruning Shears
These are crucial for obtaining clean, precise cuttings from golden wattle. A keen blade ensures the cutting is not crushed or frayed, which can affect its ability to form roots. A clean cut promotes quicker healing and lowers the chance of infection, vital for the health and viability of golden wattle during propagation.
Rooting Hormone
This chemical promotes root growth from golden wattle cuttings. Applying rooting hormone to the cutting's base boosts the likelihood of successful root development, which is essential as golden wattle might otherwise struggle to produce roots. This hormone not only accelerates root formation but also improves the overall quality and density of roots, significantly contributing to the survival rate of new golden wattle plants.
Sterile Potting Mix
A well-draining, sterile potting mix offers an ideal environment for golden wattle cuttings to root and grow. The sterile medium prevents disease and fungal attacks, common issues with new cuttings. Furthermore, a mix allowing good air circulation and proper moisture retention can greatly influence the initial growth phase positively.
Propagation Trays
These trays are utilized to hold golden wattle cuttings in a stable and organized manner. They should feature adequate drainage and be spacious enough to accommodate multiple cuttings without overcrowding, as this can lead to moisture-related problems like mold and mildew. These characteristics are particularly advantageous for managing groups of golden wattle cuttings, simplifying monitoring and maintenance.
Plastic Domes or Humidity Covers
Covering propagation trays with plastic domes or humidity covers creates a microenvironment with high humidity, which benefits the root development of golden wattle cuttings. This controlled setting maintains stable temperature and moisture levels, crucial for encouraging root growth and preventing cuttings from drying out.
Steps to Propagate Golden Wattle
Propagation Difficulty
Moderately Difficult
Post-Propagation Care for Golden Wattle
Post-Propagation Care for Golden Wattle
After propagation, ensure young golden wattle plants receive sufficient water, especially during dry spells, without overwatering. Place the plants in a location with full sunlight and shield them from severe frosts. Pruning is not needed in the early stages but can be performed to shape the plant as it matures. Fertilize sparingly with a low-phosphorus native plant fertilizer following the manufacturer's instructions.
Common Errors to Avoid When Propagating Golden Wattle
Overwatering
Excessive watering of golden wattle can lead to root rot, a potentially fatal condition if not addressed. Too much moisture around roots fosters an environment conducive to fungal and bacterial growth.
Deep planting
Planting golden wattle seeds or cuttings too deeply may hinder their access to adequate light and air, impeding their germination and growth.
Neglecting sanitation
Using unsterilized tools or containers for propagating golden wattle can introduce pathogens, resulting in disease in new plants.
Ignoring soil composition
Failing to use the appropriate soil mixture can negatively impact golden wattle's root development and overall health. This species prefers well-drained soils, often with low fertility.
Overcrowding
Placing golden wattle seeds or cuttings too close together can create competition for resources and lead to poor air circulation, increasing the risk of disease.
Advice for Propagating Golden Wattle
Correct moisture
Maintain consistent moisture when propagating golden wattle, keeping the soil or medium damp but not waterlogged, to encourage root development without causing rot.
Optimal depth
Sow golden wattle seeds or place cuttings at an appropriate depth to ensure access to light and prevent suffocation of the propagating material.
Sterilization
Always use sterilized tools and containers when propagating golden wattle to minimize the risk of introducing pathogens to the new plants.
Soil mixture
Prepare a well-drained soil mix with some coarse material like sand or perlite, which suits golden wattle's root system and mimics its natural growing conditions.
Spacing
Provide adequate space between golden wattle seeds or cuttings to ensure sufficient access to sunlight, air circulation, and resources for each individual.


