How to Overwinter Cherry plum
1
The Cherry plum plant tolerates cold temperatures well, increasing its durability in winter.
2
Trim your Cherry plum tree in the latter part of autumn to prevent illnesses and encourage robust development.
3
Reduce the frequency of watering your Cherry plum during winter, yet ensure the soil remains somewhat moist.
Why Overwinter Your Cherry plum?
Why Overwinter Your Cherry plum?
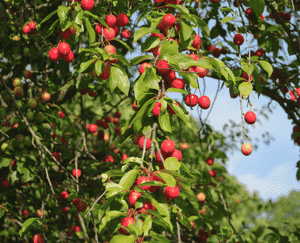
Overwintering your Cherry plum (Prunus cerasifera) guarantees its health and vitality come spring. This procedure involves various steps to shield your plant from harsh winter conditions. Although the Cherry plum is robust and can endure frost, proactive care helps prevent potential issues such as diseases, pests, and frost damage. Proper overwintering can lead to a more abundant yield of blossoms and fruits in subsequent years.
Preparing Cherry plum for Winter
Inspecting and Cleaning the Plant
Before winter arrives, thoroughly examine your Cherry plum for any indications of pests or diseases. Clear away any fallen leaves, debris, or dead branches around the base to deter fungal growth and other problems. Use a gentle insecticidal soap to wash the leaves, which can aid in eliminating any hidden pests.
Pruning Techniques for Cherry plum
Pruning in late autumn is crucial for the well-being of your Cherry plum. Remove any dead, diseased, or crossing branches to enhance air circulation. This not only helps in reducing the risk of disease but also shapes the tree for improved growth in the spring. Use clean, sharp pruning tools to make precise cuts and lessen stress on the plant.
Fertilizing Before Winter
Fertilize your Cherry plum in early fall to supply the necessary nutrients before it enters dormancy. Utilize a balanced fertilizer to assist the plant in building up its reserves. Avoid high-nitrogen fertilizers, as they can stimulate new growth that is vulnerable to winter damage.
Best Practices for Overwintering Cherry plum
Ideal Winter Locations
Place your potted Cherry plum in a protected spot, such as against a south-facing wall, to maximize sunlight and offer some defense from the elements. For Cherry plums planted in the ground, applying a thick layer of mulch around the base can help insulate the roots.
Managing Light and Temperature
Ensure your Cherry plum receives sufficient light during winter, which can be challenging in regions with limited daylight hours. If indoors, position the plant near a window where it can get maximum sunlight. Maintain ambient temperatures between 4-10°C (39-50°F) to prevent the plant from breaking dormancy too early.
Watering Guidelines During Winter
Reduce watering frequency during winter dormancy, but ensure the soil does not completely dry out. Check the soil moisture weekly; if it's dry 2-3 cm (1 inch) below the surface, give it a light watering. Overwatering can lead to root rot, so exercise caution.
Common Overwintering Problems and Solutions
Dealing with Pests and Diseases
Even in winter, pests can be an issue. Regularly inspect your Cherry plum for signs of aphids, scale, or other insects. Use horticultural oil or insecticidal soap as needed. For diseases like fungal infections, remove and destroy affected leaves or branches immediately to prevent spread.
Recognizing and Mitigating Frost Damage
Frost damage can appear as brown, wilted leaves or cracked bark. Apply mulch and consider using frost cloths or burlap wraps for additional protection during severe cold snaps. If you notice any frost damage, prune affected areas to prevent decay and promote recovery.
What to Do If Your Cherry plum Shows Signs of Stress
Identifying Signs of Stress
Signs of stress in your Cherry plum can include yellowing leaves, stunted growth, or leaf drop. These symptoms often result from inadequate water, light, or temperature conditions. Regular monitoring helps detect these signs early.
Recovery Steps for Cherry plum
If your Cherry plum exhibits signs of stress, first identify and correct the underlying issueâbe it water, light, or temperature. Prune dead or dying branches to encourage new growth. Consider relocating potted plants to a better spot and adjusting care routines. Gradual reintroduction to optimal conditions is crucial for recovery.


