How to Overwinter Yellow daylily
1
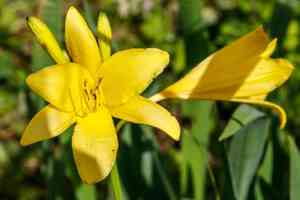
Yellow daylilies are resilient plants that thrive in diverse climates when given appropriate attention.
2
Pruning foliage prior to winter can diminish the likelihood of illness.
3
A substantial layer of mulch offers superior protection from winter's chill.
Advantages of Overwintering Yellow daylily
Advantages of Overwintering Yellow daylily
Overwintering your Yellow daylily can significantly boost its lifespan and vibrancy. This resilient plant, recognized for its lovely yellow blooms, can endure harsh winters with proper care. Overwintering safeguards the plant from freezing temperatures, promotes better spring flowering, and maintains overall plant health. Dedicating time to correctly overwinter your Yellow daylily can result in a more robust and prolific plant when the new growing season commences.
Preparing Yellow daylily for Winter
Plant Inspection
The initial step in getting your Yellow daylily ready for winter involves a thorough inspection of the plant. Look for indications of disease, pests, or decay. Removing any affected parts can prevent issues from worsening during the colder months. Identify damaged leaves or stems and carefully remove them to maintain plant health.
Trimming and Pruning
Trimming and pruning are crucial steps in preparing your Yellow daylily for winter. Cut back the foliage to approximately 15 cm (6 inches) above the ground. This helps prevent diseases and enhances mulching effectiveness. Removing dead and damaged leaves also reduces habitats for pests that could harm the plant over winter.
Feeding and Fertilizing
As winter approaches, provide your Yellow daylily with a balanced, slow-release fertilizer. This supplies essential nutrients that aid the plant in surviving the colder months. However, avoid high-nitrogen fertilizers as they can encourage undesirable growth. A good all-purpose fertilizer with a balanced ratio (e.g., 10-10-10) will deliver the necessary nutrients without overstimulating growth.
Ensuring Optimal Soil Conditions for Winter
Soil Testing and Amendment
Soil testing helps determine if your Yellow daylily needs any amendments before winter. Take a soil sample and assess its pH and nutrient levels. Amend the soil based on the results to ensure a well-balanced environment. Yellow daylilies prefer slightly acidic to neutral soil (pH 6-7). Adding compost or well-rotted manure can improve soil structure and fertility for the winter.
Mulching Techniques
Mulching is a very effective method to protect your Yellow daylily during winter. Apply a thick layer of mulch, about 8-10 cm (3-4 inches), around the plant's base to insulate the roots. This helps regulate soil temperature and prevents freezing. Mulch also retains soil moisture and suppresses weeds that can compete with the plant for nutrients.
Protecting Yellow daylily from Frost and Cold Winds
Using Covers and Cloches
Shield the Yellow daylily from extreme cold by utilizing covers or cloches. You can use frost cloth, burlap, or even an inverted bucket to cover the plant when frost is anticipated. Ensure covers do not directly touch the foliage, as this can lead to freezing damage. Secure the covers properly to prevent them from being dislodged by the wind.
Positioning for Wind Protection
If feasible, place the Yellow daylily in a spot that offers some shelter from harsh winter winds. Fences, walls, or other larger plants can serve as windbreaks, reducing the chill factor and preventing wind damage. If relocating the plant is not possible, consider using temporary barriers like windbreak fabric to shield it from gusty winds.
Common Errors to Avoid
Overwatering Issues
Overwatering is a frequent error during winter. Since the plant's growth slows, it requires less water. Excessive moisture can lead to root rot and other diseases. Always check the soil moisture before watering and adjust the frequency based on environmental conditions.
Improper Mulching
Another mistake is incorrect mulching. Applying too little mulch will not provide sufficient insulation, while too much can suffocate the plant and cause rot. Aim for an 8-10 cm (3-4 inches) thick layer of mulch, spreading it evenly around the base without piling it against the stem.


