How to Overwinter Natal plum
1
Natal plum is a delicate plant needing specific winter attention to flourish.
2
Ensure 3,000 to 5,000-lux (300 to 500-foot candles) illumination for best indoor winter development.
3
Slow adaptation is crucial when moving Natal plum back outside after winter.
Why Do Natal plum Plants Need Overwintering?
Why Do Natal plum Plants Need Overwintering?
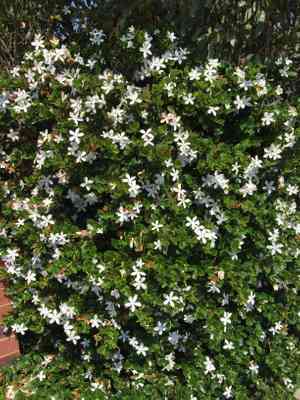
The Natal plum (Carissa macrocarpa) is an attractive evergreen shrub known for its shiny green foliage and fragrant, star-shaped blooms. However, as a delicate plant, Natal plum cannot endure frost and low temperatures. Overwintering is vital for safeguarding the plant from cold damage and ensuring its health until warmer seasons return. By employing proper overwintering methods, you prevent leaf shedding, discoloration, and other stress responses that can weaken the plant.
When to Start Overwintering Natal plum?
Monitoring Weather Changes
Observing the weather is essential when planning to overwinter your Natal plum. Begin tracking local forecasts as early as late summer. Watch for indications of the first frost, as temperatures falling below 10°C (50°F) can stress the plant. When consistent nighttime temperatures hover around this level, it's time to start preparing for overwintering.
Optimal Time Frame for Preparing Plants
The best period for initiating the overwintering process is a few weeks before the expected first frost. Ideally, aim for early to mid-autumn to ensure your plant has sufficient time to adjust and settle into its new environment. This timeframe typically falls between late September and early October.
How to Prepare Natal plum for Overwintering?
Pruning and Cleaning the Plant
Trim your Natal plum by removing any dead or damaged branches and thinning out dense growth. This helps the plant conserve energy and lowers the risk of disease. Gently clean the leaves and stems with a damp cloth to remove dust and debris, promoting better air circulation.
Inspecting for Pests and Diseases
Examine your plant closely for any indications of pests or diseases. Common pests include aphids and scale insects. Treat any infestations with an appropriate insecticidal soap or neem oil. Ensuring your plant is pest-free before bringing it indoors can prevent infestations from spreading to other indoor plants.
Adjusting Watering and Feeding Practices
Reduce watering frequency as temperatures decrease. Natal plum requires less water during dormancy, typically once the top 3-5 cm (1-2 inches) of soil feel dry. Stop fertilizing in late autumn to prevent new growth that can be vulnerable to cold damage.
Indoor Overwintering Methods for Natal plum
Selecting the Right Location
Choose a bright, cool spot in your home for your Natal plum. Ideal locations include sunrooms or south-facing windows where the plant can receive ample natural light. Avoid placing the plant near drafty windows or in the direct path of vents to prevent temperature fluctuations and stress.
Maintaining Ideal Temperature and Humidity
Aim to keep the indoor temperature between 13-16°C (55-60°F). Natal plum thrives in moderate humidity, so maintain levels around 40-50%. Use a humidifier or place a tray of water near the plant to increase humidity if needed.
Providing Adequate Lighting
If natural light is insufficient, supplement with fluorescent grow lights, ensuring they provide between 3,000 and 5,000 lux (300 to 500 foot-candles). Position lights 30-45 cm (12-18 inches) above the plant and keep them on for about 14-16 hours a day to mimic natural sunlight conditions.
Common Overwintering Problems with Natal plum
How to Handle Leaf Drop and Yellowing
Leaf drop and yellowing can result from sudden environmental changes or overwatering. Alleviate stress by gradually moving the plant indoors and monitoring watering habits. Keep soil consistently moist but not waterlogged, and mist leaves occasionally to maintain humidity.
Preventing Mold and Mildew
Mold and mildew thrive in cool, damp conditions. Avoid overwatering and ensure proper air circulation around the plant by positioning it in a well-ventilated area. Use a small fan to improve airflow if necessary, and consider a mildew-resistant fungicide if problems persist.
Transitioning Natal plum Back Outdoors
Timing the Move Back Outside
Wait until the threat of frost has passed and nighttime temperatures consistently stay above 10°C (50°F) before moving your Natal plum outdoors. This usually corresponds to mid to late spring.
Gradual Acclimatization
Acclimatize the plant to outdoor conditions by gradually increasing its exposure to sunlight and outdoor temperatures over one to two weeks. Start by placing it in a shaded area and slowly move it to direct sunlight to prevent shock.
Post-Overwintering Care Tips
Once your Natal plum is back outdoors, resume regular watering and feeding schedules. Fertilize every two weeks with a balanced, water-soluble fertilizer to encourage new growth. Regularly check for pests and signs of stress during this transition period.


