How to Overwinter Konjac
1
Konjac thrives in soil that drains effectively to avoid tuber decay during its winter rest.
2
Store Konjac tubers in a dim, cool environment at approximately 5°C (41°F) throughout the dormant season.
3
Steer clear of direct sun exposure during dormancy; subdued, indirect light is optimal.
Understanding Konjac Overwintering and Its Importance
What is Overwintering and Why is it Important for Konjac?
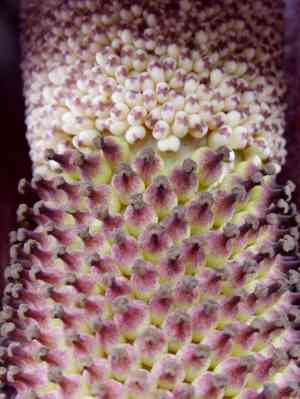
Overwintering describes the process of preparing and caring for your Konjac plant through colder periods to ensure its survival until the next active growth phase. Konjac, a tropical species, is frost-hardy, meaning it can endure some cold, but still needs proper attention to thrive through winter. This practice is crucial as it shields the plant from extreme temperatures and revitalizes it for vigorous growth when spring arrives.
Essential Preparations for Konjac Overwintering
Plant Inspection and Cleaning
Before getting your Konjac ready for overwintering, take time to thoroughly examine it. Look for any indications of disease or pests and remove any damaged foliage or stems. Cleaning the plant helps eliminate potential infestations and encourages healthier dormancy. Use a gentle spray from a hose to clean the leaves and stems, and apply insecticidal soap if needed.
Potting and Soil Requirements
Konjac thrives in a potting mix that drains well to prevent waterlogging, which can cause root rot during its dormant phase. Utilize a blend of peat, perlite, and sand to achieve the necessary drainage. If your Konjac is in an outdoor garden, consider excavating the tubers and placing them in pots filled with this mixture to better manage moisture levels. Ensure pots have drainage holes and include a layer of gravel at the bottom for enhanced drainage.
Optimal Location for Konjac Overwintering
Indoor vs Outdoor Overwintering
When choosing between indoor or outdoor overwintering for your Konjac, consider the severity of your local winter. In regions with harsh freezes, indoor overwintering is advised. For milder winters, you might leave Konjac outside, provided it's in a protected spot. Indoor overwintering involves placing the plant in a pot and moving it to a cool, dark room such as a basement or garage. Outdoor overwintering requires mounding mulch around the plant for insulation.
Temperature and Light Considerations
Konjac tubers should be kept in an environment with a consistent temperature around 5°C (41°F) to 10°C (50°F). Avoid exposing the plant to direct sunlight; indirect, low light is more suitable. Indoors, a dark corner or beneath a greenhouse bench works well. If overwintering outdoors, position the plant where it won't be directly hit by winter sunlight.
Winter Watering and Maintenance
How Much to Water Konjac in Winter?
Watering Konjac during winter should be minimal. Excessive watering can lead to tuber rot. Ideally, water just enough to keep the soil slightly moist - about once a month is sufficient. Always check the soil moisture before watering. A good guideline is to insert your finger about 2.5 cm (1 inch) into the soil; if it feels dry, a small amount of water can be added.
Common Issues to Look Out For
Frequent problems during overwintering include tuber rot, pest infestations, and fungal infections. Tuber rot, often caused by overwatering, can be prevented by ensuring well-draining soil and proper pot drainage. Regularly inspect the plant for pests like spider mites and aphids, and use neem oil as a preventive measure. Fungal infections can be reduced by ensuring good air circulation around the plant.
Reviving Konjac Post-Winter
Signs That Konjac is Ready to Move Outdoors
As spring approaches, look for indications that your Konjac is prepared to transition back outdoors. New growth signals that the plant is emerging from dormancy. Small shoots or leaves appearing from the soil indicate it's time for reintroduction to its growing environment.
Steps to Transition Konjac Back to Its Growing Habitat
When moving your Konjac back outdoors, take gradual steps to acclimate it. Begin by placing the plant outside for a few hours daily in a shaded area, progressively increasing its exposure to sunlight over about a week. Ensure outdoor temperatures are consistently above 10°C (50°F) before doing so. Increase watering gradually as the plant starts to actively grow again. Repot if necessary, and add a balanced fertilizer to support vigorous growth.


