Optimal Fertilizer for Growing Rain lily: What You Need to Know
1
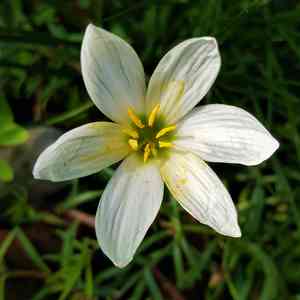
Rain lilies flower abundantly following rainfall and with adequate spring fertilization.
2
A 10-10-10 NPK balanced fertilizer is typically advised for Rain lilies.
3
Excessive fertilization may result in sparse flowering and excessive foliage, diminishing the plant's inherent charm.
Understanding Rain Lily's Fertilization Needs
Nutrient Requirements for Robust Blooms
The Rain lily, a wetland native, thrives on a balanced diet of vital nutrients. These include nitrogen, crucial for foliage development; phosphorus, essential for strong root growth and vibrant flowers; and potassium, which aids disease resistance and overall plant health. Ensuring these nutrients are present in your soil, especially during spring growth, is key to achieving the stunning blooms Rain lily is known for.
Indications of Nutrient Deficiency in Rain Lily
A Rain lily lacking nutrients will display clear warning signs. Yellowing leaves often signal insufficient nitrogen, while inadequate phosphorus can lead to weak growth and fewer flowers. Potassium deficiencies may appear as brown or scorched leaf edges. Recognizing these symptoms early allows you to adjust fertilization practices to meet the plant's needs, ensuring it remains healthy and attractive.
Choosing the Right Fertilizer for Rain Lily
Comparing Organic vs. Synthetic Fertilizers
When selecting between organic and synthetic fertilizers for Rain lily, both have advantages and disadvantages. Organic options, like compost and manure, enhance soil structure and slowly enrich nutrient content. They are eco-friendly but can be less immediately effective. Synthetic fertilizers, conversely, offer a quick nutrient boost and are easy to apply precisely. However, they can degrade soil with prolonged use. Finding a balance that suits your gardening approach and your Rain lily's requirements is crucial.
Recommended NPK Ratios for Rain Lily
For optimal health and flowering of your Rain lily, a balanced fertilizer with an equal NPK ratioâ10-10-10 (Nitrogen, Phosphorus, Potassium)âis generally advised. This ensures the plant receives even amounts of critical nutrients, promoting vigorous growth and abundant blooms. Using a slow-release formulation is also beneficial for consistent nourishment throughout the spring season.
Optimal Fertilizing Techniques for Rain Lily
Best Time to Fertilize During the Growing Season
Spring is the ideal time to fertilize your Rain lily. As the plant emerges from dormancy and enters its active growth phase, it requires ample nutrients to support new shoots and flowers. Begin fertilizing in early spring, as new growth appears, then continue at regular intervalsâevery 4-6 weeksâthroughout the growing season to maintain nutrient levels.
Step-by-Step Guide to Fertilizing Rain Lily
Fertilizing your Rain lily is straightforward. Follow these steps for best results:Select a balanced, slow-release fertilizer with a 10-10-10 NPK ratio.Measure the recommended amount based on your plant's size and the instructions on the fertilizer package.Apply the fertilizer evenly around the plant's base, avoiding direct contact with the stem or leaves to prevent burning.Water thoroughly to help the fertilizer penetrate the soil and reach the roots.Repeat this process every 4-6 weeks during the growing season.
Maintaining Soil Health After Fertilization
Monitoring Soil pH and Moisture Levels
After fertilizing, maintaining soil health is vital. Regularly check pH levels, aiming for a slightly acidic to neutral range (6.0-7.0), which is ideal for Rain lily. Use a soil test kit to monitor these levels and adjust as needed. Additionally, ensure consistent soil moistureâRain lily prefers well-drained soil that remains evenly moist but not waterlogged.
Post-Fertilization Care Tips
Beyond fertilization, additional care tips can enhance your Rain lily's growth. Mulch around the plant's base to retain moisture and regulate soil temperature. Remove any spent flowers to encourage the plant to direct energy toward new growth rather than seed production. Lastly, watch for pests and diseases; regular inspections can catch potential issues before they harm your plant.


