Flea sedge (Carex pulicaris)
Also known as: Flea Sedge
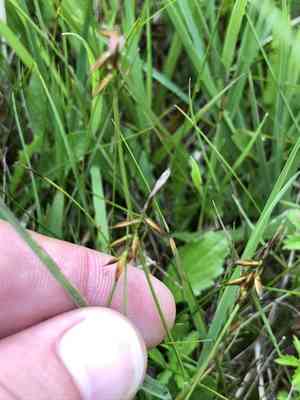
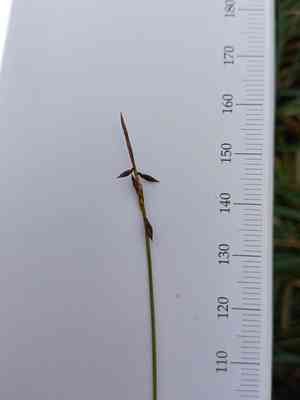
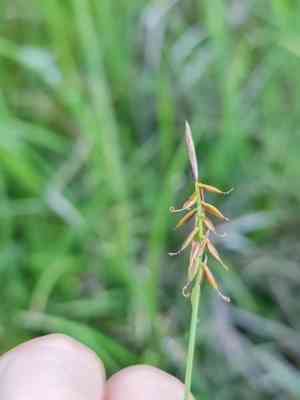
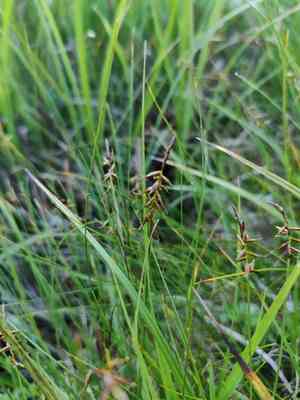
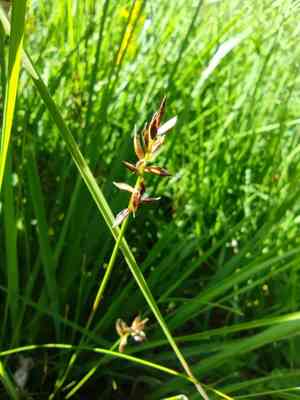
Carex pulicaris is a compact sedge featuring rigid stems that grow between 10 and 30 centimeters tall. Its leaves measure 5 to 25 centimeters in length and are narrower than 1.02 millimeters. The plant's inflorescence consists of a single spike, with 3 to 10 female flowers at the base and male flowers at the top.
In This Article
Attributes of Flea sedge
Lifespan
Perennial
Plant Type
Grass
Plant Height
Approximately 30-50 cm
Spread
Typically around 30 cm
Leaf Color
Green
Flower Size
Flowers are usually around 0.5-1 cm in size
Flower Color
Brownish-green
Images of Flea sedge
Quickly Identify Flea sedge
1
This plant can be identified by its fine, wiry stems and the unique triangular shape of its seed capsules. It\'s often found in wet, acidic soils.
Scientific Classification of Flea sedge
Phylum
Vascular plants
Class
Monocotyledons
Order
Poales
Family
Sedge
Genus
True sedges
Species
Flea sedge
Planting and Growing of Flea sedge
Care Difficulty
Easy
Watering Schedule
Every 3 days
Sunlight Requirements
Partial sun
Sunshine Duration
4-8 hours
Ideal Temperature
55-68℉
Soil Type
Potting Mix, Peat Mix
Soil pH
5.5-7
Fertilizer Type
Balanced
Pruning Season
Spring, Summer
Pruning Area
Branches, Leaves
Pruning Frequency
2 times a year
Repotting Season
Spring
Pot Type
Plastic, Ceramic
 How to Water Flea sedge?
Carex pulicaris thrives best when watered with about 100 ml per session. Ensure the soil is moist but not waterlogged. Monitoring the soil moisture with your finger can help guide accurate watering, aiming for a damp consistency without oversaturation.
What are the symptoms of an underwatered Flea sedge?
›
What should I do if my Flea sedge is not getting enough water?
›
What are the symptoms of an overwatered Flea sedge?
›
How to save an overwatered Flea sedge?
›
 What Are the Sunlight Requirements for Flea sedge?
Carex pulicaris prefers partial sun or dappled shade. This lighting allows photosynthesis to occur efficiently without risk of damage, resulting in lush and healthy foliage, as the plant can balance light absorption and water consumption effectively.
What is the ideal light condition for Carex pulicaris?
›
How can I achieve ideal light conditions for Carex pulicaris?
›
What benefits will Carex pulicaris experience with ideal light conditions?
›
 What Is the Ideal Temperature Range for Flea sedge?
Carex pulicaris thrives best in a temperate climate where the temperature stays consistently between 55°F and 68°F. This range allows for optimal metabolic processes and growth activities within the plant, ensuring robust health and development. Any temperature fluctuation beyond this range might stress the plant, but will generally not cause immediate harm unless fluctuations are extreme or prolonged.
 What Soil is Best for Flea sedge?
Carex pulicaris thrives in well-drained soils, as it prevents waterlogging that can suffocate roots and lead to root rot. Ensuring proper drainage maximizes the plant's access to oxygen, thereby promoting healthy growth. The soil should retain adequate moisture without becoming waterlogged. Proper moisture levels enable roots to absorb necessary nutrients and support rigorous foliage and growth in Carex pulicaris. Soils rich in organic matter provide essential nutrients for Carex pulicaris, improving soil structure and fertility. This enrichment helps sustain the plant's vibrant and lush appearance.
 How to Fertilize Flea sedge?
Carex pulicaris, commonly known as flea sedge, requires a balanced approach to fertilization. Use a 10-10-10 NPK fertilizer for liquid feeding at a concentration of one teaspoon per gallon of water. For solid fertilizers, a slow-release formula is ideal, applied at a rate of one tablespoon per square foot of soil.
 How to Prune Flea sedge?
Start by removing any dead, damaged, or diseased foliage. Trim back overly long or sprawling stems to maintain the plant's compact shape. Focus on thinning out the center of the plant if it appears overly dense, ensuring light and air can reach the inner parts. Pruning is best done in early spring to prepare the plant for the growing season, and again in late summer after the peak growth period. Use gentle cuts at a slight angle above a leaf node or bud to encourage new growth.
More About Pruning Techniques→
 How to Propagate Flea sedge plant?
1
Collect seeds from mature Carex pulicaris plants, ensuring they are fully ripe. Clean and dry the seeds thoroughly before sowing to prevent fungal infections.
2
Fill your seed tray with a well-draining seed compost. Sow seeds thinly on the surface and lightly cover them with a thin layer of compost to aid germination.
3
For division, choose healthy and mature plants. Use a spade to carefully lift the plant, then divide the root mass into smaller sections, each with adequate roots and shoots.
 How to Repot Flea sedge plant?
1
Carex pulicaris should be repotted when you notice its roots beginning to emerge from the drainage holes at the bottom of the pot. This indicates that the plant has outgrown its current container. Another signal is when the soil dries out faster than usual, suggesting that the root system has expanded significantly.
2
When selecting a new pot for Carex pulicaris, choose one that is one size larger than the current pot. Ensure the pot has ample drainage holes to prevent waterlogging. A terracotta pot can be beneficial as it allows the soil to dry more evenly, facilitating a healthier root environment.
3
Opt for a well-draining sandy loam mixed with a small amount of peat. This combination mimics the plant's natural habitat and ensures adequate water retention while preventing the roots from standing in excess moisture, thus reducing the risk of root rot.


