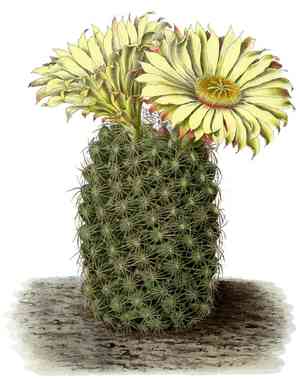
How to Transplant Chaparral pricklypear?
Chaparral pricklypear flourishes when relocated between the beginning and end of spring, aligning with its ideal growth environment. Select a bright spot with soil that drains effectively to facilitate a seamless move. Bear in mind that infrequent watering aids in lessening transplant stress and encourages root development.
Essential Preparations Before Relocating Chaparral Pricklypear
Optimal Period for Relocating Chaparral Pricklypear
The best time to move chaparral pricklypear is from early to late spring. This period offers mild temperatures and increased ground moisture, aiding root development. Transplanting during these months minimizes stress and encourages vigorous growth, as the plant can benefit from spring's natural growth surge, leading to a healthier, more resilient chaparral pricklypear throughout the year.
Required Spacing Between Chaparral Pricklypear Plants
When relocating chaparral pricklypear, ensure each plant is positioned 3-6 feet (0.9-1.8 meters) apart. This provides ample room for growth and development without competition for resources.
Ideal Soil Composition for Chaparral Pricklypear Relocation
Prepare a soil mixture that drains well for chaparral pricklypear. Ideally, use sandy or gritty soil. Incorporate some organic compost, but avoid rich fertilizers, as this plant prefers less fertile soils. Ensure the base is well-aerated.
Selecting a New Location for Your Chaparral Pricklypear
Choose a sunny spot for relocating chaparral pricklypear. This plant thrives in full sun, so aim for at least 6-8 hours of bright sunlight daily. A south-facing area is often perfect.
Equipment Needed for Chaparral Pricklypear Relocation
Gardening Gloves
To safeguard your hands while handling soil and the plant.
Shovel or Spade
For excavating around the plant and preparing the trench.
Trowel
For more precise digging and working with smaller roots.
Wheelbarrow or Bucket
To move the plant to its new position.
Pruning Shears
For trimming any damaged roots or pads.
Burlap or Tarpaulin
To wrap the root ball and reduce root damage during transit.
Stakes and Plant Ties
To offer support for the plant post-relocation if necessary.
Method for Extracting Chaparral Pricklypear from the Ground
Method for Extracting Chaparral Pricklypear from the Ground
From Ground: First, moisten the chaparral pricklypear plant to dampen the soil. Then, dig a wide trench around the plant using a shovel or spade, ensuring the plant's root ball remains intact. Carefully work the spade beneath the root ball to lift the plant from its original spot.From Pot: Gently water the plant to loosen the soil. Tilt the pot sideways and tap the bottom to slide out the chaparral pricklypear plant. Use a trowel to assist in easing the plant out if needed, making sure to keep the root ball whole.From Seedling Tray: Water the seedlings lightly to ensure the soil is damp. Carefully use a trowel to lift the seedlings, making sure to scoop under the root system. Handle the seedlings gently to prevent root damage.
Step-by-Step Guide for Relocating Chaparral Pricklypear
Site Preparation
Prepare the new planting site beforehand by digging a hole that is twice the width of the root ball and of equal depth.
Support Preparation
If the plant is tall or requires extra support, insert stakes into the ground before placing the plant.
Root Pruning (if necessary)
Trim any damaged or excessively long roots with pruning shears prior to planting.
Plant Positioning
Place the chaparral pricklypear plant in the hole, ensuring the top of the root ball is level with the surrounding soil.
Firming the Soil
Fill the hole with soil, pressing down gently but firmly to remove air pockets around the roots.
Watering
Water the plant thoroughly immediately after planting to help settle the soil around the roots.
Post-Relocation Care for Chaparral Pricklypear
Watering
Provide ample watering during the first week, then water moderately as the plant establishes itself.
Mulching
Apply a layer of mulch around the plant's base to retain moisture and regulate soil temperature.
Protection
Shield the plant from harsh weather conditions, such as frost or strong winds, by using covers if necessary.
Monitoring
Observe the plant for any indications of stress or pest problems and address them promptly.
Resolving Common Issues with Chaparral Pricklypear Relocation.
When is the best time to relocate chaparral pricklypear?
The ideal period to relocate chaparral pricklypear is from early spring to late spring.
What is the recommended spacing between each chaparral pricklypear?
Plant each chaparral pricklypear 3-6 feet (0.9-1.8 meters) apart for optimal growth.
How should I prepare the soil for relocating chaparral pricklypear?
Ensure the soil is well-draining and slightly sandy. Remove any weeds before planting chaparral pricklypear.
What is the optimal depth for planting chaparral pricklypear?
Plant chaparral pricklypear at the same depth it was growing in its original location.
Should I water chaparral pricklypear immediately after relocating?
Yes, water chaparral pricklypear thoroughly right after relocating to help it settle in.
What type of sunlight does chaparral pricklypear need?
Chaparral pricklypear thrives best in full sunlight, so choose a location with plenty of sun.
How should I handle chaparral pricklypear during relocation to avoid injury?
Wear thick gloves and use tongs or cloths to handle chaparral pricklypear to avoid its spines.
Is there a way to reduce relocation shock in chaparral pricklypear?
Water the plant well before and after relocating to reduce relocation shock.
How do I know if chaparral pricklypear is established after relocation?
Chaparral pricklypear is established when you see new growth and the plant holds up in the soil.
What fertilization does chaparral pricklypear need after relocating?
Use a balanced, low-nitrogen fertilizer sparingly after chaparral pricklypear is established, usually after a few weeks.


