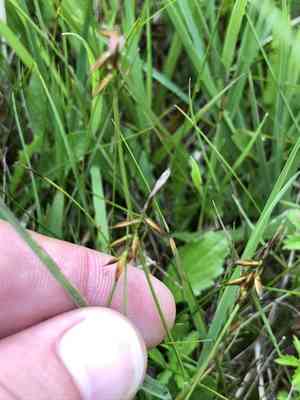
How to Transplant Flea sedge?
The ideal period for relocating flea sedge spans from the beginning to the middle of spring, when the ground is becoming warmer and water is plentiful. Choose a spot that receives full sun to partial shade and has soil that drains effectively. This guarantees the best possible development and adaptation for your enduring plant.
What Preparations are Needed Before Transplanting Flea Sedge?
What is the Ideal Time for Transplanting Flea Sedge?
The best time to move flea sedge is from early to mid-spring. This period allows the plant to benefit from cooler temperatures and increased humidity, which aids in strong root development. Moving flea sedge at this time maximizes its growth before summer heat and minimizes transplant shock, ensuring a successful transition and robust development.
How Much Space Should You Leave Between Flea Sedge Plants?
When preparing to relocate your flea sedge, aim to position each plant approximately 10-12 inches (25-30 cm) apart. This provides ample room for growth without overcrowding.
What is the Best Soil Mix for Flea Sedge Transplanting?
For flea sedge, prepare a soil mixture that drains well and is slightly acidic. You can incorporate some organic compost to enrich the soil and supply the necessary nutrients for healthy growth.
Where Should You Relocate Your Flea Sedge?
Choose a location for your flea sedge that receives full sun to partial shade. Ideally, it should get at least 4-6 hours of sunlight daily, which helps ensure vigorous growth and good health.
What Equipments Should You Prepare Before Transplantation Flea Sedge?
Gardening Gloves
To shield your hands while handling soil and plants.
Trowel or Small Spade
For excavating around the plant and creating holes in the ground for relocation.
Watering Can or Hose
To hydrate the plant before and after its move.
Bucket or Container
To transport the plant if you're moving it from one spot to another.
Pruning Shears
To trim any damaged or overly long roots or foliage.
Mulch
To help maintain moisture around the plant post-transplant.
How Do You Remove Flea Sedge from the Soil?
How Do You Remove Flea Sedge from the Soil?
From Ground: First, water the flea sedge plant to moisten the soil. Then, dig a wide trench around the plant using a trowel or small spade, ensuring the plant's root ball remains intact. Carefully work the tool under the root ball to lift the plant from its original location.From Pot: Gently water the flea sedge plant to dampen the soil. Turn the pot sideways and gently tap the bottom to loosen the soil. Carefully slide the flea sedge plant out, supporting the root ball with your hand.From Seedling Tray: Water the flea sedge seedling tray to make the soil damp. Use a small trowel or your fingers to gently lift each seedling out, being careful not to damage the roots.
Step-by-Step Guide for Transplanting Flea Sedge
Prepare the Site
Ensure the chosen location has adequate sunlight and space for your flea sedge to reach its mature size. Clear the area of any weeds and debris.
Dig a Hole
Create a hole in the ground that is twice the width and the same depth as the flea sedge's root ball. This will allow the roots to spread out more easily.
Place the Plant
Gently position the flea sedge in the hole, spreading out the roots if needed. Make sure the top of the root ball is level with the ground surface.
Backfill the Hole
Carefully fill the hole with soil, pressing down gently to remove any air pockets. Ensure the plant stands upright and is stable.
Water Thoroughly
Water the flea sedge plant generously to settle the soil around the roots and help the plant recover from the stress of transplanting.
Mulch
Apply a layer of mulch around the base of the flea sedge to help retain moisture and reduce weed competition. Keep the mulch a couple of inches away from the plant's stem to prevent rot.
How Do You Care For Flea Sedge After Transplanting?
Watering
Keep the soil around the flea sedge consistently moist, but not waterlogged, for the first few weeks after transplanting to help establish strong roots. Water deeply but less frequently as the plant establishes.
Monitoring
Observe the flea sedge for any indications of transplant shock, such as wilting or yellowing leaves. If noticed, adjust watering, and provide additional shade if necessary.
Mulching
Replenish the mulch layer if it begins to thin out to continue providing moisture retention and weed suppression.
Feeding
Avoid fertilizing immediately after transplanting. Wait for a few weeks until you see new growth before adding any slow-release fertilizer to support healthy development.
Troubleshooting Common Issues with Flea Sedge Transplantation.
When is the best time to transplant flea sedge?
Transplant flea sedge in early to mid spring for optimal growth and establishment.
How much space should I leave between each flea sedge plant?
Ensure 10-12 inches (25-30 cm) of spacing between each flea sedge plant.
What type of soil is best for flea sedge?
Flea sedge thrives in moist, well-draining soil with a slightly acidic to neutral pH.
How deep should I plant flea sedge?
Plant flea sedge at the same depth it was growing previously to avoid stress.
Should I water flea sedge immediately after transplanting?
Yes, water flea sedge thoroughly immediately after transplanting to help settle the soil.
What should I do if flea sedge shows signs of transplant shock?
Maintain soil moisture consistently and provide some shade to help flea sedge recover.
Is it necessary to fertilize flea sedge after transplanting?
A light application of balanced fertilizer can support flea sedge's growth after transplanting.
How do I prevent weeds from competing with flea sedge after transplanting?
Apply a mulch layer around flea sedge to suppress weeds and retain soil moisture.
Can flea sedge be transplanted in poor weather conditions?
Avoid transplanting flea sedge during extreme weather; choose mild, overcast days for best results.
What's the first step to transplant flea sedge successfully?
Prepare the new planting area by digging and enriching the soil well before transplanting flea sedge.


