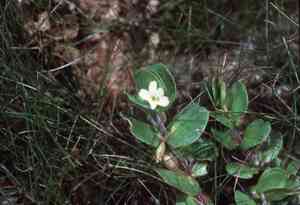
How to Transplant Disk waterhyssop?
Disk waterhyssop flourishes when relocated in the transitional periods of early to mid-spring or late autumn to early winter. Select a site offering full sun to partial shade with damp earth for optimal development. Verify the new spot satisfies its hydration requirements.
What Preparations are Needed Before Transplanting Disk Waterhyssop?
What is the Ideal Time for Transplanting Disk Waterhyssop?
The best times for relocating disk waterhyssop are from early to mid-spring or late autumn to early winter. Moving the plant during these periods allows its root system to become established before the intense heat of summer or the freezing cold of winter. Ensuring root stability in mild weather conditions reduces stress and encourages vigorous growth, making these intervals perfect for transplantation.
How Much Space Should You Leave Between Disk Waterhyssop Plants?
When transplanting disk waterhyssop, position each plant 12-18 inches (30-45 cm) apart. This spacing provides ample room for growth and prevents competition for essential resources.
What is the Best Soil Mix for Disk Waterhyssop Transplanting?
Prepare a well-draining soil mixture with a pH ranging from 6.0 to 7.5 for disk waterhyssop. Incorporate compost or aged manure as a foundational fertilizer to supply vital nutrients.
Where Should You Relocate Your Disk Waterhyssop?
Select a site that receives full to partial sunlight for transplanting disk waterhyssop. Aim for a minimum of 4-6 hours of direct sun daily to ensure robust development.
What Equipments Should You Prepare Before Transplantation Disk Waterhyssop?
Gardening Gloves
To safeguard your hands while handling soil and the plant.
Shovel or Spade
For excavating around the plant and creating a trench.
Hand Trowel
To work in smaller, restricted areas near the plant.
Watering Can
To hydrate the plant before and after its relocation.
Garden Fork
To assist in loosening the soil at the new planting site.
Bucket or Tarp
For moving the plant if necessary.
Plant Labels
To identify the disk waterhyssop in its new position.
How Do You Remove Disk Waterhyssop from the Soil?
How Do You Remove Disk Waterhyssop from the Soil?
From Ground: First, moisten the disk waterhyssop plant to dampen the soil. Next, dig a wide trench around the plant using a shovel or spade, ensuring the plant's root ball remains intact. Carefully work the spade beneath the root ball to lift the plant from its original spot.From Pot: Gently water the disk waterhyssop in its container to loosen the soil. Invert the pot while supporting the plant with your hand. Lightly tap the pot to release the plant and its root ball. If it's stuck, use a hand trowel to carefully loosen the edges.From Seedling Tray: Gently water the seedlings to make the soil pliable. Use a hand trowel or your fingers to carefully lift the seedlings along with their root ball from the tray, taking care not to harm the roots.
Step-by-Step Guide for Transplanting Disk Waterhyssop
Prepare the New Site
Loosen the soil using a garden fork to ensure it's well-aerated. Dig a hole that is twice the size of the disk waterhyssop plant's root ball.
Water the Hole
Water the hole before placing the disk waterhyssop in it to ensure the soil is moist and welcoming for the plant.
Transplanting
Position the disk waterhyssop into the hole, making sure the top of the root ball is level with the surrounding soil surface. Backfill the hole with soil, gently firming it around the base to eliminate air pockets.
Water the Plant
Thoroughly water the disk waterhyssop to settle the soil around the roots and to provide the necessary moisture for the plant to adjust to its new surroundings.
Label the Plant
Place a plant label near your disk waterhyssop to identify it, especially if you are transplanting multiple varieties.
How Do You Care For Disk Waterhyssop After Transplanting?
Watering
Keep the soil around the disk waterhyssop consistently moist, but not waterlogged, for the initial few weeks post-transplant to aid in establishing strong roots.
Mulching
Apply a layer of mulch around the base of the disk waterhyssop to help retain soil moisture and suppress weeds.
Monitoring
Regularly inspect the disk waterhyssop for indications of stress or pests. Address any issues promptly to ensure healthy development.
Supporting Growth
If needed, provide a small support stake for the disk waterhyssop to help it remain upright and grow robustly.
Troubleshooting Common Issues with Disk Waterhyssop Transplantation.
When is the best time to transplant disk waterhyssop?
The optimal period is early spring to mid-spring, or from late fall to early winter.
How much space should I leave between plants when transplanting disk waterhyssop?
Maintain a spacing of 12-18 inches (30-45 cm) between each plant to ensure optimal growth.
What kind of soil is best for transplanting disk waterhyssop?
Use well-draining, fertile soil rich in organic matter for the best results.
How should I prepare the soil for transplanting disk waterhyssop?
Amend the soil with compost or organic matter to enhance fertility and drainage.
What should I do if the leaves of disk waterhyssop turn yellow after transplanting?
Ensure proper watering and check for root damage or transplant shock, adjusting care accordingly.
How much water does disk waterhyssop need after transplanting?
Keep the soil consistently moist but not waterlogged for the first few weeks after transplanting.
What is the best method to prevent transplant shock in disk waterhyssop?
Transplant during cooler parts of the day and water thoroughly immediately after transplanting.
How deep should I plant disk waterhyssop when transplanting?
Plant at the same depth as it was growing previously to avoid stress on the roots.
Can I transplant disk waterhyssop directly into water?
Yes, disk waterhyssop can be transplanted into shallow water bodies, but ensure it is securely anchored.
How do I care for disk waterhyssop after transplanting it in late fall to early winter?
Mulch around the base to protect against cold and reduce evaporation, ensuring roots stay warm.


