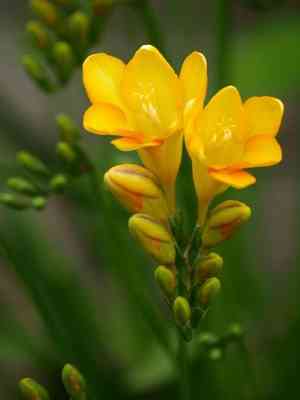
How to Prune Common freesia?
This perennial, characterized by its bulbous structure, is recognized for its aromatic, trumpet-shaped blossoms and blade-like leaves. For typical freesia, trimming entails eliminating faded flowers and discolored foliage to stimulate fresh development. The optimal period for this is in early spring or late winter, following the blooming phase. Reducing the foliage after flowering enables the bulbs to accumulate energy for the subsequent season. Consistent removal of spent flowers encourages additional blooming and sustains the plant's vitality. A particular aspect of care involves preventing harm to the bulbs during the pruning process.
What Are the Benefits of Pruning Common Freesia?
What Are the Benefits of Pruning Common Freesia?
Trimming common freesia not only promotes robust development but also aids in maintaining its desired shape. By eliminating faded blossoms and excessive growth, gardeners foster a strong, well-formed plant.
What Is the Best Time for Pruning Common Freesia?
What Is the Best Time for Pruning Common Freesia?
These periods are optimal for trimming common freesia as they align with the conclusion of the plant's dormant phase but precede its active growth stage. Late winter pruning prepares common freesia for the upcoming growing season, enabling the plant to channel its energy into developing fresh, healthy shoots. Early spring pruning, just before new growth emerges, ensures that any winter frost damage can be removed, reducing the risk of disease and encouraging a more abundant bloom in the subsequent flowering cycle. Furthermore, during these times, the absence of leaves allows for clearer visibility of the plant's structure, facilitating precise cuts and minimizing stress on common freesia.
What Tools Do I Need to Prune Common Freesia?
Hand Pruners
Given the delicate nature of common freesia, utilize hand pruners for clean cuts, which help preserve plant vitality and prevent harm.
Precision Scissors or Snips
Considering the fine foliage and slender stems of common freesia, precision scissors or snips enable more accurate trimming to remove spent flowers or shape leaves.
Soft Gloves
Not a cutting implement, but crucial for handling common freesia. They safeguard the gardener's hands and the sensitive stems and blossoms during trimming.
Disinfectant for Tools
Sterilizing trimming tools prior to use on common freesia helps prevent the transmission of diseases between plants, preserving the overall health of the garden.
How to Prune Common Freesia
Step1: Identify Pruning Targets
Pinpoint the sections of common freesia that require trimming, including dead flowers, damaged stems, and faded blooms. Accomplish this by visually inspecting the plant after flowering or upon noticing any signs of damage or decline.
Step2: Sanitize Pruning Tools
Disinfect your pruning shears or scissors to prevent the spread of disease. Clean the blades with soapy water or immerse them in a disinfectant solution like isopropyl alcohol.
Step3: Trim Dead Flowers and Spent Blooms
For dead flowers and faded blooms, gently grasp the base of the flower stem and cut it where it meets healthy tissue or a main stem, at an angle to promote water runoff.
Step4: Thin Overcrowded Stalks
Thinning common freesia is essential. Locate any overcrowded or crossing stems which can foster disease due to poor air circulation. Trim these stems back to the plant's base or to their point of origin on a main stem.
Step5: Cut Damaged Stalks Cleanly
When addressing damaged stems, make precise cuts to remove the entire affected area. Cut back to a healthy segment, ensuring a clean cut that doesn't fray or split the stem, to facilitate rapid healing.
Step6: Shape Plant for Aesthetic Appearance
After trimming for health, consider shaping common freesia if necessary to maintain an aesthetically pleasing look. Trim any excessively long stems to match the plant's overall contour, but avoid heavy pruning as it can stress common freesia.
Step7: Discard Pruned Material Properly
Collect all trimmed material and dispose of it correctly to reduce the chance of pests or diseases lingering around common freesia.
Step8: Water Plant Post-Pruning
Water common freesia deeply after trimming to encourage recovery and new growth, taking care not to excessively wet the foliage as this may invite fungal diseases.
Step9: Monitor Plant Health Post-Pruning
Observe common freesia for signs of stress or disease after trimming and provide care as needed, such as adjusting watering or applying a balanced fertilizer to support healthy growth.
Post-Pruning Care for Common Freesia
Post-Pruning Care for Common Freesia
Immediately after trimming common freesia, water the soil thoroughly but avoid wetting the foliage to minimize stress. Position common freesia in bright, indirect light, maintaining a temperature range of 60-70°F and relative humidity around 50%. Apply a balanced, water-soluble fertilizer to support new growth. Observe common freesia daily for wilting or discoloration, which could indicate stress or infection. If symptoms appear, adjust care accordingly and consider a fungicide if infection is suspected. Consistent, moderate watering is crucial as common freesia recovers.
Common Pruning Mistakes with Common Freesia
Excessive Pruning Hinders Photosynthesis and Blooming
Over-trimming common freesia can lead to reduced flowering or harm to the plant. Removing too much foliage or cutting back the plants too severely can impede their ability to photosynthesize and store energy for the next blooming season.
Aggressive Pruning Can Damage Plant Bulbs
Cutting into or harming the bulbs when trimming is a frequent error. Being too aggressive near the plant's base where the bulbs are located can impair future growth potential.
Incorrect Removal of Green Foliage Inhibits Energy Storage
Neglecting to remove only the spent flowers and seed pods can be detrimental. Some gardeners mistakenly cut back green foliage, not realizing that common freesia needs its leaves to gather energy for the next year's growth.
Using Dirty or Dull Tools Promotes Disease and Poor Healing
Using unclean or blunt tools for trimming can introduce diseases and result in jagged cuts that heal poorly. Ensuring that pruning shears are clean and sharp is vital for the health of common freesia.
Common Pruning Tips for Common Freesia
Deadheading Encourages Second Bloom
Focus on deadheading, which is the removal of spent flowers, to prevent common freesia from allocating resources to seed production. This can help encourage a second bloom.
Remove Yellowing Foliage Post-Bloom for Bulb Health
Once flowering has concluded and foliage begins to yellow, gently remove only the old flower stalks and fading leaves. This helps direct common freesia's energy into bulb regeneration for the subsequent season.
Prune After Foliage Dies Back to Preserve Nutrients
Wait until the foliage has naturally died back before trimming. This is when common freesia has already absorbed the necessary nutrients from the leaves for the next growth cycle.
Leave Stem Section Above Bulb to Prevent Rot
When cutting back the foliage, leave a short section of the stem above the bulb. This prevents excess moisture from accumulating around the bulb, which could cause rot.
Clean Pruning Tools to Prevent Pest and Disease Spread
Practice sanitation by cleaning your trimming tools before and after use on common freesia to avoid spreading pests or diseases among your plants.


