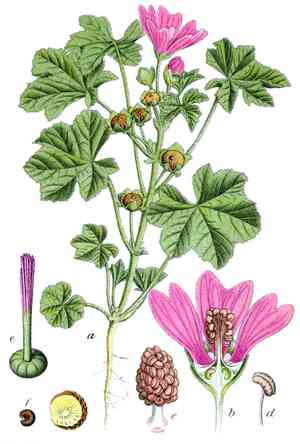
How to Propagate Coulter's globemallow?
Coulter's globemallow flourishes in adequately drained earth with abundant solar exposure. For planting, lightly disperse seeds on the soil's top layer and carefully press them into the surface without fully covering them. Maintain damp, but not saturated, soil conditions to facilitate sprouting. After the young plants have taken root, they need very little hydration. Think about relocating juvenile plants once they are sturdy enough to endure external pressures, guaranteeing vigorous, hardy development.
Optimal Time for Coulter's Globemallow Propagation
Propagation Method
Seeding
Propagation Period
Spring
Tools for Coulter's Globemallow Propagation
Seed Trays
Seed trays are vital for offering a controlled setting for seed sprouting. Select trays with sufficient depth to support the rooting needs of coulter's globemallow.
Seed Starting Mix
A premium, free-draining seed starting mix guarantees coulter's globemallow seeds have ideal conditions for germination, lowering the chance of damping-off and other soil-borne illnesses.
Heat Mat
A heat mat assists in maintaining a steady soil temperature, which is crucial for the germination of coulter's globemallow seeds. This device ensures a stable environment, fostering quicker and more uniform sprouting.
Humidity Dome
A humidity dome maintains elevated moisture levels within the seed tray, essential for the initial stages of seedling growth for coulter's globemallow. It helps prevent the soil from drying out rapidly.
Seedling Watering Can
A watering can with a fine rose spout ensures gentle irrigation to avoid dislodging seeds or disturbing young coulter's globemallow seedlings. Consistent and even moisture is vital for healthy development.
Seed Dibber
A seed dibber is utilized to create precise planting holes for coulter's globemallow seeds. This tool ensures seeds are sown at the correct depth, which is critical for optimal germination and early development.
Plant Labels
Plant labels assist in tracking various seed types and planting dates. Accurate labeling is important to monitor the growth progress and care requirements of coulter's globemallow.
Spray Bottle
A spray bottle offers a gentle method to keep the soil surface moist without overwatering. This is especially beneficial during the initial germination phase of coulter's globemallow.
Transplanting Trowel
A transplanting trowel is used to carefully lift and handle delicate coulter's globemallow seedlings when they are ready to be moved to larger pots or their final growing locations, minimizing root disturbance.
Rooting Hormone
While not always required, rooting hormone can boost the rooting success rate when transplanting coulter's globemallow seedlings. It helps stimulate root development and improve the chances of healthy establishment.
Propagating Coulter's Globemallow
Propagation Difficulty
Easy
Caring for Newly Propagated Coulter's Globemallow
Caring for Newly Propagated Coulter's Globemallow
Post-transplantation, coulter's globemallow needs well-draining soil and should be watered sparingly, allowing the soil to dry between waterings. Position the plant in an area with full sun to partial shade. Regularly check for pests and diseases, and provide occasional feeding with a balanced, diluted fertilizer during the growing season. Prune spent flowers to encourage more blooms and maintain the plant's shape.
Common Propagation Errors for Coulter's Globemallow
Overwatering
This can lead to root rot, mold, and fungal infections, hindering root establishment.
Incorrect Soil Type
Using soil that is too rich or retains excessive moisture can impede root development and cause decay.
Improper Light Conditions
Providing either insufficient light or too much intense sunlight can stress the plant, impacting growth and propagation success.
Lack of Patience
Moving cuttings or seedlings too soon can damage them before they are adequately established.
Tips for Propagating Coulter's Globemallow
Well-Draining Soil
Utilize a well-draining soil mix to prevent waterlogging and root rot.
Moderate Watering
Ensure the soil remains moist but not saturated to encourage healthy root growth.
Balanced Light Exposure
Place in an area with ample indirect sunlight to promote robust growth without causing stress.
Allow Proper Root Development
Wait until cuttings or seedlings have developed strong roots before transplanting to minimize shock and improve survival rates.


